Pages

Sunday, May 29, 2011

Snickerdoodles

Clayton has never had a snickerdoodle cookie before, which I think is crazy because he absolutely loves cinnamon, like on everything... in everything; it doesn't matter. So I decided to make him some homemade snickerdoodles. I just love the aroma that these cookies put off, it just fills your kitchen with the best cinnamon smell. I also decided to add a little bit of salt into the cinnamon-sugar mixture that you roll the cookies in (just for a little extra flavor). It was a nice contrast against the sweetness of the sugar and the spiciness of cinnamon. If you like cinnamon (as much as Mountain Man does) you should really give these recipes a go!
Homemade Snickerdoodles
For the Snickerdoodles:
1 ¼C Sugar
2 Sticks of Butter, Unsalted
3 Egg Yolks
2t Vanilla
2 ½C AP Flour
1t Baking Soda
½t Cream of Tartar
½t Salt
¼C Sugar
2T Cinnamon
¼t Salt

Directions: 
1. Preheat oven to 350 and line a baking sheet with parchment paper and spray with Pam .
2. In a mixing bowl, beat together the butter and sugar until creamy. Add in one egg at a time, and then the vanilla. Slowly add in the flour, baking soda, cream of tartar, and salt. Make sure the scrape down the sides and beat until incorporated.
3. Refrigerate the dough for roughly an hour. In a small bowl, mix together the sugar, cinnamon, and little bit of salt. Then using an ice cream scoop, make cookie dough balls and then roll them into the cinnamon sugar mixture. Do not push the cookie dough balls down, so they won’t spread too much.
4. Bake for 10-12 minutes until the cookies look crackled. Remove from the oven and let the cookies cool on the cookie sheet for 5 minutes. Then place them on a cooling rack and cool another 10 minutes.
5. Sprinkle a little extra of the cinnamon sugar mixture on top of the cookies and enjoy!

Saturday, May 28, 2011

French Onion Soup Stuffed Mushrooms

I really think I could be a vegetarian... honestly. I love nothing more than to just have a big plate of grilled veggies. I love all veggies like zucchini, carrots, eggplant, broccoli, onion, and especially mushrooms because they have such a meaty texture, which makes you feel like you're actually eating a meat dish when you're not. I saw some big mushroom caps at the grocery store, and I thought why not make some stuffed mushrooms. I stuffed these mushrooms with caramelized onions that are reduced in a beef broth-wine mixture, then topped them with some gruyere cheese. These would be perfect for a party or even as a vegetarian meal.
French Onion Soup Stuffed Mushrooms
For the Stuffed Mushrooms:
2T Butter
1 Large Vidalia Onion, Halved & Sliced Thick
¼C Beef Broth (or Vegetable Stock)
1t Worcestershire
1 Splash of White Wine
½C Gruyere Cheese, Grated
6 Large White Mushroom Caps, Washed & Stemmed

Salt & Pepper, To Taste
Chopped Parsley, For Garnish

Directions:
1. In a medium skillet, melt 1T of butter over medium heat. Add onions and sauté for 15-20 minutes, stirring occasionally, until very soft. Splash in the white wine, beef broth, and Worcestershire. Then, cook the onion for another 5 minutes or until the liquid is cooked down. Set aside.
2. Melt 1T of butter in a large skillet over medium heat. Throw in the mushrooms and toss around for a couple minutes, just to start the cooking process. Sprinkle the mushrooms with salt.
3. Please the mushroom caps face down in a cupcake tin. Place a heaping spoonful of the caramelized onions, then top with the shredded gruyere cheese. Bake for 10 minutes at 325 to finish the cooking process. Then turn on the broiler and broil the tops of the mushrooms for a couple minutes or until golden brown.
4. Sprinkle with the chopped parsley and serve immediately.


Thursday, May 26, 2011

Chicken Caesar Club Sandwiches with Maple Dijon Potato Salad

We got really lucky today in that I didn't have class and Clayton didn't have work, so we decided to do a little lunch date. I obviously made Clayton a sandwich because that's his favorite meal. So I finally decided to make a Chicken Caesar Club Sandwich, which is stacked with homemade creamy caesar dressing, roasted, chicken, baby arugula, sun-dried tomatoes, crispy pancetta, and shaved parmesan (ummm, yum right?). I wasn't really feelin' the whole sandwich idea today, so I just made his sandwich into a salad and topped with pesto croutons. It was delish as well. I served Clayton's sandwich with a side of Maple Dijon Potato Salad. It's different than the classic potato salad because it is not tossed with a heavy mayo dressing, but with a sweet and tangy mustard vinaigrette, as well as roasted onions and chopped chives & fresh parsley. And shockingly enough, this meal actually filled Clayton up, which I didn't think was possible. So he's having leftovers for dinner. Enjoy!
Chicken Caesar Club Sandwich with Maple Dijon Potato Salad
Chicken Caesar Club Salad 
For the Roasted Chicken:
2 Skin-On, Bone-In Chicken Breasts
2T Olive Oil
Salt & Pepper, To Taste

For the Caesar Dressing:
1T Garlic, Chopped
2T Fresh Parsley, Chopped
2t Anchovy Paste
1t Dijon Mustard
2T Lemon Juice
½C Mayo
¼C Sour Cream
¼C Parmesan Cheese, Grated

For the Sandwiches:
1 Large Ciabatta Roll
Olive Oil
Roasted Chicken, Sliced
½C Baby Arugula
6 Slices of Thick-Cut Pancetta, Cooked
10 Sun-Dried Tomatoes
Prepared Caesar Dressing
Shaved Parmesan
Salt & Pepper, To Taste

Directions:
1. Wash and dry the chicken breasts and then toss them in the olive oil and salt & pepper. Roast the chicken breasts in a pan in the oven at 350 degrees for 45 minutes. Once they have cooled, remove the skin and thinly slice the chicken, and then set aside.
2. In a food processor, add the garlic and parsley, and then pulse until it’s minced. Add in the paste, mustard, lemon juice, mayo, and Parmesan cheese. Process until smooth and creamy. Refrigerate the dressing until ready to use.
3. Slice the Ciabatta roll and drizzle with olive oil, and then toast in a 400-degree oven for 5-10 minutes until golden brown.
4. Spread each side of the bread with the homemade Caesar dressing. Place the arugula on the bottom of the bread, then top with the sundried tomatoes, roasted chicken, crispy pancetta, and shaved Parmesan. Sprinkle the sandwiches with a little salt & pepper.
5. Cut the sandwich and serve with the Maple Dijon Potato Salad


For the First Maple Dijon Dressing:
1T Olive Oil
1T Cider Vinegar
2T Maple Syrup
1t Dijon Mustard
1T Grainy Mustard
1t Garlic, Minced
Salt & Pepper, To Taste

For the Second Maple Dijon Dressing:
1T Olive Oil
1T Cider Vinegar
2T Maple Syrup
1t Dijon Mustard
1T Grainy Mustard

For the Roasted Potato Salad:
1 ½lbs Small Red Potatoes, Cut into Quarters
1 Onion, Halved & Sliced to ¼inch Thick
Prepared Maple Dijon Dressing
3T Chives, Chopped
3T Fresh Parsley, Chopped
Salt & Pepper, To Taste

Directions:
1. Preheat the oven to 425 degrees. Cut the potatoes & onions into halves and quarters, depending on their size and place them on a sheet pan that has been sprayed with Pam.
2. In a medium-mixing bowl, combine all of the ingredients in the first dressing. Whisk to combine. Pour this dressing over the prepared potatoes and onions, tossing them so that they are covered completely.
3. Bake the potatoes for 45 minutes to an hour or until the potatoes are lightly browned on the outside, but tender on the inside. Make sure to flip them halfway through, so that they will brown evenly on both sides.
4. Once the potatoes and onions are done cooking, place them in a mixing bowl along with the second dressing and finish it by tossing the salad with the chopped parsley, chives, salt, & pepper. 
5. Serve along side of the Chicken Caesar Club Sandwich (we like our potato salad kind of warm, but you could easily refrigerate yours until it's cold enough to serve).


Wednesday, May 25, 2011

Baked Cinnamon Roll French Toast Casserole

Baked Cinnamon Roll French Toast Casserole... it's a mouth full isn't it? Yeah I know, but I had to adequately describe to you how good this is (and easy shhhh). I wish I had a mouth full of this. Right now actually. The thing about this recipe is that you can go the hard route or the easy route, it's really up to you. I went with the easy route just because I wasn't in the mood, but I know I will try the hard route soon because it will be that much more yummier (is that even a word). The easy route is buying canned cinnamon rolls and the hard route is making your own homemade cinnamon rolls & cream cheese glaze to put into the casserole. Either way, it's delicious. It's so soft in the middle, but so crunchy with the cinnamon topping, just heaven in my mouth. It's definitely something you can prepare the night before, and just pop it in the oven the morning of, and feed a whole bunch of people. Definitely give this one a go!
Slices of the Casserole
Baked Cinnamon Roll French Toast Casserole
See That... That's the Crunchy Cinnamon Topping Covered in Cream Cheese Frosting
For the Batter:
8 Large Eggs
2C Half & Half
1C Milk
2T Sugar
1t Vanilla
¼t Cinnamon
¼t Nutmeg

For the Cinnamon Streusel:
½C AP Flour
½C Brown Sugar
1t Cinnamon
¼t Salt
½C Butter, Cut into Pieces

For the Casserole:  
2 Cans of Grands Large Cinnamon Rolls, Baked & Cut into Cubes
Cream Cheese Glaze from Canned Cinnamon Rolls
Prepared Batter
Prepared Cinnamon Streusel

Directions: 
1.  Bake the can of store-bought cinnamon rolls according to the label’s directions. Once fully cooked, let the cinnamon rolls cool (saving the cream cheese frosting for later) before you cube them. Cut the cooled cinnamon rolls into cubes and spread them out and let them become slightly stale, roughly 3 hours. Meanwhile, grease a 9x13-inch baking dish with butter and set aside. Once dried, toss the cubed cinnamon roll pieces into the prepared dish.
2. Next, prepare the French toast batter by combining the eggs, half & half, milk, sugar, vanilla, cinnamon, and nutmeg until well incorporated. Pour this mixture over the cinnamon roll cubes. Cover the baking dish and store in the refrigerator for at least 4 hours (preferably overnight).
3. To make the cinnamon streusel, mix together the flour, brown sugar, cinnamon, and salt. Next, cut the butter into this mixture until it resembles a fine pebble mixture.
4. Take the soaked casserole out of the refrigerator and pour the crumbly cinnamon streusel evenly on top of the rolls.
5. Preheat the oven to 350 degrees and bake the casserole for 45 minutes (a softer texture) or an hour (a firmer texture). Once it is done baking, immediately pour the cream cheese glaze all over the casserole.

source: Cinnamon Baked French Toast

*Please check out, Sweets for a Saturday for my link, as well as many others!!

Tuesday, May 24, 2011

S'mores with Homemade Vanilla Bean Marshmallows

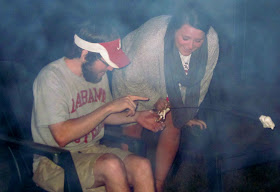
I love s'mores. I mean I guess everyone does, but in december I discovered that making homemade, fluffy marshmallows really isn't that hard. I made the recipe mainly for hot chocolate & coffee for winter-time, but I really wanted to use them for some yummy s'mores. So when my friends and I decided to do this trip to North Carolina, I knew I had to make a fresh batch for our bonfires at night. These marshmallows are way better than the store bought kind, by far. Especially because they toast a lot quicker and they turn into marshmallow fluff in the middle, so that the s'mores are extra gooey & extra messy, which is the exact reason you should eat s'mores. I cut the Vanilla Bean Marshmallows to the size of a graham cracker because I hate when you have to toast two marshmallows to fill up the graham cracker. Enjoy :)
First S'more of the Trip
Oh-So-Gooey
Toastin' the 'Mallow
S'mores with Homemade Vanilla Bean Marshmallows
For the Marshmallows:
1C Confectioners’ Sugar
3 ½C Envelopes of Unflavored Gelatin
1C Cold Water, Divided
2C Sugar
½C Light Corn Syrup
¼t Salt
2 Large Egg Whites
1t Vanilla
1 Vanilla Bean, Split & Scraped for Seeds

Directions:
1. Oil bottom and sides of a 13x9 rectangular metal baking pan and dust bottom and sides with some confectioners’ sugar.
2. In bowl of a standing electric mixer or in a large bowl sprinkle gelatin over ½C cold water, and let stand to soften.
3. In a 3-quart heavy saucepan cook granulated sugar, corn syrup, second ½C of cold water, and salt over low heat, stirring with a wooden spoon, until sugar is dissolved. Increase heat to moderate and boil mixture, without stirring, until a candy or digital thermometer registers 240°F, about 12 minutes. Remove pan from heat and pour sugar mixture over gelatin mixture, stirring until gelatin is dissolved.
4. With standing or a hand-held electric mixer beat mixture on high speed until white, thick, and nearly tripled in volume, about six minutes if using standing mixer or about 10 minutes if using hand-held mixer.
5. In separate medium bowl with cleaned beaters beat egg whites (or reconstituted powdered whites) until they just hold stiff peaks. Beat whites and vanilla (or your choice of flavoring) into sugar mixture until just combined. Pour mixture into baking pan and don’t fret if you don’t get it all out (learning from my mess of a first round). Sift ¼C confectioners sugar evenly over top. Chill marshmallow, uncovered, until firm, at least three hours, and up to one day.
6. Run a thin knife around edges of pan and invert pan onto a large cutting board. Lifting up one corner of inverted pan, with fingers loosen marshmallow and ease onto cutting board. With a large knife trim edges of marshmallow and cut marshmallow into roughly one-inch cubes. (An oiled pizza cutter works well here too.) Sift remaining confectioners’ sugar back into your now-empty baking pan, and roll the marshmallows through it, on all six sides, before shaking off the excess and packing them away.


Sunday, May 22, 2011

Marinated Chicken & Steak Kabobs with Buffalo Chicken Mac

Whenever my friends and I have a party, birthday, or tailgate to cook for, we always cook burgers and hot dogs. Mainly because they are really easy to make, and pretty much everyone likes them, and if you don't, I'm pretty sure you're not an American. Anyway, we were trying to think of something different to make for Sam's birthday dinner, and we decided on chicken & steak kabobs that we would marinate then string them on to skewers with red, orange, yellow, and green peppers & red onions. They were so yummy, and we had enough to feed a freakin' army (so definitely half this recipe for a smaller party, we had 8 people, but we could've fed 12). With our kabobs, Sam requested my Cajun Bacon Mac (which is her favorite & she always wants that, so no surprise there), but I was determined to make something new & different. Another favorite of Sam's is my Buffalo Chicken Dip, so I decided I would make Buffalo Chicken Mac as a side. I loved this mac n' cheese. The cheese sauce was made with this Buffalo Wing Cheese that I found at Fresh Market, as well as cheddar cheese, velveeta, and lots of buffalo sauce. We mixed the macaroni into the cheese sauce and layered it (almost like lasagna) with the creamy ranch rotisserie chicken layers. It's so cheesy & gooey, while being spicy & creamy, it's just so yummy. I want it again... now. So below is a picture of our entire birthday celebration meal for Sam. We also grilled some corn with cajun seasoning as another side. Enjoy all of this yumminess :)
Making the Kabobs
Marinated Kabobs with Buffalo Chicken Mac & Grilled Cajun Corn

For the Marinade:

½C Soy Sauce
½C Balsamic Vinegar
½C Worcestershire
¼C Brown Sugar 
4T Garlic, Chopped
4T Olive Oil
1t Fresh Rosemary, Chopped
1t Garlic Salt
1T Montreal Steak Seasoning
Salt & Pepper, To Taste  

For the Kabobs:
Wooden Skewers, Soaked in Water for 10-15 minutes
4 Ribeye Steaks, Cubed
4 Boneless, Skinless Chicken Breasts, Cubed
2 Red Peppers, Cut into Squares
2 Orange Peppers, Cut into Squares
2 Yellow Peppers, Cut into Squares
2 Green Peppers, Cut into Squares
4 Red Onions, Cut into Squares

For the Buffalo Chicken Mac:
1lb Pasta
4T Butter
¼C Flour
2t Dry Mustard
2 ½C Half & Half
½C Buffalo Sauce
1 ½C Sharp Cheddar Cheese, Shredded
½lb Velveeta, Cubed
2 ½C + 1C Buffalo Wing Cheese, Shredded
1C + ½C Ranch Dressing
8oz Cream Cheese, Softened
3C Shredded Rotisserie Chicken
1C Panko
Salt & Pepper, To Taste

Directions:
1. To Marinate the Chicken & Steak: whisk all of the ingredients in a bowl until well combined. Meanwhile, separate the cubed chicken and steak into two different gallon plastic bags and pour half of the marinade over each protein. Place the bags into the refrigerator and marinate over night (preferably longer), and make sure to squeeze the bag and move the chicken and steak around so that it is equally distributed.
2. To make the Kabobs: remove the marinated chicken and steak from the refrigerator and start stringing on the different colored peppers and onion between the pieces of meat, leaving some space at the bottom, for easier turning on the grill. Let the kabobs sit at room temperature for an hour, so that the proteins will achieve better grill marks. Grill the kabobs for 2-3 minutes on each side (or longer depending on how you like your steak cooked, but make sure the chicken feels firm), making sure the peppers & onions are charred nicely. Take the kabobs off the grill and let them rest for 5-10 minutes before eating. 
3. To Make the Buffalo Chicken Mac: preheat the oven to 350 degrees F and spray a 9x13-baking dish with Pam, then set aside. Bring a large pot of salted water to a boil, then add the pasta and cook it according to the directions on the box. Strain the pasta and set aside. 
4. To Make the Creamy Ranch Chicken: in a medium-mixing bowl, mix together the ranch dressing and softened cream cheese, then fold in the shredded rotisserie chicken until completely covered, then set aside.
5. To Make the Buffalo Cheese Sauce: melt 2T of butter in a saucepan over medium high heat, then whisk in the flour and dry mustard. Slowly whisk in the half & half, then whisk in the buffalo sauce, whisking until the mixture becomes thick, about 2 minutes. Next, whisk in 1 ½C sharp cheddar cheese, ½lb Velveeta cubes, and 1 ½C buffalo wing cheese until smooth. Add salt & pepper to taste. Pour the prepared cheese sauce over the cooked pasta, and mix until the pasta is completely covered in the cheese sauce. 
6. To Layer the Mac n' Cheese: pour half of the macaroni into the prepared pan, then layer the creamy ranch chicken on top of the pasta, then top with the remaining macaroni. Finish the dish by topping it with the remaining ½C of Shredded Buffalo Wing Cheese and Panko breadcrumbs. Melt the other 2T of butter and drizzle over the Panko. 
7. Bake the dish for 30 minutes until the cheese is starting to bubble & melt. Serve immediately. 

Saturday, May 21, 2011

Rainbow Velvet Cake

Here's another recipe from our vacation. Since it was Sam's birthday, we had to bake her a cake of course. She doesn't really like many cakes, but she does love red velvet cake. But, I didn't want to make just any ole' plain red velvet cake, so I decided to make a Rainbow Velvet Cake. I mean honestly, red velvet cake is  just a southern cake with very light cocoa flavoring and then a whole bunch of red dye. So instead, I made 6 thin layers of cake (instead of the traditional 3 thick layers), each layer being a different color of the rainbow. I don't know what was more exciting for us eating this colorful masterpiece or the moment of when we got to cut into the cake and finally see all the beautiful rainbow layers. It was an awesome recipe and just so pretty to look at. This Rainbow Velvet Cake might have to be birthday staple from now on, we just loved it.
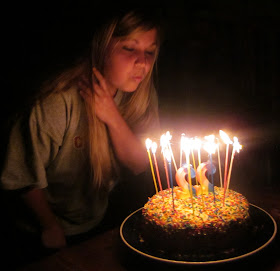
Birthday Cake with Sparkler Candles
Sam Blowing out her Candles 
Pretty Awesome Rainbow Velvet Cake
For the Rainbow Cake:
2 ½C AP Flour
1 ½C Sugar
1t Baking Soda
1t Salt
2t Cocoa Powder
1 ½C Vegetable Oil
1C Buttermilk, Room Temperature
2 Large Eggs, Room Temperature
Food Coloring For Each Layer
1t White Distilled Vinegar
1t Vanilla

For the Cream Cheese Frosting:
4 8oz Packages of Cream Cheese, Softened
2 Sticks of Unsalted Butter, Softened
3C Confectioners’ Sugar, Sifted
2t Vanilla

Directions:
1. Preheat the oven to 350 degrees F and line 6 round cake pans with parchment paper and spray with Pam and set aside.
2. In a medium sized mixing bowl, sift together flour, sugar, cocoa powder, baking soda, and salt.
3. In another mixing bowl, stir together buttermilk, oil, eggs, vanilla and vinegar.
4. In a large mixing bowl on medium speed, mix the dry ingredients into the wet ingredients until just combined and a smooth batter is formed.
5. Divide equally into 6 bowls and add a different food coloring to each bowl (as much as you want for the desired brightness of each cake). Mix the food coloring in so that is well incorporated. Pour the each batter into one of the prepared cake pans.
6. Bake each cake for about 10-12 minutes until a toothpick inserted into the middle of the cake comes out clean. Cool in the pans for about 5-10 minutes, and then let it completely cool on a rack.
7. To make the cream cheese frosting, start off by beating the cream cheese and butter together until light and fluffy, then add in the vanilla. Slowly add in the sifted confectioners’ sugar and beat until well incorporated.
8. To complete the cake, start by putting the purple cake layer on the cake stand, the top with cream cheese and follow with that same pattern going up the color spectrum from blue to green to yellow to orange to pink. Finally completely cover the cake with the cream cheese frosting making sure that is smooth. Garnish with sprinkles for decoration.
9. Refrigerate the cake for at least 30 minutes, so that the cream cheese frosting can set. But, let the cake come to room temperature for 10-15 minutes before eating. 
Slice of Rainbow Velvet Cake that's Ready to Eat!!

Friday, May 20, 2011

High-Rollers & Tripod Tribals

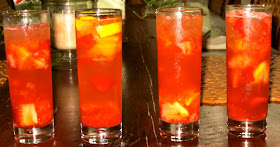
During our trip to the mountain house in North Carolina, we all celebrated my friend's birthday. Sam turned 22 on the trip, so naturally we had to make some kind of cocktail for a proper celebration. All the boys on the trip were making old fashions, so the girls decided to make up some specialty cocktails that would be better than theirs (just kidding, but they were still really good). We ended up coming up with two different cocktails, and by no means are these professional drinks, but they still tasted damn good. The names might sound bizarre to everyone, but they are just inside jokes amongst my friends & I. These cocktails are super tasty, and definitely get the job done (if you know what I mean).
All the Girls with our Drinks
For the High-Rollers:


2 Slices of Orange
2 Slices of Lemon
1T Sugar
3 Dashes of Bitters
Ice
1 Shot of Orange Juice
1 Shot of Whiskey Sour
4 Shots of Whiskey
2 Cherries
1T Cherry Syrup
1 Dash of Club Soda

Directions:
1. In a tall glass, muddle 1 slice of orange and lemon along with the sugar, ice, and bitters.
2. Next, in a shaker, toss together the ice, orange juice, whiskey sour mix, and whiskey. Shake this mixture rigorously until well incorporated. Pour this liquid over the muddled glass mixture, and then top with some cherry syrup and 2 cherries. 
3. When ready to serve, splash some club soda on top and garnish with the other slices of orange and lemon. 
High-Rollers
For the Tripod Tribals:
1 Slice of Lemon, Cubed
2 Strawberries, Cut into Cubes
1T Sugar
2 Dashes of Bitters
Ice
2 Shots of Lemonade
1 Shot of Sour Mix
3 Shots of Whiskey 
1 Splash of Lemon-Lime Soda

Directions:
1. In a tall glass, muddle the lemon and strawberry cubes along with the sugar, bitters, and ice. 
2. Next, in a shaker, toss together the ice, lemonade, sour mix, and whiskey. Shake this mixture rigorously until well incorporated. Pour this liquid over the muddled glass mixture and stir to combine with the muddled strawberries. 
3. When ready to serve, splash some lemon-lime soda on top. 
Tripod Tribals 

Gooey Butter Red Velvet Bars

Just a week or so ago, I made Gooey Butter Cake for a friend's birthday. And since the recipe is so... well, idiot-proof, I couldn't keep thinking of all the endless possibilities of this recipe. All you have to do is change out the cake box mix. I ended up to red velvet cake, but I also wanted to do carrot cake, strawberry, and funfetti. So really you can cater this recipe to any birthday, party, or holiday. So, I made Gooey Butter Red Velvet Bars this time. I really liked how I added mini chocolate chips & chocolate sprinkles to it because red velvet cake has cocoa powder in it, but you could easily leave that out. But, I just love this richness of red velvet cake with the gooey-ness of the cream cheese topping. It's just a more decadent form of the famous southern cake, but in bar form. Anyway, the bars were a hit, and I'm thinking that carrot cake will have to be the next one I try. Enjoy!
Gooey Butter Red Velvet Bars
For the Cake:
1 Box of Red Velvet Cake Mix
1 Egg
1 Stick of Butter, Melted
2T Milk

For the Gooey Butter Topping:
8oz Block of Cream Cheese, Softened
2 Eggs, Room Temperature
1 Box of Confectioners’ Sugar
1t Vanilla
½C Mini Chocolate Chips
1C Chocolate Sprinkles

Directions:
1. Preheat the oven to 350 and spray a pan with Pam, then set aside. 
2. In a medium mixing bowl, mix together the cake mix, egg, melted butter, and milk until combined. Press the dough into the prepared pan, so that there is an even layer. Sprinkle the chocolate chips on top of the cake layer.
3. In another mixing bowl, beat together the cream cheese, eggs, sugar, and vanilla until smooth and creamy. Pour over the cake & chocolate chips. Cover the cream cheese layer with the chocolate sprinkles.
4. Bake in the oven for 30-45 minutes until barely set in the middle (do not over bake).
5. Let the cake cool at room temperature for about an hour before cutting, so that the gooey butter topping will set and it will be easier to eat. 

Thursday, May 19, 2011

My Favorite Banana Bread

Every week when the boyfriend & I go to the grocery store, I always buy bananas. I let them ripen through the week and then make banana bread over the weekend. It's just one of those things that we love to eat. Maybe it's because banana bread isn't too sweet and that way you can eat a whole lot of it and not get sick of it. But we typically leave it plain, but for this recipe I also included a cream cheese & peanut butter frosting, which both of them go great on top of the banana bread to make it more sweet like a dessert. Well, I hope this will become one of you go-to recipes like it has for us.
Banana Bread with Cream Cheese Frosting
Banana Bread with Peanut Butter Frosting
For the Bread:
2 Eggs
1C + 2T Sugar
2T Sour Cream
1t Vanilla
1C + 2/3C AP Flour
1t Baking Soda
¼t Cinnamon
½t Salt
½C Vegetable Oil
4 Ripe Bananas, Mashed
1C White Chocolate Chips
½C Walnuts, Chopped (optional)
 
For the Cream Cheese Frosting:
1C Confectioners’ Sugar, Sifted
8oz Cream Cheese, Softened
1t Vanilla
6T Milk

For the Peanut Butter Glaze: 
4t Milk
1T Creamy Peanut Butter
2/3C Powdered Sugar

Directions:
1. Preheat the oven to 350 degrees F and line a loaf pan with aluminum foil and spray with Pam, then set aside (a bundt pan can also be used).
2. In a standing mixer, beat together the eggs and sugar until light and fluffy, then add in the sour cream and vanilla and mix until incorporated.
3. In a separate bowl, whisk together the flour, baking soda, cinnamon, and salt. With the standing mixer at the lowest speed, add in the flour mixture into the wet mixture in small increments. Next, slowly drizzle in the vegetable oil until just incorporated.
4. In another small bowl, mash the ripe bananas until mushy. Fold in the mashed bananas into the batter. Next fold in the white chocolate chips, as well as the chopped walnuts.
5. Pour the banana bread batter into the prepared pan and bake for an hour until golden brown on top. Let the banana bread cool in the pan for 10-15 minutes, then remove it and let it cool completely on a cooling rack.
6. To make the cream cheese frosting, beat together the confectioners’ sugar, cream cheese, vanilla, and milk until creamy and smooth. Once the banana bread has completely cooled, frost the banana bread and then topped with more chopped walnuts. 

I'm Backkkkkkk!

Sorry to all of those who have been looking for new recipes and there have been NO recipes. I know, tisk tisk, I promise I'll make it up to you. But I have been up at my family's mountain house in North Carolina for a week with a group of my friends from Alabama. And of course, there's no internet access. On the bright side, I do have a lot of recipes for you, so please check back within the next few days because I'm going to upload them all. Anyway, while we were up there I made my favorite banana bread, marinated chicken & steak kabobs, buffalo chicken mac n' cheese, rainbow velvet cake (yes, you heard me right), vanilla bean marshmallows and a couple cocktails. So keep checking back if any of those recipes sound good to you! Meanwhile, here are a couple pictures from this weekend to keep you occupied until then :)
All the Girls on the First Night
Hiking up Whiteside Mountain
Whiteside Mountain, North Carolina
All the Girls at the Top of the Mountain
The Family :)
Me & Baby Weezy
Celebrating Sam's 22nd Birthday