Showing posts with label Cornmeal. Show all posts

Tuesday, October 20, 2015

Pan Fried Italian Sausages with Charred Peppers + Onions on a bed of Creamy Parmesan Polenta

Pan Fried Italian Sausages with Charred Peppers + Onions on a bed of Creamy Parmesan Polenta
This is a dish I have never made before, seeing that it's an Italian staple, and I'm not the biggest fan for Italian food, it makes perfect sense that I wouldn't concoct a recipe for Sausage with Peppers + Onions. But, guess what... we all loved it, even me!! We're huge sausage people over here... any kind, any brand, any flavor... you name it, we want it. I especially love Al Fresco's Chicken Sausage; I decided that the best choice would be their Sweet Italian Style. But really, you could sub in any kind of Italian sausage, even a spicy one if you so please. It really doesn't matter what you end up using, as long as they are cooked up perfectly until they are golden brown, slightly charred, and crisped on the outside. The pan fried sausages are nestled on top of a bed of creamy parmesan polenta and charred peppers + onions. So let's start with the polenta first because who doesn't want extra cheesy polenta to chow down? These are perfectly seasoned in every which way and they are a cinch to make! Although the consist of mainly freshly grated parmesan, I wanted to add some shredded fontina to balance out the flavor and give them that little extra boost of cheese flavor! I'm tellin' y'all, every single one of us was moaning and groaning over this polenta... it was that good. I can't wait to use it in more of my recipes in the future, so keep that in your back pocket. Next, come the charred peppers + onions. I tried to used as many colors as I could get my hands on, so I grabbed 2 red onions, 1 red bell pepper, 1 orange bell pepper, 1 yellow bell pepper, and 1 green bell pepper. Now if you hate red onions, you can switch out another type of onion instead. If you can't find all four colors of bell peppers, just use what your local grocery store is carrying. No biggie! I have a somewhat strange, unorthodox method to cooking and charring the peppers + onions, so hear me out. I begin by sautéing them in some butter and olive oil, and then braise them in a sweetened red wine + red wine vinegar mixture. While they are cooking and the liquid is reducing, it is important that you keep an out on the veggies because you want them still quite crunchy before the next step. Now, here's where it might get weird for some of y'all. I like to pour the whole put into a strainer (placed over the sink) and allow all of the braising liquid to drip off. I even use some paper towels to dry them as much as I can before it's second stage of cooking. Don't worry though, your peppers will still have plenty of flavor; this step is important because you need dried veggies in order to get all of those wonderful charred edges. Secondly, you gotta have a dry cast iron skillet because that is how you achieve the blackening phase. So, put that sucker on high heat and add the dried peppers + onions in the screamin' hot pan and add in the minced garlic, Italian seasoning, a pinch of sugar, crushed red pepper flakes, kosher salt, and fresh cracked pepper. Toss to combine the vegetables with all of the seasonings, and once they have reached an al dente texture and a charred exterior, throw in some fresh mixed herbs for a little fresh bite. Now all that's left of the recipe is to begin assembling. I like to serve this in bowls, starting with a few big ladles of the cream parmesan polenta and some more freshly grated parmesan for good measure. Then you make a mound of your charred peppers + onions, so that your pan fried Italian sausages have a bed to rest on. We decided that we wanted a sweet + spicy dish, so we drizzled some white balsamic reduction over the top and garnished it with a sprinkling of dried red pepper flakes and fresh mixed herbs (think basil, parsley, chives, and oregano) to finish off the dish. This is a great weekday or Sunday supper, and also, a perfect hearty meal for this time of the year!! Enjoy :)


For the Pan Fried Italian Sausages:
8 Italian Sausage Links (We love Al Fresco’s Sweet Italian Style Chicken Sausage)
2T Unsalted Butter + 1T EVOO

For the Charred Peppers + Onions:
2T Unsalted Butter + 2T EVOO
1-2 Red Onions, Sliced (we like a lot of onion, so we used two)
4 Bell Peppers, Sliced into Strips (we used 1 of each color: red, orange, yellow, + green)
¼C Red Wine + ½C Red Wine Vinegar
1-2T Light Brown Sugar
4 Garlic Cloves, Minced
2t Italian Seasoning
A Heavy Pinch of Sugar ( to help the blackening process)
½-1t of Crushed Red Pepper Flakes (depending on how hot you like it)
Fleur de Sel + Fresh Cracked Pepper, To Taste
1-2T Mixed Fresh Herbs (we used basil, parsley, chives, andR
4C Unsalted Chicken Stock (homemade or store-bought)
2 Large Cloves of Garlic, Minced
1C Stone-Ground Cornmeal
1T Kosher Salt + 1t Fresh Cracked Pepper
1C Freshly Grated Parmesan
4oz Fontina Cheese, Shredded
¼C Crème Fraiche
4T Unsalted Butter
¼-½C Heavy Cream or Milk (to thin it out to your desired thickness) 
1-2T Mixed Fresh Herbs (we used basil, parsley, chives, + oregano)   

For the Sausage + Peppers with Parmesan Polenta:
Prepared Parmesan Polenta
Freshly Grated Parmesan, For Garnishing
Prepared Charred Peppers + Onions
Pan Fried Italian Sausages, Browned + Crisped
Homemade or Store-Bought White Balsamic Reduction, For Drizzling
Mixed Fresh Herbs, For Garnishing (same mixture of herbs used above)

Directions:
1. For the Pan Fried Italian Sausages: Melt the butter and EVOO in a cast iron skillet over medium-high heat, and then add in half of the sausages. Brown on all sides, about 8-12 minutes total, until they are golden brown yet slightly blackened in color. Remove the crisped sausages from the pan onto a plate and cover them with aluminum foil so that they stay warm while you cook the remaining half of the sausages (by following the same process as before). Make sure to keep them warm until you are ready to serve the dish.
2. For the Charred Peppers + Onions: In a large skillet, over high heat, melt together the butter and EVOO. Add in the red onion and multicolored pepper slices. Toss to coat them in the oil, along with some kosher salt and fresh cracked pepper, and sauté for about 5-10 minutes. Pour in the red wine and red wine vinegar to deglaze the pan. Add in the brown sugar and cook for a few more minutes until the wine has reduced by half. Get a large strainer and place it over your sink, pour the red wine braised peppers + onions into the strainer, so that all of the excess liquid is removed. Once all the liquid has dripped off, get a few pieces of paper towels and dry the peppers + onions are completely dried off. This is an important step because it will help you to obtain a perfect char (also make sure to completely wipe out all remaining liquid/moisture/butter/oil from the pan). With the skillet still on high heat, return the dried peppers + onions to the wiped down pan and let them vegetables char, making sure to stir them around for even browning. You want your peppers to be al dente in texture and blackened on the edges for color (so, make sure your pan is completely dry to obtain this component of the recipe). Add in the minced garlic, Italian seasoning, a heavy pinch of sugar, crushed red pepper flakes, and salt + pepper to taste. Cook again, while tossing to combine the seasonings with vegetables, for a minute or two, making sure that the minced garlic doesn’t burn. Once the peppers + onions are done, do a quick taste test and add in any necessary seasoning to your preferred taste (for example: kosher salt, fresh cracked pepper, crushed red pepper flakes, and/or sugar). After you have done the taste test and love the flavor, stir in the fresh herbs and keep this mixture ready until you are ready to assemble.
3. For the Creamy Parmesan Polenta: In a large pot, pour in the chicken stock and add in the minced garlic. Cook over medium-high heat until the stock comes to a boil. Reduce the heat to medium-low and very slowly whisk in the cornmeal, whisking constantly to make sure there are no lumps. Switch to a wooden spoon and add in the kosher salt and fresh cracked pepper. Simmer, while stirring constantly, for 10-12 minutes or until they are thick. Be sure the scrape the bottom of the pan thoroughly while you’re stirring. Move the pan off the heat and mix in the freshly grated Parmesan, shredded fontina cheese, crème fraiche, butter, and fresh herbs. If this mixture becomes to thick (either by overcooking or allowing it to sit too long), stir in some of the heavy cream/milk to loosen it again. Taste for seasonings and serve it immediately.
4. Assembling the Dish: Ladle some of the Creamy Parmesan Polenta into the bottom of a serving bowl and freshly grate some more Parmesan over of the polenta. Using a spoon or tongs, make a mound of the charred peppers + onions on top of the polenta. Place two links of pan fried Italian sausages (per bowl, per person) in the middle of the vegetable bed and drizzle the surface of the dish with a little bit of the white balsamic reduction (this is optional, but we like the sweetness of the reduction against the saltiness of the polenta). Garnish with fresh mixed herbs and enjoy while it’s still hot!!

Thursday, October 31, 2013

Salty Winter White Honey Pie with Himalayan Sea Salt

Salty Winter White Honey Pie with Himalayan Sea Salt
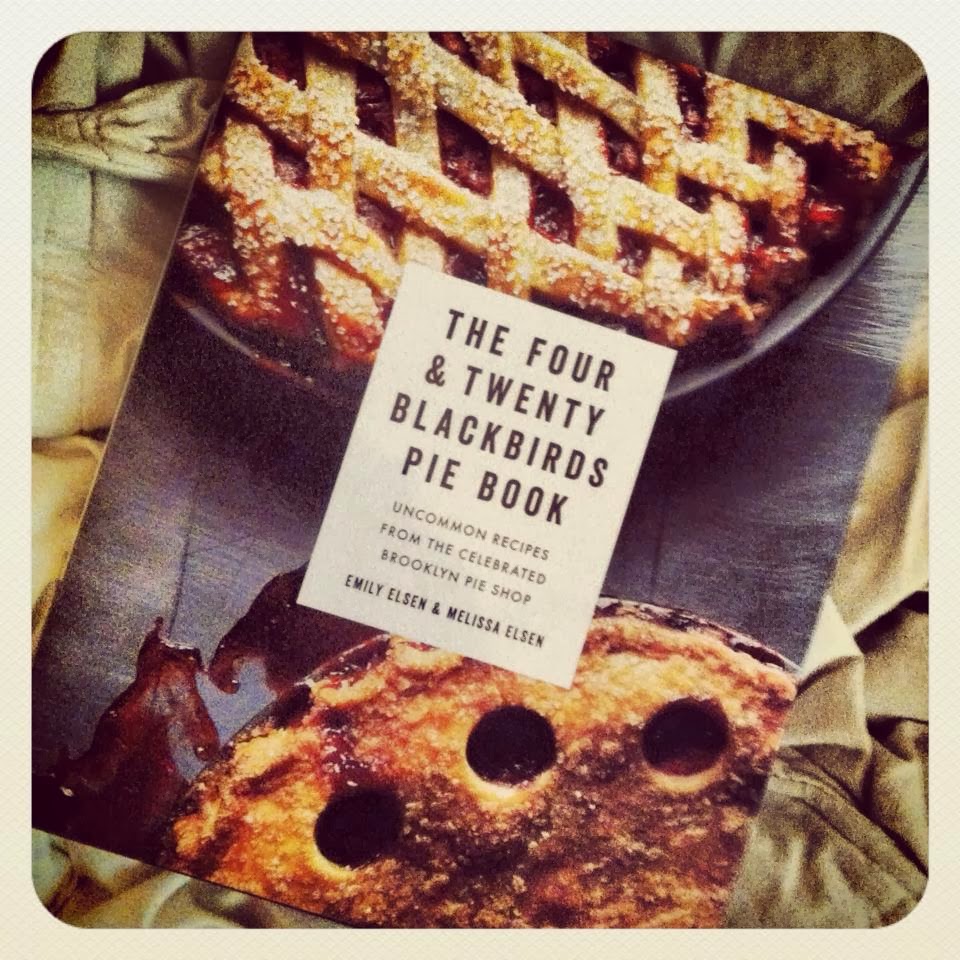
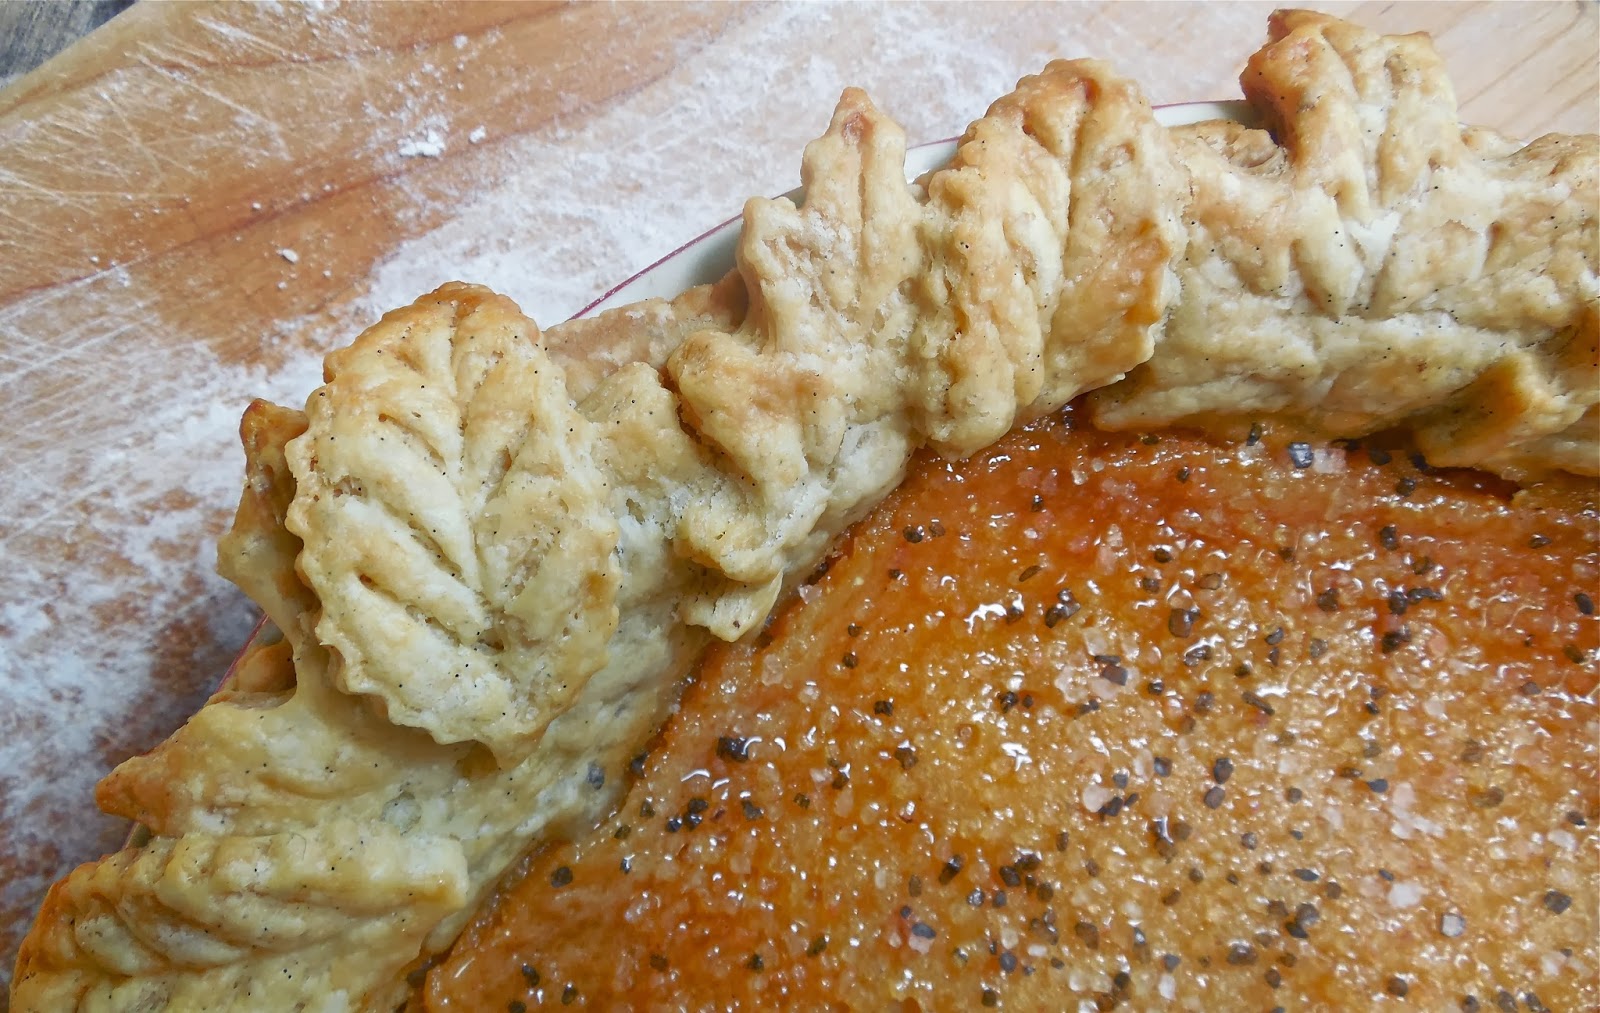
Happy Halloween, y'all!! Is it totally bad on my part that I woke up this morning completely unaware that is was a holiday? Oh well, it's one of the only holidays I've never really cared for, which is completely confusing since it practically screams FOOD. So, while y'all are all out in costumes, begging strangers for food, and getting scared shitless by creepy people... I will be inside, making caramel apples, and drinking with my Mountain Man. I thought this pie would be the perfect thing to post today because, I mean, look at it... it is the utter definition of autumn. You've probably seen this recipe floating around the internet, like I did, I saved it and went along minding my own business until I saw that their cookbook was about to be released and it rejuvenated my need to make it. This pie is somethin'-kinda-special. I believe I love it so much because it is similar in texture to buttermilk pie, which is my one only weakness. You can use any honey that you like, but I was feeling a little nostalgic and decided to use our ABSOLUTE favorite honey from the Savannah Bee Company.
new cookbook famous for their salty honey pie.
one of these jars could be YOURS!
perfect elements of any pie.
so rustic :)
Naturally, the pick had to be their delicious Winter White Honey, which comes around this time of year especially and can be eaten with a spoon. It's thicker than classic honey, is bright winter white in color, and has the slightest taste of cinnamon on the back of your tongue... it's faboosh, lemmetelly'all. I love this honey sooooooo much, that I bought two jars, just so that I could use one, but also give one away to one of my followers!! Yay for #followerfreebies :) All you have to do is post in a comment below BEFORE midnight on Sunday of how you would like to use this fabulous honey in your kitchen. Whether you wanna make this pie, put it in tea, or slather it on a bagel, it don't matter! Just a comment on this blog post and you have been entered into the contest! The winner will be chosen randomly and will be announced on Monday afternoon, so please get on here and so you can share in the joy of Winter White Honey yourself. You have to have this pie because it is sweety-salty-balanced-goodness!! Enjoy :)


himalayan salt topping.

For the Vanilla Bean Pâte Brisée:
3 ¾C AP Flour (plus extra for rolling)
3 Sticks of butter, Cut into ½inch Cubes & Chilled
1 ½t Salt
1T + 1 ½t Sugar
12-18T Ice Water, Very Cold
3 Vanilla Beans, Sliced & Scraped for Beans

For the Salty Winter White Honey Pie:
1 stick of Unsalted Butter, Melted

¾C Granulated Sugar

1T White Cornmeal

½t Salt

1 Vanilla Bean, Split & Scraped for Seeds
¾C Honey

3 Large Eggs, Lightly Beaten

½C Heavy Cream

2t White Vinegar
Honey, For Drizzling
1-2t Himalayan Sea Salt, For Sprinkling

Directions:
1. To Make the Vanilla Bean Pâte Brisée: Start by cutting the sticks of butter into ½inch cubes and placing in the freezer bag, along with the flour, salt, and sugar. Place the bag of flour into the freezer and chill for at least 1-2 hours. In a food processor, pour the frozen flour bag in, as well as the scraped vanilla beans, and pulse 6-8 times until the mixture resembles a course meal, with pea size pieces of butter. Add water 1T at a time, pulsing until the mixture just begins to clump together. If you pinch of some of the crumbly dough and it holds together then it’s ready. Remove the dough from the machine and place on a clean surface. Carefully split the dough into three equal pieces and shape into discs (save the other two rounds of pie dough in plastic wrap and freeze them for a rainy day). Do not over knead the dough. You should still be able to see little bits of butter in the dough. Sprinkle the discs with a little flour on all sides and wrap it in plastic wrap and refrigerate at least an hour. Remove one of the discs from the refrigerator and let it sit at room temperature for 5-10 minutes. Sprinkle some flour on top of the disk. Roll out with a rolling pin on a lightly floured surface to a 12inch circle (1/8inch thick). Place the rolled out disc on to a pie dish, lining up the fold with the center of the pan, trimming the excess and topping the pie crust with some autumn leaf pie crust pieces. Cover with plastic wrap and freeze for 30 minutes.
2. Preheat the oven to 375 degrees.
3. For the Salty Winter White Honey Pie: In a medium bowl, stir the melted butter, sugar, cornmeal, salt, and vanilla beans. Stir in the honey and the eggs one at a time, followed by the heavy cream and vinegar. Remove the pie shell from the refrigerator or freezer, place on a rimmed baking sheet, and strain the filling through a fine-mesh sieve directly into the pie shell (or strain it into a separate bowl and then pour it into the shell).
4. Bake on the middle rack of the oven for 45-50 minutes, rotating 180 degrees when the edges start to set, 30-35 minutes through baking.
5. Finishing the Pie: It is finished when the edges are set and puffed up high and the center is no longer liquid but looks set like gelatin and is golden brown on top. Allow it to cool completely on a wire rack, 2-3 hours. Drizzle the top lightly with some honey, and then sprinkle the Himalayan Sea Salt all over the surface of the pie.

Tuesday, October 29, 2013

Date Night : Candied Bacon Steaks with Triple Corn Hoecakes, Coca Cola Glaze, “BTFO” BBQ Sauce Drizzle, Southern Braised Collard Greens, & Pickled Shallots

Candied Bacon Steaks with Double Corn Hoecakes, Coca Cola Glaze, “BTFO”
BBQ Sauce Drizzle, Southern Braised Collard Greens, & Pickled Shallots
Finally, a date night post. It seems like it has been months since our last dinner post. Between the wedding planning, bachelor-bachelorette party planning, my Mountain Man's new job, a few health scares, and revamping my food blog... I have been QUITE the busy bird. But if that doesn't sound crazy enough, I decided to throw another big commitment onto my plate, and I'm finally ready to share another exciting announcement :) Drum roll please....... Piece, Love, & Cooking/Haute + Heirloom is now an up and running Etsy store. You can find my store here. I know many of y'all will have questions... like what will you be selling, how will you send it, will you do custom orders? As of right now, I have posted products like freshly baked cookies, recipe DIY kits, cake mixes, pickles, candied jalapenos, jams, jellies, marmalades, caramels, sauces, bars and brownies, brittle, doughnuts and cronuts, pies, marshmallows, gourmet caramel apples, simple syrups, and so-so-so-so-so much more!! Of course most of your favorites will be on there, but here will be some new additions as well :) I hope that all of my loyal followers will wander on over to my Etsy store and buy some things. But no worries, no commitment necessary. I personally wanted to take on this adventure myself, so that I could get my name and recipes out there for everyone to enjoy. Maybe one day, after much hard work and raising funds, my dream cafe will come true! The store isn't completely stocked quite yet, but we're at about 35 different products... and GROWING. Okay, enough about that and onto our delightful date night...
a gourmet southern date night
I have already posted the recipes for my Bacon Fat Fried-Triple Corn Hoecakes and my Most Flavorful Braised Southern Collard Greens, which is what were both served alongside our main dish component. I mean, what goes better with cornbread and collards... PORK, butofcourse. You've got to schmancy it up a little though, so I bought some cured pork bellies and braised them in sorghum molasses, coca cola, and spices. After slow-cooking the squares of belly, I removed them from the oven and used a sharp knife to form a crosshatch look to it. I felt like this would be most beneficial because it would allow more fat to render during the second cooking process, it would also trap in the homemade coca cola glaze to make it extra sticky, and it helped the belly to crisp up more on top. Once the braising + glazing, you literally have a glorified "bacon steak". Yep, bacon steaks are real over here at PLC, so if that doesn't convince you enough to make it, then you're, well, un-American. C'MON Y'ALL, IT'S BACON STEAKS, HERE. The homemade coca cola glaze pairs perfectly with the pork belly and gives it that finger-licking-good essence. OhMahGah, it's a Candied Bacon Steak...  yeah it should be blowin' your mind, don't fear the overwhelming emotions that are hitting you like a mack truck right now. Woo-sah, in blue-out red, keep calm. Although I already had so many components in one dish, it was seriously lacking in much needed acidity and brightness of flavor. This was provided by the Signature "BTFO" BBQ Sauce (yes, that means back the f*ck off) and the pink pickled shallots. You might be wondering why the sauce is so violent. Well, the explanation is quite simple to explain... the South Carolina mustard based condiment has three different uses of garlic. You have fresh minced garlic, roasted garlic paste, and garlic powder. So after eating, I'm pretty sure your friends, family, or significant other will say "BTFO" because you're breath will be stanky. But hey, as long as they are eating it with you, then it don't matter. When you are ready to plate, I made a solid swipe of the "BTFO" BBQ Sauce, topped it with a glazed pork belly steak, and drizzled it with more coca cola glaze. Off to the side, stack a few of the buttered hoecakes and top them with some collard greens + pink pickled shallots. In a optimistic look into the future, this exactly the type of cuisine I will be focusing on... modern. southern. comfort. If you're a gal or guy that obsesses about pork and bacon as much as we do, then candied bacon steaks are a "must" to make!! Enjoy and please make sure to check out the new Haute + Heirloom store on Etsy :) Love y'all, XOXO Juliana.
look at the collard green "green-ness" + the pickled shallot "pink-ness", it's so beautiful 
perfectly fried hoecakes + a shot of the sauce drizzles 
CANDIED BACON STEAKS. enuff said.  
Homemade "BTFO" South Carolina Mustard Based BBQ Sauce
For the Candied Bacon Steaks:
2lbs House Cured Pork Belly, Cut into Large Squares
½C Sorghum Molasses
1C Coca Cola or Cheerwine Soda
1t Paprika, Chili Powder, & Cayenne (these can be reduced for a less spicy version)
Fleur de Sel + Fresh Cracked Pepper, To Taste

For the Coca Cola Glaze:
1C Coca Cola or Cheerwine (whatever soda you used to braise the pork belly)
2 Limes, Zested & Juiced
1 ½C Light Brown Sugar, Firmly Packed
Salt & Pepper, To Taste

For the Signature “BTFO” BBQ Sauce:
1T Canola Oil
¼C Minced Shallots + ¼C Minced Garlic
¾C Classic Yellow Mustard + ¼C Stone Ground Mustard
¾C Sorghum Molasses (maple syrup may be substituted if needed)
¼C Brown Sugar
1T Worcestershire Sauce + 1T Sweet Potato-Habanero Hot Sauce (I use Cochon’s)
½t Onion Powder, Garlic Powder, & Chili Powder
1T Freshly Cracked Pepper
1T Red Pepper Flakes
¾C Cold Apple Cider Vinegar
1-2T Roasted Garlic Paste (can be homemade or store-bought)

For the Self Rising Corn Flour:
1C Corn Flour (I used Bob’s Red Mill Corn Flour)
1 ½t Baking Powder
¼t Salt

For the Double Corn Hoecakes:
1C Self Rising Corn Flour (the entire batch you just made in the previous step)
1C Southern Ground Cornmeal
¼C Corn Powder (this can be made by processing freeze dried corn kernels into powder)
2T Buttermilk Powder
2t Baking Powder (possibly just 1T of this instead)
½t Salt + ¼t White Pepper
1T Sugar, Optional
2 Beaten Eggs
¾C Well-Shaken Buttermilk
¼C + 2T Potlikker Stock (chicken stock or water may be substituted here as well)
¼C Canola Oil/Melted Bacon Fat/Melted Butter (plus extra for frying)

Directions:
1. For the Candied Bacon Steaks: Preheat the oven to 200 degrees. Cut in the pieces of cured pork belly into large squares or extremely thick slices. This will help the pork belly remain in tact during the braising process. Line a baking dish with tin foil, spray with Pam, and arrange the pieces of pork in the pan. In a mixing bowl, whisk together the sorghum molasses, Coca Cola, and assorted spices until completely incorporated. Pour the liquid evenly over the pork belly, so that the meat is only halfway submerged. Sprinkle the dry tops of the meat with fleur de sel and fresh cracked pepper. Cover the entire pan with tin foil, so that all of the moisture will be sealed in, which will create super tender pork belly. Bake for 4 hours, making sure to flip over the bacon slices at the halfway mark of the cooking time (two hours each side). Once it has cooked, remove the pork belly from the pan and put on a plate or in a container to chill in the refrigerate overnight.
2. For the Coca Cola Glaze: In a small saucepan, bring the soda, lime zest and juice, brown sugar, and a pinch of salt & pepper to a boil over high heat. Decrease the heat to medium-low and simmer until it is syrupy, about 30-45 minutes. If serving right away, keep warm until you are ready to plate. But this glaze can also be made the night before and refrigerated until you need it.
3. For the “BTFO” BBQ Sauce: In a medium pot, warm the canola oil over medium-low heat until hot. Add in the minced garlic and shallots and cook until soft and transparent. In a mixing bowl, whisk together the yellow mustard, grainy mustard, sorghum molasses, and Worcestershire sauce. Sift the dry mustard, garlic powder, and chili powder over the mustard mixture (this will help avoid lumping). Pour it into the pot containing the sautéed aromatics. Next, whisk in the fresh cracked pepper, red pepper flakes, and water/apple cider vinegar. Simmer the BBQ sauce on low heat for 30-45 minutes, stirring often throughout cooking time. Once the timer has expired, mix in the roasted garlic paste, and then season to taste, adding any needed seasonings, water, or vinegar to reach the desired taste to your liking. Cool the sauce before refrigerating or keep warm if ready to serve.
4. For the Self-Rising Corn Flour: In a small mixing bowl, sift together the corn flour, baking powder, and salt until you have a thoroughly combined mixture. Pour it into a container or plastic bag for storing.
5. For the Double Corn Hoe Cakes: In a large mixing bowl, whisk together the prepared Self-Rising Corn Flour, cornmeal, corn powder, buttermilk powder, baking powder, salt, white pepper, and sugar until the components are distributed evenly throughout. In another bowl, whisk together the two beaten eggs, buttermilk, potlikker stock, and ¼C melted fat. Create a well in the center of the dry ingredients and pour the wet ingredients into the center. Using a fork, gently whisk together the mixtures until a hoecake batter is formed. Heat a large cast iron skillet over medium-high heat and add some fat to the pan for cooking (I personally like to use equal parts of canola oil and bacon fat/melted butter/duck fat because the canola oil helps to raise the burning temperature to the other delicate fat). Once the fat is hot enough, scoop or drop ¼C of batter into the hot skillet to form small silver dollar cakes. Fry them until they are golden brown and perfectly crispy, about 1-2 minutes on each side. Remove the hoe cakes to a paper towel lined plate and briefly drain them of excess oil.
6. Crisping the Pork Belly: Heat a cast-iron skillet over medium-high heat with just about 1T of canola oil to lube the pan. Score the top of your braised pork belly squares with diagonal lines to create hatch marks. Season with a little salt and fresh cracked pepper, and then place the square (marked side down) onto the scorching hot pan. Sear for roughly 3-5 minutes until it has developed a deep brown color and the fat has begun to render. Next, reduce the heat to medium-low and let the pork belly cook at a slower pace, making sure to fry all sides of the square. The overall cooking process should take about 15-20 minutes. Remove the pork belly to a cooling rack that is fitted on top of a baking sheet pan, and then lightly dab with paper towels to remove excess fat. Heavily brush the Coca Cola Glaze all over the crisped pork belly and broil in the oven for 5 minutes per side, making sure to brush once or twice more with the remaining glaze until a candied bacon steak has been formed.
7. Assembling the Dish: On a serving plate, either drizzle a circle or brush a streak of the “BTFO” BBQ Sauce around the circumference or through the center of the plate (this will create a rim or middle division, creating a place to plate your dish). On one half of your sauce base, place a small stack of buttered silver dollar hoecakes, while on the other half, lay down a glazed square of braised pork belly. Ladle one last spoonful of Coca Cola glaze over the candied bacon steak. Next, create a small mound of cooked Southern collard greens in between the two main components. Garnish with crispy bacon lardons, fried garlic chips, & minced chives.

Tuesday, October 22, 2013

Bacon Fat Fried-Triple Corn Hoecakes


Bacon Fat Fried Double Corn Hoe Cakes
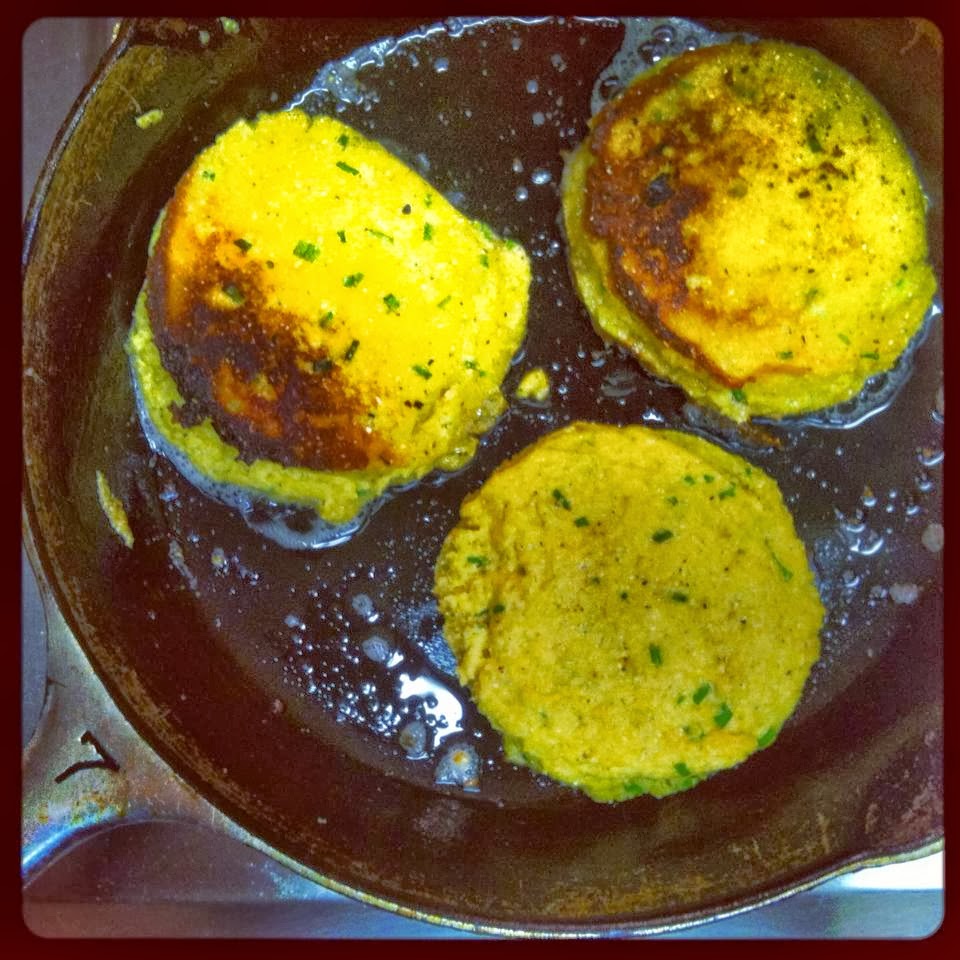
I truly believe that classic, southern hoecakes have been far + widely overlooked by chefs/cooks around the country. This doesn't make a lick of sense to me because we made these on a weekly basis when we were growing up. Hoecakes are a part of my life... they taught me so many things, like: always use a heavy-duty cast iron skillet. This type of pan retains and holds in heat, so that the temperature doesn't drop down too low when you have loaded up the pan with blobs of batter. Ironically, I think it might have been one of my first foodie/culinary moment as a kid. I loved to put on one of my mom's aprons and just get elbows deep in the kitchen mess. Another vital life lesson, BUY A SPLATTER SCREEN. As many of my followers know, I fry a whole bunch, and a screen can save a trip to the E.R because of possibly retina damage (okay, maybe a little dramatic, but that's totally the case for making homemade caramel, PREACH). Lastly, I cherish this memory because it actually happened to help me learn how to flip a cake, of any sort, to utter perfection. For the life of me, I swear that my pancakes were so poorly made, that they made a Bisquick Mix look like a goddess. But, luckily, I have recovered and moved on from my fried cake-failing day. Now on to the recipe... these hoecakes are quite special to me because I found this hand-written recipe that my grandmother used to make when I was a young child. Although, it's hard to beat a simple, classic recipe... I had to give it a go and make with a little gourmet flair. It first starts with making "Self Rising Corn Flour", which is my own little concoction to double up on the corn-y flavor. The flour mixture includes some corn flour, baking powder, & salt. Then you make the second batch of dry ingredients... ground cornmeal, corn powder, buttermilk, seasonings, leavening agents, bacon fat, and fresh chives. *PS: I am obsessed with using Corn Powder; it's amazing how perfect the flavor. I'm also a sucker for adding milk powder + buttermilk powder for that extra-special little touch. So, shhhh, keep my secret ingredients, well, secret. After frying up the batter, you should have puffed hoecakes with a crusty + golden brown exterior. Now I'm not gonna lie, my recipe was THIS close to adding in some charred/grilled corn/sweet fresh corn. Wouldn't that be fab?? Next time we make these, I'm definitely going to add some of that in. Hoecakes are considered a way of life in the South, I would know because while living in Savannah, we stopped by Paula Deen's  restaurant, which is known for fresh-out-of-the-skillet hoecakes. But to no such luck, they were sold out every time we got there, boo :( So please y'all, don't let this unique southern staple vanish right before our very eyes, get to the grocery store, make them, tell friends, and share with everybody you can!! Enjoy :)
Bacon Fat Fried-Triple Corn Hoecakes
Date Night: Coca Cola Braised Pork Belly, Bacon Fat Fried-Triple
Corn Hoecakes, a side of my "Most Flavorful Braised Southern Collard Greens", Pink
 Pickled Shallots, Coca Cola Glaze + "BTFO" BBQ Sauce
For the Self Rising Corn Flour:
1C Corn Flour (I used Bob’s Red Mill Corn Flour)
1 ½t Baking Powder
¼t Salt

For the Double Corn Hoecakes:
1C Self Rising Corn Flour (the entire batch you just made in the previous step)
1C Southern Ground Cornmeal
¼C Corn Powder (this can be made by processing freeze dried corn kernels into powder)
2T Buttermilk Powder
2t Baking Powder (possibly just 1T of this instead)
½t Salt + ¼t White Pepper
1T Sugar, Optional
2 Beaten Eggs
¾C Well-Shaken Buttermilk
¼C + 2T Potlikker Stock (chicken stock or water may be substituted here as well)
¼C Rendered Bacon Fat (plus extra for frying)
1-2T Fresh Minced Chives (depending on your preference)

Directions:
1. For the Self-Rising Corn Flour: In a small mixing bowl, sift together the corn flour, baking powder, and salt until you have a thoroughly combined mixture. Pour it into a container or plastic bag for storing.
2. Making the Double Corn Hoe Cake Batter: In a large mixing bowl, whisk together the prepared Self-Rising Corn Flour, cornmeal, corn powder, buttermilk powder, baking powder, salt, white pepper, and sugar until the components are distributed evenly throughout. In another bowl, whisk together the two beaten eggs, buttermilk, potlikker stock, and ¼C melted fat. Create a well in the center of the dry ingredients and pour the wet ingredients into the center. Using a fork, gently whisk together the mixtures until a hoecake batter is formed. Gently fold in the fresh chives.
3. Heat a large cast iron skillet over medium-high heat, and then add some fat to the pan for cooking/frying (I personally like to use bacon fat, but canola oil, melted butter, or duck fat will work as well).
4. Frying the Hoe Cakes: Once the fat is hot enough, scoop or drop ¼C of batter into the hot skillet to form small silver dollar cakes (I used an ice cream scoop for a round shape). Fry them until they are golden brown and perfectly crispy, about 1-2 minutes on each side. Remove the hoe cakes to a paper towel lined plate and briefly drain them of excess oil.
5. Serving the Hoe Cakes: Enjoy these special hoecakes with a big ‘ole bowl of collard greens + potlikker, chili, or you can use them like we did , and serve them along side some braised pork belly and my recipe for “The Most Flavorful Braised Collard Greens”.