Saturday, July 14, 2012

Dry-Rubbed Beer Can Chicken with Alabama White BBQ Sauce

Dry-Rubbed Beer Can Chicken with Alabama White BBQ Sauce
Have y'all ever had Beer Can Chicken? It was one of my favorite meals growing up. I think it was because of the sheer amazement and excitement that a whole chicken was stuffed with a beer can and then cooked on the grill to absolute perfection. It's almost like it is poached on the inside from the beer, but crispy & smoky from the grill. My dad was the ultimate grill-master, me? Not so much. So, I decided to try and make Beer Can Chicken in the oven. Well people, it was so good. So good that we made it the next night. And well, we don't do that a lot. First, you gotta rub the chicken down with your favorite dry rub. I'm partial to mine because it's smoky, sweet, & a little bit spicy. And it goes good on anything, especially this chicken and BBQ. Then, you shove a bunch of fresh herbs and lemon inside the chicken, which just gives it the best herby & lemony flavor. Well, after that you just pop it in the oven until it's golden brown & crispy, then cut it into pieces (or if you are disgusting like us, pick off half the meat and eat it straight). I drizzled our chicken with a classic Alabama White BBQ Sauce, which a lot of people have not heard of, but it is dear to my heart. It is a mayo based sauce, that is super vinegary & peppery, and it goes perfectly on chicken. Most people in Alabama actually marinate the chicken in the sauce and then grill 'em up... and that's super good too (so try that soon as well). We served our Dry-Rubbed Beer Can Chicken with Mexican Grilled Corn, which I'll post in a day or so!! Enjoy :)
Look at the gorgeous brown skin...
And that yummy drizzle of Alabama White BBQ Sauce... 
Here's some chicken without the sauce.
Here's the chicken right out of the oven, beer can still in baby. 
For the Dry Rub:
1T Salt
2T Brown Sugar
2t Garlic Powder
2t Onion Powder
1t Ground Cumin
1t Chili Powder
1t Black Pepper
Vegetable Oil
3-4lb Whole Chicken (sometimes referred to as a young or fryer chicken)

For the Beer Can Chicken:
Prepared Dry Rubbed Chicken
1 Can of Beer (your choice of beer)
2 Fresh Rosemary Sprigs
3 Fresh Thyme Sprigs
Handful of Fresh Parsley
½ Lemon, Sliced Thinly
1 Small Vidalia Onion, Quartered
3 Garlic Cloves, Smashed

For the Alabama White BBQ Sauce:
1C Mayo
1t Dijon Mustard
¼C Apple Cider Vinegar
3 Drops of Worcestershire
1T Sugar
¼t Cayenne, Paprika, Onion Powder, & White Pepper
2t Prepared Horseradish
1 Large Clove of Garlic, Finely Minced
1T Lemon Juice
Salt & Pepper, To Taste  (I like a lot of pepper for this recipe)

Directions:
1. For the Dry Rub: Remove the chicken from the refrigerator and its packaging. Wash and dry the chicken completely. In a small bowl, combine all of the spices and seasonings to make the dry rub. Rub a little bit of vegetable oil and the seasoning mixture all over the chicken until it is completely coated and covered. Stuff the inside of the bird with the lemon, onions, garlic, and parsley. Let this marinate at room temperature for 30 minutes to an hour.
2. Preheat the oven to 350 degrees and line a roasting pan with tin foil. Set out and open a beer to allow it to get to room temperature (making sure to pour out half of the beer for your drinking pleasure). Stick the sprigs of rosemary and thyme into the beer can. Place the beer can into the center of the lined roasting pan, and then slip the chicken on top of the can, using its legs as a tripod, so it will stand up straight.
3. Cook the beer can chicken in the preheated oven for 1 hour, rotating it halfway to ensure even cooking (It’s also yummy to baste the chicken in some of the beer reduction every 20-30 minutes or so). After an hour of cooking, bump the oven heat up to 450 degrees. Cook the chicken at this high temperature for 10-15 minutes, turning the pan to make sure the chicken skin crisps and browns evenly on all sides. After the chicken skin has crisped, remove the chicken from the oven and let it rest for 10 minutes. The juices should run clear and the temperature of the thigh meat should be about 170 degrees when checked with a meat thermometer. Gently remove the hot beer can from the chicken and place onto a cutting board. Cut the chicken into pieces, brush with some more beer reduction, and serve with the Alabama White BBQ Sauce.

Thursday, July 12, 2012

Antico Inspired "San Gennaro Pizza" on White Truffle Oil Pizza Dough

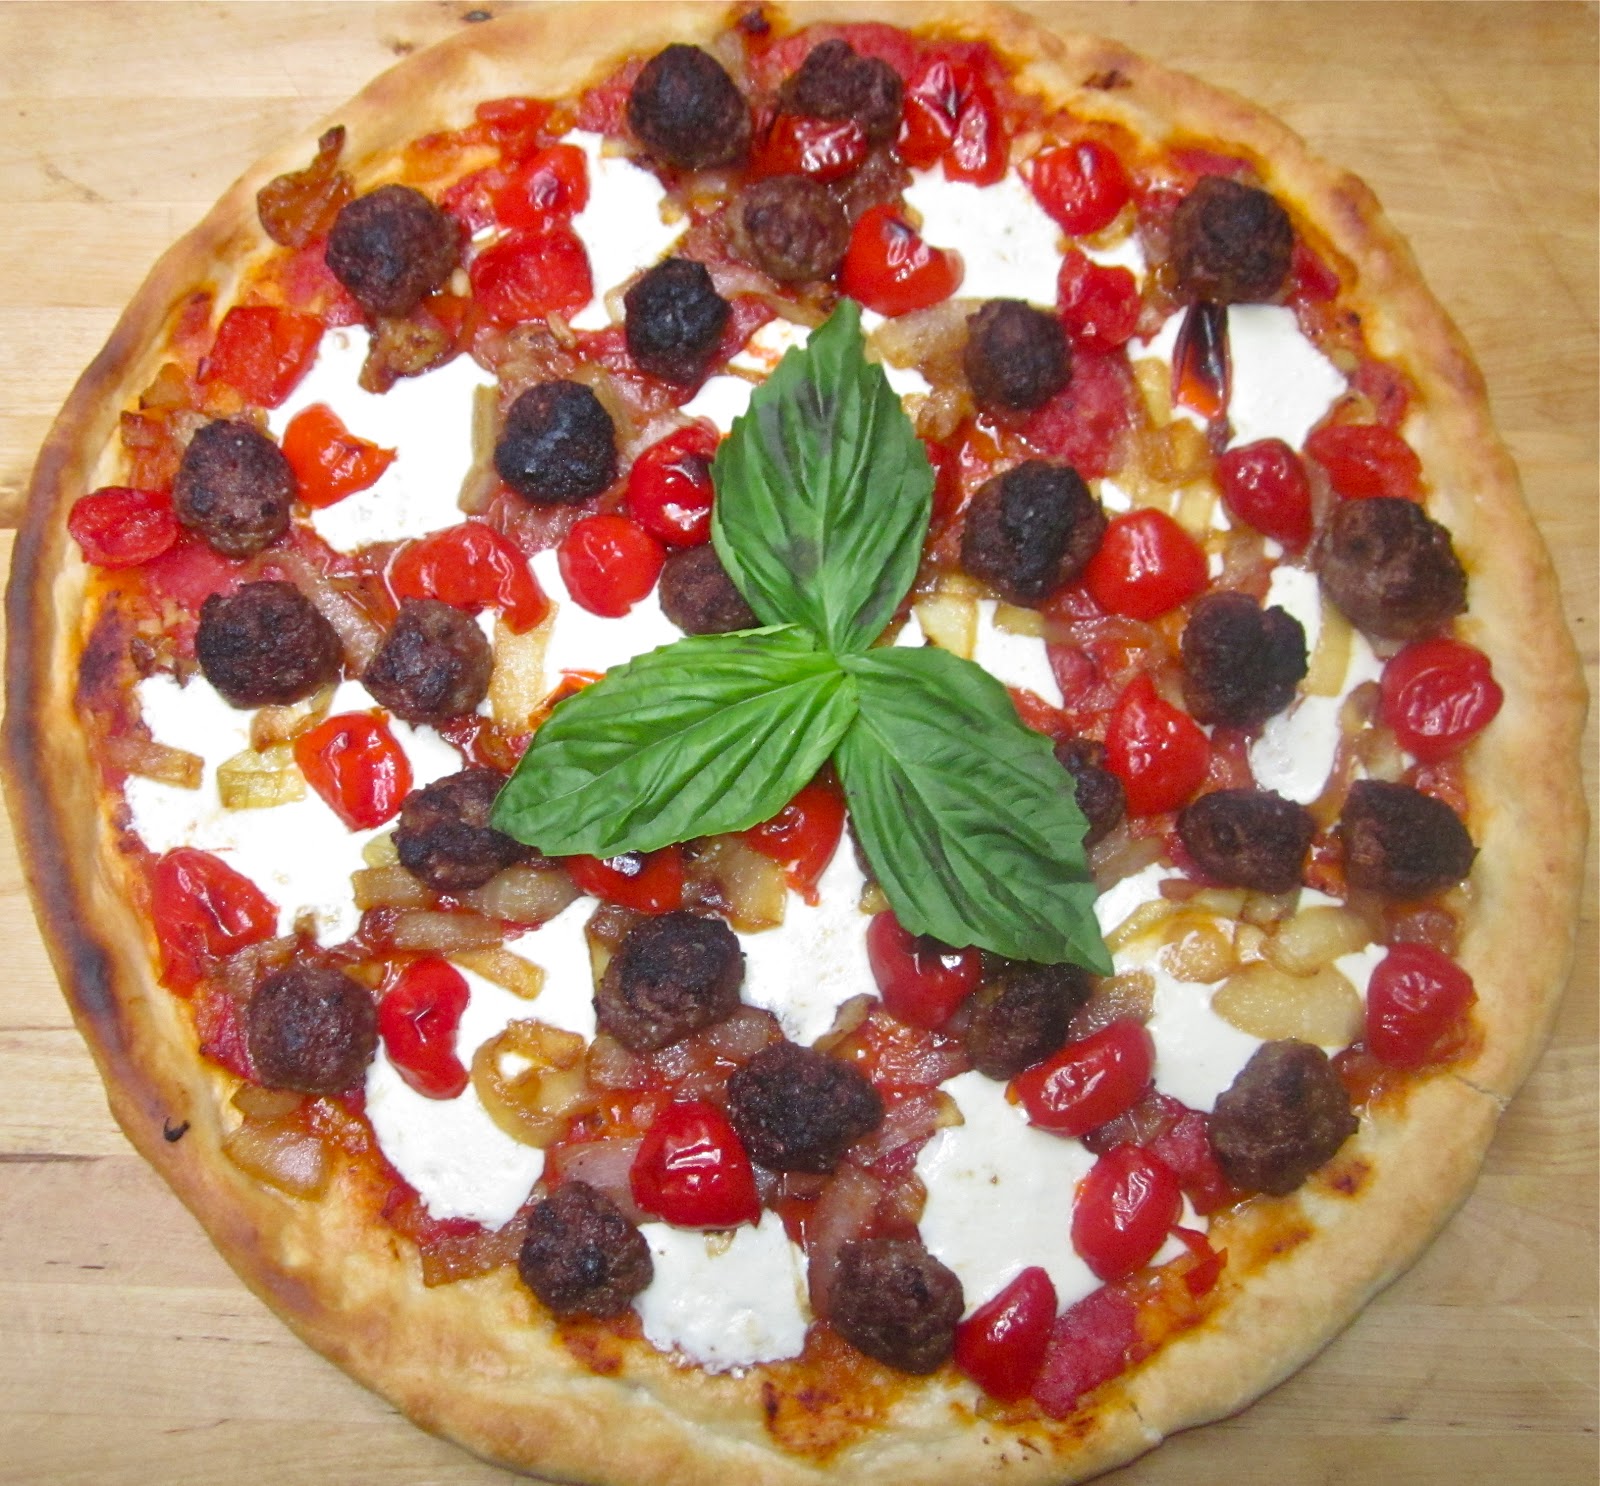
Our Antico-Inspired "San Gennaro Pizza" on White Truffle Oil Pizza Dough
If you ever make a trip to Atlanta, I have a great little pizza place for y'all to try. It's not really a secret anymore, but jam-packed after about 7PM. You wanna know how good it is? Well, celebrities like Jay Z, Ryan Reynolds, Scarlett Johannson, Tom Brady, and so many more frequent this tiny pizza parlor for authentic Italian style pizza. It's been voted some of the best authentic pizza in the Southeast, so it has a big reputation. If you try to go and eat there, it can be quite crowded since they don't have a lot of seating room, so we usually opt to take it to go and enjoy it at home on the porch. And trust me, it's just as good. Their pizzas are nothing fancy or crazy, but just focus on using high quality, imported Italian ingredients.
Here are some of Antico's pizzas that we enjoyed at home...
And well, you gotta get some fresh-made cannoli's for dessert... duh.
We particularly loved their signature pizza called the "San Gennaro". This pizza featured blistered pizza crust that is covered with a San Marzano tomato sauce and topped with caramelized Cipollini onions, Italian ground sausage, creamy buffalo mozzarella, sweet & spicy pickled red peppers (or peppadew peppers), and fresh basil as a garnish. Although it sounds so simple, it really is just so tasty. So much so that we had to recreate it at home. I tried to find every high-quality ingredient that I could because I think it makes a huge difference in flavor. The only change I made was substituting my White Truffle Oil Pizza Dough for just plain ole' dough. That's obviously up to you, it would be just as delicious on a different crust... trust me!! If you ever get a chance to grab a pizza in Atlanta, then definitely go for it, but until then make some of these at home like us because they are really yummy!! Enjoy :)
Creamy Mozzarella, Italian Sausage, Caramelized Cipollini Onions, & Peppedaw Peppers... perfecto! 
Don't forget to top it with a bunch of fresh basil!
Oh man, this is so good. 
For the White Truffle Pizza Dough:
1 ½C Warm Water
1t Active Dry Yeast
4C AP Flour
1t Truffle Salt
½t Sugar
1/3C White Truffle Oil

For the San Marzano Tomato Sauce:
28oz San Marzano Tomatoes, Whole & Peeled
1 Medium Onion, Finely Chopped
4T Unsalted Butter
2t Sugar
Salt & Pepper, To Taste

For the San Gennaro Pizza:
Prepared White Truffle Pizza Dough
Prepared San Marzano Tomato Sauce
8oz Fresh Buffalo Mozzarella, Thinly Sliced
Caramelized Cipollini Onions
Sweet & Spicy Peppadew Peppers
Ground Italian Sausage, Cooked & Crumbled
Fresh Basil, Chiffonade

Directions:
1. For the White Truffle Pizza Dough: Sprinkle the yeast over the warm water. In a mixer, combine flour and truffle salt. With the mixer running on low speed, drizzle in the white truffle oil or until just combined with the flour. Next, pour in the yeast mixture and mix until just combined. Coat a separate bowl with a light drizzle of white truffle oil and form the dough into a ball. Toss to coat the dough, and then cover the bowl tightly with plastic wrap and store in the refrigerator for at least 1 day, but preferably 3-4 days.
2. For the Tomato Sauce: Melt the butter in a medium saucepan and add in the onions. Cook over medium heat until caramelized & soft, about 5-10 minutes. Add in the tomatoes and gently crush the tomatoes. Cover the pot and bring the sauce to a boil for 3-5 minutes, and then reduce the heat to low and cook for another 10 minutes. Season with salt and pepper to taste. Set the sauce aside until ready to spoon over the pizza dough.
3. Preheat the oven to 500 degrees and roll out half of the pizza dough as thinly as possible and place onto a large baking sheet (the other half can be used for another pizza).
4. Making the Pizza: Drizzle the dough lightly with white truffle oil or olive oil and sprinkle a little bit of salt and fresh cracked pepper. Spread the tomato sauce all over the surface. Lay the sliced mozzarella across the dough, and then sprinkle the top with the peppers, caramelized onions, and sausage. Bake the pizza for 12 to 15 minutes, or until the crust is golden brown and the cheese is bubbly. Remove from the oven and immediately garnish the pizza with fresh basil. Cut into squares or slices and serve immediately.

Tuesday, July 10, 2012

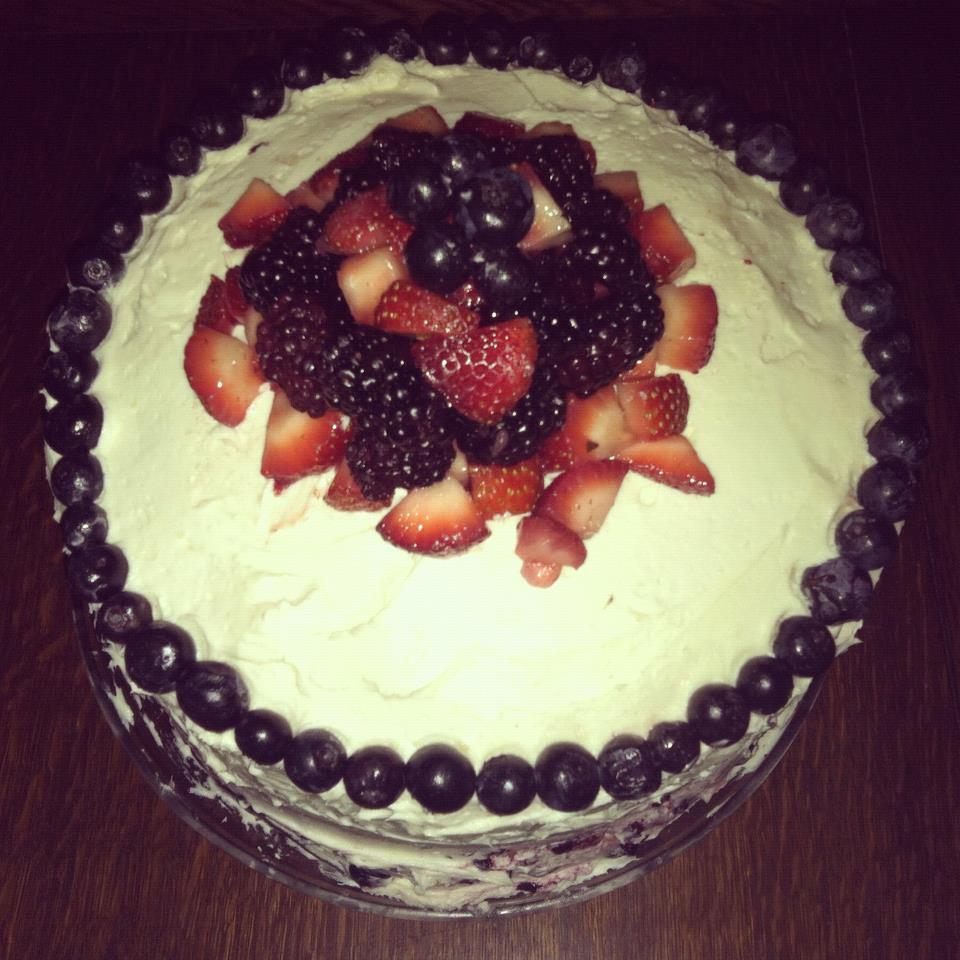
Mixed Berry Shortcake Layer Cake with Fresh Berries, Lemon Soaking Syrup, & Whipped Mascarpone Frosting

Mixed Berry Shortcake Layer Cake with Fresh Berries, Lemon Soaking Syrup, & Whipped Mascarpone Frosting
I know that the Fourth of July has come and passed us now, but I still have one more festive recipe to post. For our meal on the 4th, we enjoyed jello shots & fried chicken and this cake for dessert. This cake is so simple, yet so flavorful. Sometimes you don't want a cake with a bunch of crazy components... you just want a vanilla cake with a bunch of fresh berries and a killer frosting. I mean the frosting was divine. I used  this frosting as the base, but I added in a whole bunch of mascarpone, so it's like ten times better than before. We were literally eating it with a spoon. And it might seem like there's a lot of the frosting on the cake, but trust me, you want it there. I love the balance of flavors in this cake. And hey, it's patriotic to boot! I know I'm a little late, but it'd be a great cake for next year's celebration!! Enjoy :)


For the Vanilla Cake:
5 Large Egg Whites, Room Temperature
¾C Whole Milk, Room Temperature
1 Lemon, Zested
2 ¼t Vanilla
2 ¾C Cake Flour, Sifted
1 ¾C Sugar
1T + 1t Baking Powder
¾t Salt
12T Unsalted Butter, Room Temperature & Cut into Cubes

For the Lemon Soaking Syrup:
¼C Sugar
3T Fresh Lemon Juice

For the Whipped Mascarpone Frosting:
10T AP Flour
2C Milk
2t Vanilla
4 Sticks of Salted Butter (or you can use unsalted and just add salt to taste)
2C Sugar
16oz Mascarpone

For the Mixed Berry Shortcake:
Prepared Three Layers of Vanilla Cake
Prepared Whipped Mascarpone Frosting
Lemon Soaking Syrup
Fresh Blueberries, Blackberries, Strawberries, & Raspberries, For Garnishing

Directions:
1. Preheat the oven to 350 degrees and line 3 round cake pans with parchment paper and spray with Pam and set aside.
2. For the Cake: In a medium bowl, combine and stir the egg whites, ¼C of milk, lemon zest, and the vanilla. Set it aside. In the bowl of an electric mixer, fitted with the paddle attachment, combine the dry ingredients together on low speed for 30 second. Add the butter and remaining ½C of milk, and mix on low speed until just moistened. Increase to medium speed and mix for 1½ minutes. Scrape the side of the bowl and begin to add in the egg mixture in 3 separate batches; beat on medium speed for 20 seconds after each addition. Divide the batter evenly into the three prepared cake pans. Bake each cake for 15-20 minutes or until a toothpick comes out clean when inserted into the center (do not over-bake). Let the cakes cool on racks for 10 minutes before loosening the sides with a knife, and invert onto greased wire racks.
3. For the Lemon Soaking Syrup: In a small bowl, combine the sugar and lemon juice, stir with a fork until the sugar dissolves. Set it aside until ready to use.
4. For the Whipped Mascarpone Frosting: In a small saucepan, whisk flour into milk and heat, stirring constantly, until it thickens. You want it to be very thick, thicker than cake mix, more like a brownie mix is. Remove from heat and let it cool to room temperature. (If I’m in a hurry, I place the saucepan over ice in the sink for about 10 minutes or so until the mixture cools.) It must be completely cool before you use it in the next step. Stir in vanilla. While the mixture is cooling, cream the butter and sugar together until light and fluffy. You don’t want any sugar graininess left. Then add the completely cooled milk/flour/vanilla mixture and beat the living daylights out of it. If it looks separated, you haven’t beaten it enough! Beat it until it all combines and resembles whipped cream. Once it has reached the consistency you liked, gently adding in the mascarpone and beating to combine. It should be fluffy and light, but smooth.

Saturday, July 7, 2012

Mac n' Cheese Stuffed Burgers with Coca-Cola Caramelized Onions & Weaved Bacon Patties

Mac n' Cheese Stuffed Burgers with Coca-Cola Caramelized Onions & Weaved Bacon Patties
I've been lazy about blogging this week, sorry charlie. But no worries, I finally have a recipe to post today!! And its a doozy, lemme tell you. A couple months ago, we made these All-American Bacon-Crusted Burger with Thousand Island Mayo, and they were delish. I couldn't stop thinking about them and how I wanted to make them even crazier and more over-the-top than it already was. Well, I was thinking maybe I should stuff the burgers with some cheese, so it would get nice & ooey-gooey when you bite into it. But no, that wasn't crazy enough for us. Then bam, I was hit by a bus. No I'm just kidding... no bus incident here, but bam, a great idea had just popped into my head. Why not stuff a burger with a mac n' cheese patty. Holy Paula Deen... I couldn't wait to try it. So, we made some mac n' cheese and pressed inside of two burger patties and grilled them up. When you bite into these burgers (I mean that's if you can because they are so large, you practically have to un-hinge your jaw in order to do so), the mac n' cheese just oozes out and the cheesy-pasta-goodness just comforts your fatty Southern soul. The burgers are also loaded with Coca-Cola Caramelized Onions (um, what the what) that are sweet, soft, and perfectly caramelized. It's practically like a jam when you spread it on the burger buns. But one of our favorite components was the Weaved Bacon Patty. This patty ensures bacon in every bite, which is so genius. And you know what, next time I make a BLT, I making these patties for sure. They would be so perfect. We finished the burgers with my favorite thousand island mayo, tomato, and lettuce. But feel free to add anything else you would like... I mean it's your burger now isn't it? Yes. I also included a bunch of step-by-step pictures to show you how to make these stuffed burgers because it's hard to visualize the process. I hope it helps!! Enjoy :)
Press a portion of the ground beef into a large, round cookie cutter...
Then place a piece of American cheese inside...
Add in the mac n' cheese... 
And top with another slice of cheese and slide it out of the cookie cutter...
Press another portion of ground beef into the same cookie cutter, slide it out of the mold,
and place it on top of the mac n' cheese stuffed burger. Seal the edges to make sure
it's all covered and the mac n' cheese won't spill out.
Here are the cooked & crispy weaved bacon patties... yum 
Place a cooked burger patty on a bun...
Top the burger with a weaved bacon patty...
Load her up with all those delicious toppings & coca-cola caramelized onions... 
See the mac n' cheese stuffing? Heaven. on. earth. yep.  
Just let go & devour it..
For the Mac n’ Cheese Stuffed Burgers:
1lb Ground Chuck (80/20)
4 Slices of American cheese
Your Favorite Mac n’ Cheese Recipe
Salt & Pepper, To Taste

For the Coca-Cola Caramelized Onions:
4 Vidalia Onions, Sliced
Butter & Olive Oil, For Cooking
Salt, To Taste
12oz Coca Cola

For the Thousand Island Sauce:
2T + 2t Mayo
1T Ketchup
2t Sweet Pickle Relish
½t Sugar & White Vinegar
¼t Paprika & Garlic Powder 
Salt & Pepper, To Taste

For the Mac n’ Cheese Stuffed Burgers:
Prepared Mac n’ Cheese Stuffed Burger Patties, Cooked
Prepared Coca-Cola Caramelized Onions
Crispy Weaved Bacon Patties
2 Gourmet Hamburger Buns, Buttered & Toasted
Prepared Thousand Island Sauce
Homemade Pickle Chips
Heirloom Tomatoes, Sliced & Sprinkled Lightly with Salt and Pepper
Fresh Iceberg Lettuce, Ribs Removed & Torn into Bun-Sized Pieces

Directions:
1. For the Mac n’ Cheese Stuffed Burgers: Prepare your favorite mac n’ cheese recipe, pour it into a baking dish, and then refrigerate until cold and set. Split the ground chuck into 4 equal portions. Spray a large 4inch round cookie cutter with Pam and place it on top of a piece of parchment paper, press 1 of the portions of ground beef into the cutter, pressing it in to compact it and slightly pushing it up the sides, so there’s a deep indentation. Place 1 slices of American cheese on top of the pressed meat. Next, using a 3inch round rookie cutter, cut the chilled mac n’ cheese into small rounds. Place the mac n’ cheese round into the indentation of the beef, on top of the American cheese slice. Gently push the compacted mac n’ cheese-ground meat out of the cookie cutter, making sure it stays together. Repeat the process with another portion of the ground beef, compacting it in and pushing it up the sides (this patty portion will not be filled, but will be used to seal the burger completely). Place this formed patty on top of the other mac n’ cheese filled patty and seal the meat on the sides, so it’s completely formed. Repeat with the other two portions of ground beef. You should have two huge stuffed burger patties. Season all sides with salt & pepper. Heat a cast iron skillet over medium-high heat and melt some butter in it until very hot. Fry the each burger and cook for 2-3 minutes on each side, or until the outsides are brown and crispy. Place them onto a baking sheet and bake them in a preheated 400-degree oven for 5-10 minutes until your preferred doneness. Let them rest slightly before you assemble the burgers.
2. For the Coca-Cola Caramelized Onions: In a large pan on medium heat sauté the onions in half the butter for 10 minutes. Stirring occasionally but not too much. Over stirring will not allow the onions to brown. When the onions have absorbed all the butter, add the remaining butter and sauté another 10 minutes, occasionally stirring. When the onions absorb the second round of butter or oil and they are brown and translucent, start deglazing with the Coke, using enough to cover the bottom of the pan in a thin layer. Keep stirring occasionally and repeat the deglazing process until the onions are completely brown and soft, and all of the coke has be absorbed. Keep warm until you are ready to use.
3. For the Thousand Island Sauce: Combine all of the ingredients in a small bowl and stir to combine. Season with salt & pepper to your taste.
4. For the Weaved Bacon Patties: Preheat the oven to 350 degrees and line a baking sheet with a Silpat. Cut strips of bacon in half and weave the bacon slices into a square patty. I did this similarly to how you would weave a lattice-topped piecrust. Just alternately overlap the slices of bacon with each other to form a square patty. Bake the weaved patties in the oven for 20 minutes, and then boost the heat up to 400 degrees and cook until the bacon slices are all crisp (this will depend on how thick your bacon is, mine took an extra 10-15 minutes). Set these aside until you are ready to use them.
5. Assembling the Burgers: Top each slice of buttered & toasted bun with a thick layer of Thousand Island Sauce. On the bottom slice of each bun, top the sauce with 1 slice of seasoned heirloom tomato and lettuce. Place one stuffed burger on top of the lettuce, spread with Coca-Cola Caramelized Onions, and then top with the other weaved bacon patty and finish with the top slice of the bun. Repeat the make the other burger.
6. Serve immediately with some French fries.

Thursday, July 5, 2012

Happy Independence Day Y'all

I know I'm a little late, but Happy Independence Day :)
I hope y'all all had some great celebrations yesterday, we sho' did!!
I'll post a recipe tomorrow... but until then, here are some pictures from yesterday 

sparklers with my love
sparklers + kisses  
heading downtown
fireworks over river street
jello shots so big... you hav'ta eat 'em with a spoon!
ready to party
mixed berry shortcake layer cake for dessert
chocolate covered s'mores from river street sweets
yummy fried chicken

check back tomorrow for another recipe, y'all :)

Monday, July 2, 2012

Raspberry-Goat Cheese Cheesecake with Chocolate Ganache Topping

Raspberry-Goat Cheese Cheesecake with Chocolate Ganache Topping
Hey y'all, whacha doing? Getting ready for the 4th of July (aka the best holiday ever, besides Christmas, Thanksgiving, St. Patty's Day, and well okay, all holidays are amazing). But the Fourth goes down in my book as my absolute favorite. I don't know what it is about it, maybe the combination of grillin' out, banana pudding, peach cobbler, caloric Southern food, fireworks + sparklers, those firecracker popsicles that I was obsessed with as a child, block parties, shrimp boils, beach bummin', going to the lake, loud country music, getting drunk having fun with my best friends, red-white-and-blue colored desserts, ice cold arnold palmers, dancin' the night away, baseball games... well, as you can see the list goes on & on. Now, onto the recipe. Remember that time I made those goat cheese brownies and they were absolutely delicious. Well, I made another goat cheese dessert. This time it was a cheesecake. I saw this recipe on last week's "The Best Thing I Ever Made" on the Food Network. It was all about cheese and Anne Burrell was raving about this goat cheese cheesecake she had made. So, I happened to have a bunch of goat cheese around and ended up making her cheesecake. I decided to use a chocolate cookie crust instead of the traditional graham cracker crust, add some fresh raspberries, and spread on a thick layer of dark chocolate ganache as a topping. It is an odd & quirky combination, but it totally works. Given, I have a mild obsession with goat cheese, so if you are not a goat cheese fan, then definitely don't make this. You will absolutely hate it. This cheesecake is light yet creamy, tangy but sweet, and rich but refreshing. It's a truly decadent dessert that I know we will make again & again!! Enjoy :)
A Slice of Raspberry-Goat Cheese Cheesecake with Chocolate Ganache Topping 
Look at them raspberries :)
yummy chocolate crust + chocolate ganache topping
Always top with some fresh raspberries!!
For the Chocolate Cookie Crust:
6T Unsalted Butter, Melted
2C Chocolate Cookie Crumbs
¼C Sugar
Pinch of Salt
Pinch of Espresso Powder

For the Raspberry-Goat Cheese Cheesecake:
2 8oz Packages of Cream Cheese, Room Temperature
12oz Goat Cheese
1 ½C Sour Cream
4 Large Eggs
1 ½C Sugar
2t Vanilla
1-2C Fresh Raspberries

For the Chocolate Ganache Topping:
1C Dark Chocolate Chunks
½C Heavy Cream

Directions:
1. Preheat the oven to 350 degrees and spray a 9inch springform pan with Pam. Set it aside.
2. For the Chocolate Cookie Crust: Place the cookie crumbs, sugar, salt, and espresso powder in a mixing bowl. Stir in the melted butter until well combined. Press the crumb mixture into the bottom and up the sides of the pan, packing it tightly and evenly. Bake until golden brown, about 10-15 minutes. Cool on a rack, and then wrap the outside of the spring form pan with foil and place in a roasting pan.  Bring a medium pot of water to a boil. Meanwhile, make the goat cheese cheesecake filling.
3. For the Raspberry-Goat Cheese Cheesecake Filling: In the bowl of an electric mixer, fitted with a paddle attachment, beat the cream cheese and goat cheese together until light and fluffy. Add the sour cream and continue beating until combined. Add the sugar and vanilla and beat until smooth. Add the eggs one at a time, beating in each until thoroughly mixed before adding the next one. Pour the filling into the prepared crust and push the raspberries down into the cheesecake. Gently place the cheesecake into the roasting pan that is in the oven and pour the boiling water into the roasting pans until it comes about halfway up the side of the spring form pan. Bake for 30 minutes, and then rotate the baking sheet and bake until the filling is set, another 25 to 30 minutes. If the filling starts to color, tent the pan with aluminum foil. Remove the cake from the oven and run a knife along the outside edges to loosen cheesecake from sides of pan. Let the cheesecake cool at room temperature for at least 3-4 hours. Chill in the refrigerator for at least 4 hours, or preferably overnight.
4. For the Chocolate Ganache Topping: In a small saucepan, bring the heavy cream just to a boil.  Remove from the heat and stir in the chocolate until smooth.  Pour the ganache over the top of the cooled cheesecake, smoothing with a spoon and allowing some of the ganache to drip over the sides of the cheesecake.  Return to the fridge to chill an additional 3 hours or until the ganache is shiny and set.

Saturday, June 30, 2012

Date Night : Bibimbap with Asian Marinated Flank Steak, Kimchi Fried Rice, Sautéed Vegetables, & Sweet Gochujang Sauce

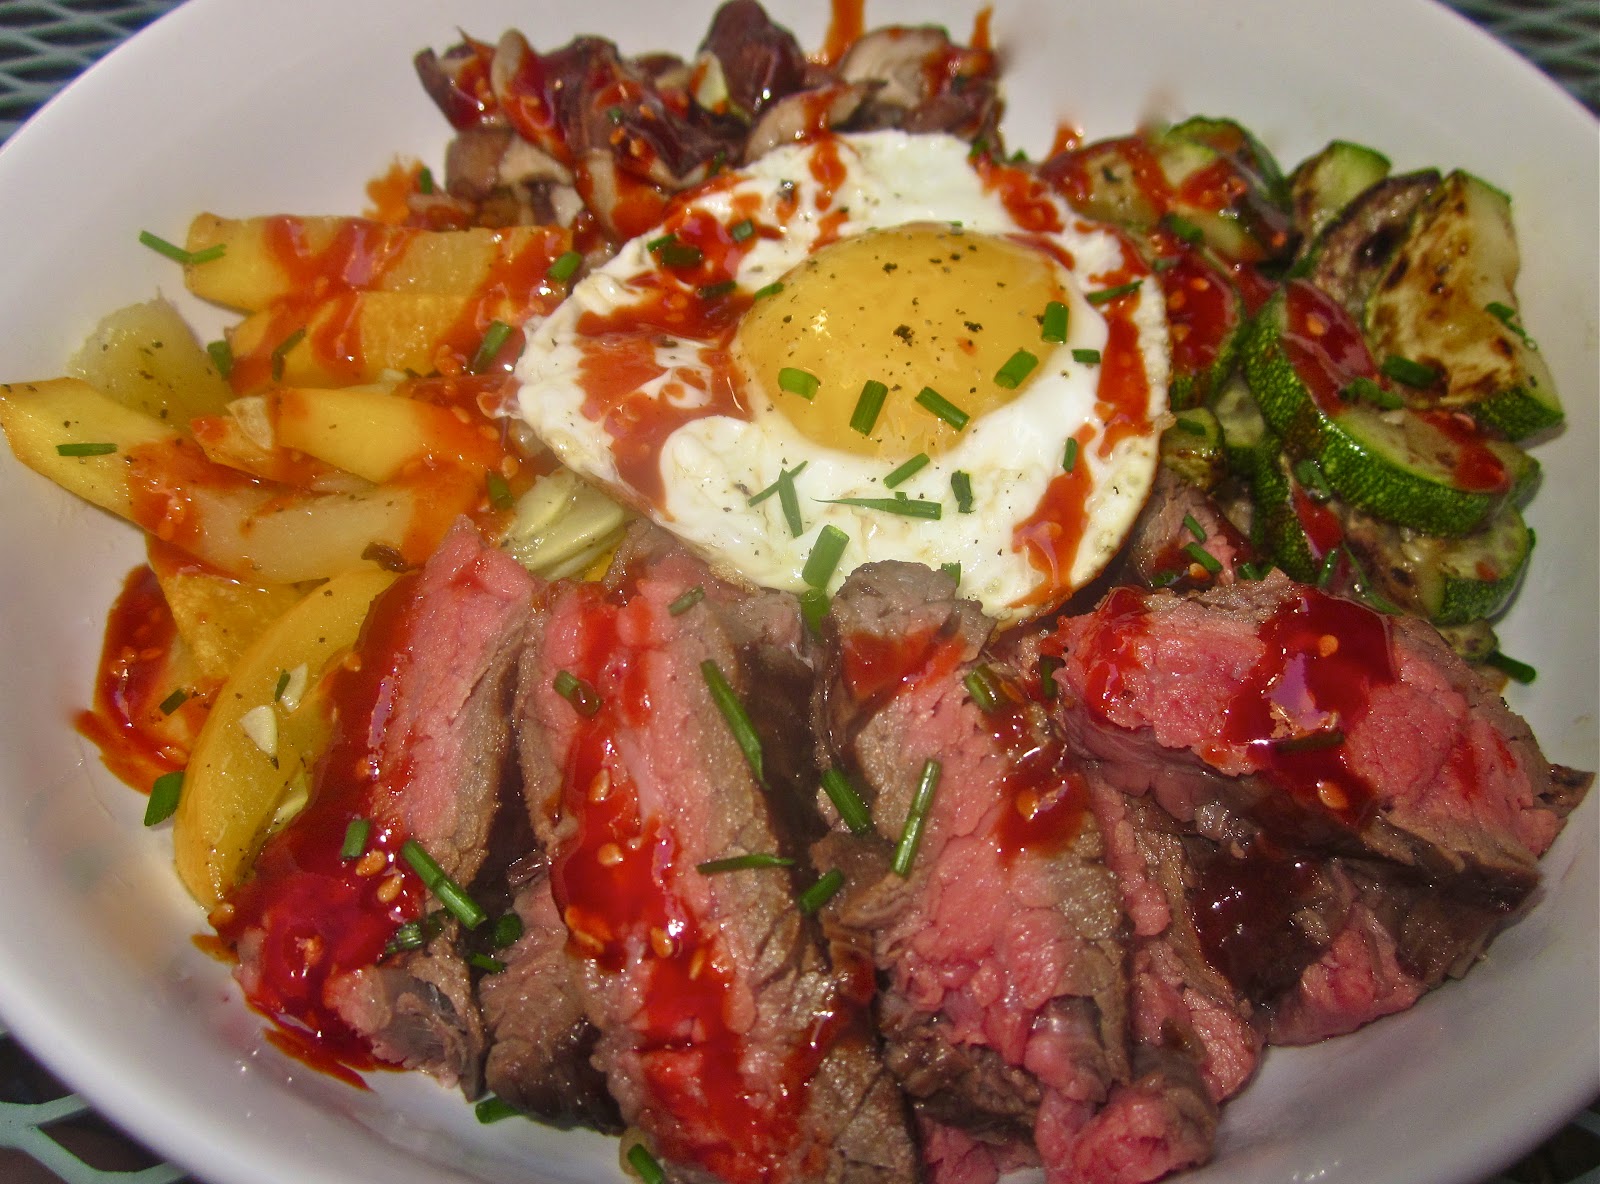
Wow, I'm just now realizing that I haven't posted a date night recipe in a while. That's sad. But hey, I'm posting one now, that counts for something. Do y'all love the whole Asian taco craze right now? We sure do. One of our favorite places to go that features this fusion is Hankook Taqueria in Atlanta. If y'all are ever in Atlanta for the weekend, I seriously recommend that you go there. Alton Brown actually featured it on "The Best Thing I Ever Ate" on the Food Network. The tacos are great, but I personally prefer their Bulgogi nachos, sesame french fries, and Bibimbap. And for a while now, I've been itchin' to recreate one of their dishes at home. Well, we finally got inspired to make Bibimbap, which is pretty much a bowl of rice, vegetables, some kind of meat, and an egg. It really is up to you on how you make it, and that's why I like it. The first thing that I knew I wanted to make was Asian Marinated Flank Steak because that's just the perfect component. We like our steak seared to medium or medium-rare, but you can cook yours anyway you like. At the bottom of the bowl, we scooped a heaping amount of bacon-kimchi fried rice to serve as the base. This rice is super delish people. So, don't leave it out. Now, the vegetables, that's solely up to you. We used carrots, zucchini, mushrooms, and spinach. But, other popular choices are squash, bean sprouts, or onions. Just pick your favorites and cook 'em up! We topped our Bibimbap with a fried egg and a drizzle of sweet Gochujang sauce. These are important components, so don't leave them out. And if you don't know what Gochujang is, it's a Korean condiment that is similar to Ketchup, but somewhat spicy like Sriracha. I know this may seem like a crazy dish, but it all totally works. It's like a really fancy fried rice, yummmm!! Enjoy :)
Bibimbap with Asian Marinated Flank Steak 
Don't Forget the Fried Egg + Sweet Gochujang Sauce!
For the Asian Marinated Flank Steak:
½C Soy Sauce
½C Cooking Sherry
4T Honey
2T Sesame Oil
2T Fresh Ginger, Minced
3 Cloves Fresh Garlic, Minced
½t Crushed Red Pepper Flakes
1 Whole Flank Steak
Hoisin Sauce, For Glazing

For the Kimchi Fried Rice:
1t Sesame Oil
1T Vegetable Oil
1T Chili-Garlic Sriracha
3 Slices of Thick Cut Bacon, Cut into Small Pieces & Fried until Crispy
2 Cloves of Garlic, Minced
3 Green Onions, Thinly Sliced
2T Soy Sauce
¾C Kimchi, Chopped
3C Leftover White Rice

For the Sweet Gochujang Sauce:
1T Gochujang & Rice Wine Vinegar
1T Honey
1t Soy Sauce, Brown Sugar, Sesame Oil
1t Toasted Sesame Seeds

For the Bibimbap:
Prepared Kimchi Fried Rice
Asian Marinated Flank Steak, Thinly Sliced
Sautéed Carrots, Zucchini, Fried Spinach Bean Sprouts, & Mushrooms
Fried Eggs
Fresh Minced Chives or Green Onions, For Garnishing
Prepared Sweet Gochujang Sauce, For Drizzling

Directions:
1. To Marinate the Asian Flank Steak: Combine all of the ingredients in a mixing bowl and whisk until incorporated. Remove the flank steak from the package and rinse it off. Place the meat into a plastic big and pour the marinade over the meat. Refrigerate for at least 6 hours or overnight preferably. Remove the steak from the marinade and place on a plate, and let it come to room temperature, about 1 hour.
2. To Cook the Asian Flank Steak: Heat a grill pan on high heat. When the pan is extremely hot, place the steak on a slight angle. Cook without touching for about 2 minutes. Rotate the meat about 45 degrees, keeping it on the same side, and cook for another 1-2 minutes. Flip the meat over and cook it using the same method used previously, and for a total cook time of 5-8 minutes for medium-rare. Glaze the meat with the hoisin sauce while the meat is cooking. Remove the meat to a cutting board and let it rest for 10 minutes before slicing. Once it has rested, thinly slice the meat against the grain. Keep it warm until ready to serve.
3. To Make the Kimchi Fried Rice: In a medium bowl, combine the rice and chili-garlic sauce. Mix until the rice is evenly covered in the sauce, set aside. In a large fry pan or wok, heat the oil over medium-high heat. Add the garlic and green onions until fragrant, about 2 minutes. Add the rice and mix everything together well. Use a spatula to flatten the rice against the pan, and keep still for about 3 - 5 minutes to let the rice get crispy. Repeat until the rice is evenly crispy. Next, add the soy sauce and sesame oil, adding more to taste, stir well. Mix in the crumbled bacon and chopped Kimchi. Keep warm until ready to serve.
4. To Make the Gochujang Sauce: Mix all of the ingredients in a bowl until smooth and incorporated. Refrigerate until ready to use.
5. For the Bibimbap: Scoop some of the Kimchi fried rice into a large bowl. Top the rice with all of the sautéed vegetables & sliced flank steak around the bowl, leaving a spot in the middle. Place the crispy soft poached egg in the center. Garnish with a drizzle of the Gochujang sauce on top of all the components.  Serve warm.