Tuesday, October 20, 2015

Pan Fried Italian Sausages with Charred Peppers + Onions on a bed of Creamy Parmesan Polenta

Pan Fried Italian Sausages with Charred Peppers + Onions on a bed of Creamy Parmesan Polenta
This is a dish I have never made before, seeing that it's an Italian staple, and I'm not the biggest fan for Italian food, it makes perfect sense that I wouldn't concoct a recipe for Sausage with Peppers + Onions. But, guess what... we all loved it, even me!! We're huge sausage people over here... any kind, any brand, any flavor... you name it, we want it. I especially love Al Fresco's Chicken Sausage; I decided that the best choice would be their Sweet Italian Style. But really, you could sub in any kind of Italian sausage, even a spicy one if you so please. It really doesn't matter what you end up using, as long as they are cooked up perfectly until they are golden brown, slightly charred, and crisped on the outside. The pan fried sausages are nestled on top of a bed of creamy parmesan polenta and charred peppers + onions. So let's start with the polenta first because who doesn't want extra cheesy polenta to chow down? These are perfectly seasoned in every which way and they are a cinch to make! Although the consist of mainly freshly grated parmesan, I wanted to add some shredded fontina to balance out the flavor and give them that little extra boost of cheese flavor! I'm tellin' y'all, every single one of us was moaning and groaning over this polenta... it was that good. I can't wait to use it in more of my recipes in the future, so keep that in your back pocket. Next, come the charred peppers + onions. I tried to used as many colors as I could get my hands on, so I grabbed 2 red onions, 1 red bell pepper, 1 orange bell pepper, 1 yellow bell pepper, and 1 green bell pepper. Now if you hate red onions, you can switch out another type of onion instead. If you can't find all four colors of bell peppers, just use what your local grocery store is carrying. No biggie! I have a somewhat strange, unorthodox method to cooking and charring the peppers + onions, so hear me out. I begin by sautéing them in some butter and olive oil, and then braise them in a sweetened red wine + red wine vinegar mixture. While they are cooking and the liquid is reducing, it is important that you keep an out on the veggies because you want them still quite crunchy before the next step. Now, here's where it might get weird for some of y'all. I like to pour the whole put into a strainer (placed over the sink) and allow all of the braising liquid to drip off. I even use some paper towels to dry them as much as I can before it's second stage of cooking. Don't worry though, your peppers will still have plenty of flavor; this step is important because you need dried veggies in order to get all of those wonderful charred edges. Secondly, you gotta have a dry cast iron skillet because that is how you achieve the blackening phase. So, put that sucker on high heat and add the dried peppers + onions in the screamin' hot pan and add in the minced garlic, Italian seasoning, a pinch of sugar, crushed red pepper flakes, kosher salt, and fresh cracked pepper. Toss to combine the vegetables with all of the seasonings, and once they have reached an al dente texture and a charred exterior, throw in some fresh mixed herbs for a little fresh bite. Now all that's left of the recipe is to begin assembling. I like to serve this in bowls, starting with a few big ladles of the cream parmesan polenta and some more freshly grated parmesan for good measure. Then you make a mound of your charred peppers + onions, so that your pan fried Italian sausages have a bed to rest on. We decided that we wanted a sweet + spicy dish, so we drizzled some white balsamic reduction over the top and garnished it with a sprinkling of dried red pepper flakes and fresh mixed herbs (think basil, parsley, chives, and oregano) to finish off the dish. This is a great weekday or Sunday supper, and also, a perfect hearty meal for this time of the year!! Enjoy :)


For the Pan Fried Italian Sausages:
8 Italian Sausage Links (We love Al Fresco’s Sweet Italian Style Chicken Sausage)
2T Unsalted Butter + 1T EVOO

For the Charred Peppers + Onions:
2T Unsalted Butter + 2T EVOO
1-2 Red Onions, Sliced (we like a lot of onion, so we used two)
4 Bell Peppers, Sliced into Strips (we used 1 of each color: red, orange, yellow, + green)
¼C Red Wine + ½C Red Wine Vinegar
1-2T Light Brown Sugar
4 Garlic Cloves, Minced
2t Italian Seasoning
A Heavy Pinch of Sugar ( to help the blackening process)
½-1t of Crushed Red Pepper Flakes (depending on how hot you like it)
Fleur de Sel + Fresh Cracked Pepper, To Taste
1-2T Mixed Fresh Herbs (we used basil, parsley, chives, andR
4C Unsalted Chicken Stock (homemade or store-bought)
2 Large Cloves of Garlic, Minced
1C Stone-Ground Cornmeal
1T Kosher Salt + 1t Fresh Cracked Pepper
1C Freshly Grated Parmesan
4oz Fontina Cheese, Shredded
¼C Crème Fraiche
4T Unsalted Butter
¼-½C Heavy Cream or Milk (to thin it out to your desired thickness) 
1-2T Mixed Fresh Herbs (we used basil, parsley, chives, + oregano)   

For the Sausage + Peppers with Parmesan Polenta:
Prepared Parmesan Polenta
Freshly Grated Parmesan, For Garnishing
Prepared Charred Peppers + Onions
Pan Fried Italian Sausages, Browned + Crisped
Homemade or Store-Bought White Balsamic Reduction, For Drizzling
Mixed Fresh Herbs, For Garnishing (same mixture of herbs used above)

Directions:
1. For the Pan Fried Italian Sausages: Melt the butter and EVOO in a cast iron skillet over medium-high heat, and then add in half of the sausages. Brown on all sides, about 8-12 minutes total, until they are golden brown yet slightly blackened in color. Remove the crisped sausages from the pan onto a plate and cover them with aluminum foil so that they stay warm while you cook the remaining half of the sausages (by following the same process as before). Make sure to keep them warm until you are ready to serve the dish.
2. For the Charred Peppers + Onions: In a large skillet, over high heat, melt together the butter and EVOO. Add in the red onion and multicolored pepper slices. Toss to coat them in the oil, along with some kosher salt and fresh cracked pepper, and sauté for about 5-10 minutes. Pour in the red wine and red wine vinegar to deglaze the pan. Add in the brown sugar and cook for a few more minutes until the wine has reduced by half. Get a large strainer and place it over your sink, pour the red wine braised peppers + onions into the strainer, so that all of the excess liquid is removed. Once all the liquid has dripped off, get a few pieces of paper towels and dry the peppers + onions are completely dried off. This is an important step because it will help you to obtain a perfect char (also make sure to completely wipe out all remaining liquid/moisture/butter/oil from the pan). With the skillet still on high heat, return the dried peppers + onions to the wiped down pan and let them vegetables char, making sure to stir them around for even browning. You want your peppers to be al dente in texture and blackened on the edges for color (so, make sure your pan is completely dry to obtain this component of the recipe). Add in the minced garlic, Italian seasoning, a heavy pinch of sugar, crushed red pepper flakes, and salt + pepper to taste. Cook again, while tossing to combine the seasonings with vegetables, for a minute or two, making sure that the minced garlic doesn’t burn. Once the peppers + onions are done, do a quick taste test and add in any necessary seasoning to your preferred taste (for example: kosher salt, fresh cracked pepper, crushed red pepper flakes, and/or sugar). After you have done the taste test and love the flavor, stir in the fresh herbs and keep this mixture ready until you are ready to assemble.
3. For the Creamy Parmesan Polenta: In a large pot, pour in the chicken stock and add in the minced garlic. Cook over medium-high heat until the stock comes to a boil. Reduce the heat to medium-low and very slowly whisk in the cornmeal, whisking constantly to make sure there are no lumps. Switch to a wooden spoon and add in the kosher salt and fresh cracked pepper. Simmer, while stirring constantly, for 10-12 minutes or until they are thick. Be sure the scrape the bottom of the pan thoroughly while you’re stirring. Move the pan off the heat and mix in the freshly grated Parmesan, shredded fontina cheese, crème fraiche, butter, and fresh herbs. If this mixture becomes to thick (either by overcooking or allowing it to sit too long), stir in some of the heavy cream/milk to loosen it again. Taste for seasonings and serve it immediately.
4. Assembling the Dish: Ladle some of the Creamy Parmesan Polenta into the bottom of a serving bowl and freshly grate some more Parmesan over of the polenta. Using a spoon or tongs, make a mound of the charred peppers + onions on top of the polenta. Place two links of pan fried Italian sausages (per bowl, per person) in the middle of the vegetable bed and drizzle the surface of the dish with a little bit of the white balsamic reduction (this is optional, but we like the sweetness of the reduction against the saltiness of the polenta). Garnish with fresh mixed herbs and enjoy while it’s still hot!!

Saturday, September 26, 2015

Saturday Down South: University of Alabama-Inspired Houndstooth Pudding Trifle with Homemade Red Velvet Pudding, Cream Cheese Whipped Cream, Crushed Double Stuffed Oreos, + Red Velvet Cake Sprinkles

The Haute + Heirloom blogger has returned, yay!! I know I have been gone for-like-ever and I apologize for that, but I have been extremely busy and my personal life is in shambles. I hate that I haven't posted some of my new recipes, but I'm back, and the recipes are even BETTER. It's a 100% guarantee, mmk? As many of my followers know, we are huge football fans. Obviously, Alabama comes in first in the ranking, and just behind them comes University of Georgia + the Atlanta Falcons. So if you're a Georgia gal like me, this dessert is perfect for all three teams and all of your buddies will love you for making a pan of this trifle during the long day of tailgatin'. Trust me on that one. My usual go-to dessert had always been my Gourmet Banana Pudding, but I wanted something festive to celebrate with... and this is certainly festive. If you didn't know already, Alabama's team colors are crimson + white, but the school has incorporated the pattern of houndstooth into the scheme as well. The tradition of houndstooth comes from the greatest college football coach of all time, Bear Bryant. He wore a houndstooth hat to every single game, and well, it caught on like wildfire. Now it's almost impossible to not see someone with houndstooth on during the game day. So, when I first started concocting this dish in my head, it became clear to me that I wanted the same idea that I use for banana pudding. Instead of creamy vanilla bean pudding, there is a luscious + homemade red velvet pudding. You have to know by now that my obsession with "red velvet desserts"is quite unhealthy and I tend to go overboard, but hey who's counting anyway. Next, I used crushed up Double Stuffed Oreos rather than the homemade shortbread because I needed the contrast of the black + white cookies to represent the houndstooth concept. And hell, who doesn't like Oreos... I sure do!! What's even better about them is that if you let the pudding trifle sit in the refrigerator for 1-4 hours (or overnight if you need to) like we did, the cookies begin to soften to the texture of the Oreos in cookies + cream ice cream. They literally, like, melt in your mouth. Lastly, you have to make the "frosting" type whipped cream layer. It has the tang of a cream cheese frosting (which is what all red velvet cakes must have), the sweetness from the sweetened condensed milk, the delightful cloud-like fluff from the Cool Whip, oh and don't forget that vanilla bean that is added in because that is so much better than vanilla extract. One fun ingredient I found for this dessert are some of Betty Crocker's yummy Red Velvet Cake Sprinkles. And let's be honest, sprinkles make every dessert so much better, it's a scientific fact. To be frank, these are double the fun because they are sprinkles that taste like cake.... woah, woah, WOAH. Mind Blown. These Red Velvet Cake Sprinkles also give the dish a little crunch with each bite. Textures galore here, folks!! I hope y'all enjoy this pudding trifle as much as we did because it's already on our tailgate menu for the Alabama-LSU game in Tuscaloosa in November. So go on, start cookin' it :)
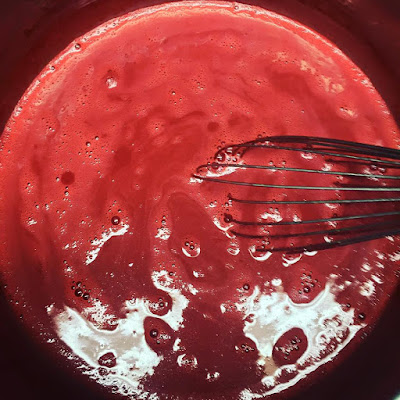
the beginning of making the homemade red velvet pudding
assembling like a beast
check out those layers, guys
The Close Up: Amazing Betty Crocker Red Velvet Cake Sprinkles
And the best shot of them all... a perfect spoonful of every glorious layer :)
For the Classic Pudding Mix:
½C Cornstarch
¼C Buttermilk or Milk Powder (I used buttermilk since it’s a key component in red velvet cake)
1C Cake Flour (AP Flour can be substituted if you don’t have it)
1 ½C Sugar
1t Kosher Salt  

For the Homemade Red Velvet Pudding:
3C Whole Milk, Divided
¾C Classic Pudding Mix (above; you will have leftover mix, but now you can make more of it)
5T Cocoa Powder, Sifted
Generous Pinch of Salt
¼C Sugar
2 Eggs
1T White Vinegar
2T Salted Butter
2t Vanilla Extract
1T Cream Cheese Emulsion
Red Food Coloring (use as much as you want until you reach your desired red color)

For the Cream Cheese Whipped Cream:
8oz Cream Cheese, Softened
1 Can of Sweetened, Condensed Milk
1T Cream Cheese Emulsion
¼C Heavy Whipping Cream
16oz Cool Whip, Defrosted
1 Vanilla Bean, Split + Scraped for Seeds (if you don’t have vanilla bean, sub in 2t vanilla extract)
Generous Pinch of Salt  (or to taste)

For the Houndstooth Trifle:
Prepared Homemade Red Velvet Pudding, Completely Chilled
Prepared Cream Cheese Whipped Cream, Completely Chilled
1 Box of Double Stuffed Oreos, Crushed into Bite Size Pieces
1 Container of Betty Crocker Red Velvet Cake Sprinkles (chocolate sprinkles can be subbed in)

Directions:
1. For the Classic Pudding Mix: Combine the cornstarch, flour, buttermilk powder, sugar, and salt. Whisk the mixture until it is a cohesive mixture is formed. Set this pudding mix aside. If you have any remaining pudding mix left, store it in an airtight container.
2. For the Homemade Red Velvet Pudding: Pour 2 ½C of whole milk into a medium sized saucepan or pot. Turn on the stove to low heat and allow the milk to get hot (with some slight steaming), but make sure the milk does not start boiling! While the milk is heating, get another mixing bowl and whisk together the pudding mix, sifted cocoa powder, sugar, 2 eggs, a generous pinch of salt, white distilled vinegar, and the remaining ½C of whole milk. While whisking, make sure it is a smooth, creamy, chocolate liquid. Once the milk is hot, add in the chocolate liquid to the hot milk and whisk vigorously (so that the eggs won’t cook and curdle). Then add in the salted butter, vanilla extract, cream cheese emulsion, and red dye. Increase the heat to medium or medium-low while whisking continuously because the pudding could easily burn. Cook and whisk until the pudding mixture starts to thicken, this usually takes about 8-12 minutes, depending on the thickness that you prefer. During the cooking period, make sure to taste test it to see if it needs more salt or vanilla (do it to taste) When it has reached your desired consistency, turn off the heat and remove the pan from the burner. It will continue to thicken a little more as it cools and sits. Press a piece of plastic wrap onto the top of the pudding; this will help the pudding to remain smooth and also prevents it from developing a “skin” on top.  Cool the pudding until it is completely chilled and store in the refrigerator until you need to use it.
3. For the Cream Cheese Whipped Cream: Place the softened cream cheese, vanilla bean seeds, heavy whipping cream, cream cheese emulsion, and a pinch of salt into the bowl of a standing mixer with the whisk attachment. Beat the cream cheese at medium speed until it smooth and slightly whipped, about 1-2 minutes. With the mixer still on, pour in the can of sweetened, condensed milk and mix until it is a cohesive, creamy mixture (also make sure to scrape down the sides and the bottom of the bowl to get any remaining cream cheese that is stuck). This should take another 1-2 minutes. Lastly, gently fold in the defrosted (yet still cold) Cool Whip, so that it is completely incorporated, but still has a light and airy texture. Cool the refrigerator until you are ready to use it.
4. Assembling the Houndstooth Pudding Trifle: Get your favorite serving piece (preferably a glass trifle dish, so that you can see every layer) and begin the layering process. Start off with a base of crushed double stuffed Oreo cookies. Next, dollop some of the homemade red velvet pudding all over the cookies and then gently smooth it out, so that the Oreos are completely covered. Following the same method as the pudding, dollop the cream cheese whipped cream on top of the red velvet pudding and smooth the top as well. Spread some of the red velvet sprinkles evenly over the cream cheese whipped cream. Repeat the layering process of crushed cookies, red velvet pudding, cream cheese whipped cream, and red velvet sprinkles until you have run out of all of the different components. 
5. You can enjoy the pudding now, but I personally prefer to let it sit in the refrigerator, so that the pudding and whipped cream have firmed up, while the cookies are soft (think of the softened textures of Oreos in cookies + cream ice cream). You can chill it from 1-4 hours… or even overnight if you want or need to! Besides that, it’s time to chow down on your festive football dessert. And hey, it’s also great for UGA + Falcons fans as well!!

Monday, June 8, 2015

Espresso Infused Dark Chocolate Cupcakes with Whipped Sea Salt Buttercream, Honey Caramel Sauce, Smoked Fleur de Sel, + Crispy Cake Crumbs

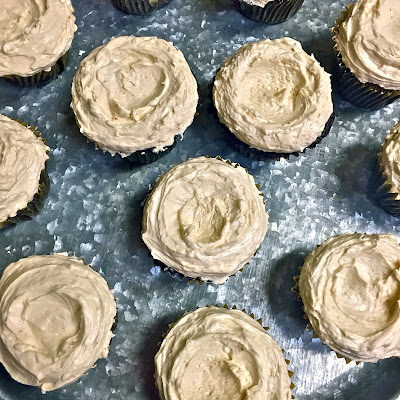
Y'ALL. I am a self-proclaimed cupcake hater. Feel free to glitter bomb if you please, but it's just not my thang. Buttttttttt, these cupcakes have changed my tune. They are by far the best cupcakes I have ever made. The base is a luxurious espresso infused dark chocolate cupcake that has a deep complex flavor, yet manages to stay utterly moist during the baking process. My secret for that texture... a little bit of mayo. I know some of you will squirm, maybe throw your hands up in the air, or scoff at the idea of putting in a condiment that normally belongs on a hamburger into cake batter. But hear me out, okay? My great grandmother, Mama Jones, always added some creamy mayo into her recipes for cake. This is especially important in red velvet cake + any kind of chocolate cake. Listen though, it isn't too weird if you really think about it... mayo is simply eggs + oil whipped together. And well, we already put that in a lot of our cakes from the get=go, so why not give it the little push it needs to make an extra moist cake. Now that you've gotten over the initial shock factor of the mayo, the res of the batter has dark cocoa powder, freshly brewed espresso, buttermilk, and other classic baking ingredients. The star of this show, however, is by far the whipped sea salt buttercream. Why, oh why, I had I never thought of the concept. I never really like buttercream... it was always far too sweet, to the point where I almost just drop dead on the spot. But with the sea salt whipped in, it makes it not too sweet, not too salty... just rightttttt. While living in Savannah, a little gourmet chocolate shop was down the street from our apartment. We went nearly every week, if not twice, just so I could get my favorite truffle that had dark chocolate and a gooey local honey center. It was the most mind-blowing combination that I have ever come across. So a light bulb went off in my head and I just had an itch to top the cupcakes with a homemade honey caramel sauce. It was the perfect. And all those cupcakes needed was a sprinkle of smoked fleur de sel and a crispy dark chocolate cake crumbs. Voila! The best cupcakes y'all will ever eat, and I mean it!! Enjoy :)


For the Espresso Infused Dark Chocolate Cupcakes:
1 ¾C AP Flour
2C Sugar
1C Dark Cocoa Powder (high quality)
2t Baking Soda
1t Baking Powder
1t Kosher Salt
1C Buttermilk, Well-Shaken
½C Mayo
½C Vegetable Oil
2 Extra Large Eggs, Beaten
1t Vanilla Extract
1C Freshly Brewed Espresso

For the Whipped Sea Salt Buttercream:
2 Sticks of Salted Butter, Room Temperature (very soft)
½t Kosher Salt (add a little at a time until you have reached your desired saltiness)
2t Vanilla Extract
4C Confectioners’ Sugar, Sifted
¼C Chilled Heavy Cream

For the Honey Caramel Sauce:
½C Honey
1 Stick of Unsalted Butter
¾C Light Brown Sugar, Packed
1 Can of Sweetened, Condensed Milk
¼t Kosher Salt   
Smoked Fleur de Sel, For Garnishing

Directions:
1. Preheat your oven to 350 degrees and line a cupcake pan with liners. Set this aside while you make the batter.
2. For the Espresso Infused Dark Chocolate Cake: Sift together the AP flour, sugar, dark cocoa powder, baking soda, baking powder, and salt into the bowl of a standing mixer (fitted with the paddle attachment). In another bowl, whisk together the buttermilk, mayo, vegetable oil, eggs, and vanilla extract until completely combined. With the mixer on low speed, slowly add the wet ingredients to the dry ingredients. With the mixer still on low, pour in the coffee and stir to combine, scraping the bottom of the bowl with a rubber spatula. Pour the finished batter into the cupcake liners and bake for 10-15 minutes until a cake tester comes out clean. Let the cupcakes cool completely before topping them with frosting.
3. For the Whipped Sea Salt Buttercream: In the bowl of a standing mixer, fitted with the whisk attachment, add the softened, salted butter and beat until creamy. Throw in the salt and vanilla, and beat again. Start by adding one cup of confectioners’ sugar at a time, whipping it until it is smooth and incorporate before the next addition. Repeat until all of the confectioners’ sugar has been used. Finally, whip in the heavy cream to loosen the texture (you can use a little more if you need to).
4. For the Honey Caramel Sauce: In a medium saucepan, melt the honey, butter, and brown sugar on medium heat. Once melted, let the mixture come to a rolling boil for 2 minutes while stirring continuously. Add in the sweetened, condensed milk and stir to combine. Allow it to cook for another minutes or two so that it will thicken slightly. Remove from the heat and stir in the salt. Let this mixture cool slightly before topping the Buttercream with it.
5. Finishing the Cupcakes: Using a large ice cream scoop, gather the whipped sea salt Buttercream and plop it on top of the cooled chocolate cupcakes. Using a knife or a spoon, smooth out the sides and create a hollowed out center. Pour a little bit of the honey caramel sauce into the center and garnish with a sprinkle of smoked fleur de sel. If you want to decorate them, you can sprinkle on some chocolate sprinkles or toasted cake crumbs.

Saturday, June 6, 2015

Summer Strawberry Pizza with Sauteed Ramps, Crumbled Gorgonzola, Shaved Speck, Baby Arugula, + a Balsamic Reduction Drizzle on Multigrain Pizza Dough

Every time Summer starts to creep around, I begin to crave a rustic pizza with fruit as the star ingredient. It might sound delicious to some of y'all... and it might sound absolutely-down-right-disgusting to the rest. But bless your heart, you couldn't be more wrong. Just take my word for it. This pizza came about on a Saturday at our local farmer's market. Don't you love when dishes just come together so spontaneously? We saw  lusciously ripe, ruby red strawberries and some perfectly pungent (yet still mild) wild ramps and I thought, well heck, let's marry those two flavors. I am on a real ramp kick lately. I can't find them at grocery stores in our hood, but at the edge of Spring, you can find them by the barrel, freshly pulled out of the ground by your friendly local farmer. They are the loveliest combination of a leek, green onion, shallot, and garlic. And when they are sauteed, they just mellow out a bit and give any extremely rich recipe a itty bitty kick. So, I spread a thin pesto-like sauteed ramp base on the pizza dough before I loaded it up with a bunch of different cheeses. I crumbled the ever-so-sticky gorgonzola cheese on top for an extra pop of flavor. It perfectly paired with the sweet strawberries. UM YUM. The pizza is finished with shaved Speck, which we prefer to Prosciutto, if you get in a pickle, just use that instead... no biggie. Baby arugula is scattered across the top for its' peppery bite, and anyway, it goes amazingly with strawberries and gorgonzola. And no fruity pizza would be complete without a drizzle of syrupy balsamic reduction. It just wouldn't. So take our word for it, this is something that can't be missed during these hot summer months. I guarantee it!! Enjoy :)


For the Strawberry Pizza:
1 Ball of Multigrain Pizza Dough (regular or whole wheat dough can be substituted)
1 Small Bunch of Ramps, Chopped
2T Extra Virgin Olive Oil
8oz Fresh Buffalo Mozzarella (sliced, torn into small pieces, or shredded)
4-8oz of Ripe Strawberries, Thinly Sliced
¼C Crumbled Gorgonzola Cheese
¼t Dried Red Pepper Flakes
4oz Shaved Prosciutto (we actually used Speck just because we prefer it over prosciutto)
2T Fresh Basil, Minced
Homemade Balsamic Reduction, For Drizzling
1-2 Handfuls of Baby Arugula, For Garnishing
Kosher Salt + Fresh Cracked Pepper, To Taste

Directions:
1. Preheat your oven to its hottest setting, around 500-550 degrees, and arrange a rack in the middle of the oven. Let your pizza stone heat up in the oven for at least 30-45 minutes.
2. For the Sautéed Ramps: Heat a large skillet over medium heat. Once hot, add in olive oil, red pepper flakes, and chopped ramps. Sauté until they become fragrant and translucent, but still slightly crunchy and sharp. This usually 5-10 minutes. Season with salt and pepper and set them aside to cool before you spread them on the pizza dough.
3. For the Strawberry Pizza: Create a 12inch round of dough on a semolina dusted pizza peel and spread the sautéed ramps over the top. Place the torn fresh mozzarella evenly across the dough, and then add on the sliced strawberries, crumbled Gorgonzola cheese, some red pepper flakes, kosher salt, and fresh cracked pepper. Slide the pizza onto the heated pizza stone and bake for 12-15 minutes or until the crust is golden brown and the cheese has melted and begun to caramelize. Remove it from the oven and immediately lay small piles of the thin slices of speck (or prosciutto) over the hot pizza. Just before serving, scatter the baby arugula on top, followed by a drizzle of balsamic reduction.
4. Cut into slices and serve immediately!