Showing posts with label White Chocolate. Show all posts

Wednesday, December 31, 2014

Homemade Peppermint Bark Topped Red Velvet Brownies with Chocolate Fudge Icing, White Chocolate, + Crushed Peppermint Candies

Homemade Peppermint Bark Topped Red Velvet Brownies with Chocolate Fudge Icing, White Chocolate, + Crushed Peppermint Candies
I come to you with a sad message today... it's the end of 2014, which means this is my last new recipe for the year :( But the good news is that I will be back tomorrow with out Top Ten Favorite Recipes: Salty + Sweet of the year... YAY!! This is by far our favorite post of the year because we get to reminisce and reflect back on all of the yummy food we were able to create, and more importantly, EAT. But before we get to talkin' about the festive Christmas-treat inspired red velvet brownies I made, let's talk about last night, shall we? As many of my followers know, my Mountain Man + I both attended the University of Alabama and are huge football fans, so we decided to travel down to New Orleans for the Sugar Bowl/First College Football Playoff Game where our Crimson Tide is taking on the Buckeyes of Ohio State. We woke up early, drove all day, unpacked our stuff, and got ready to head out for a night of good cajun food, lots of booze, and even more shenanigans. And I know as I type this story out to y'all, you are probably thinking... Oh man, New Orleans, she got hammered, what if she was arrested, did she get any beads? Well, my friends, the complete opposite happened. We had arrived at the restaurant and just ordered our food, and while waiting, I went outside to answer a phone call. I opened the door and assumed that there were at least 2-3 steps until the sidewalk, but there weren't any, just one largeeeeeeee drop off. I fell to the ground, rolled my ankle, and crashed it into the cement sidewalk. It was so bad that it immediately started swelling and I had to go to the Emergency Room. So, our first night in New Orleans, we spent it getting x-rays, crutches, finding an open pharmacy, and finished by icing my ankle for the rest of the night. Do I have the best luck or what? I mean, I guess I just like to make a big fat freakin' grand entrance wherever I go. Okay, the depressing start of my NYE vacation has come to an end, so let's get to that recipe. My Mountain Man's family always has a huge reunion Christmas party every year, and I knew I had to make a festive dessert to join in on the potluck. As we all know, my borderline-unhealthy relationship has taken over just about every type of dish you can think of, but I had yet to make red velvet brownies. I made them with the all classic "secret southern" ingredients Mama Jones used to make her red velvet cake with... red food coloring, white vinegar, buttermilk powder (instead of buttermilk for better brownie texture), and just a tad bit of mayo to keep it moist. After you mix up the batter, dump it into a prepared baking pan, bake them, and allow them to cool slightly... then you whip up my mother's easy-peasy chocolate fudge poured icing and drown the top of the red velvet brownies in a thick layer of sugary-chocolatey-heavenly goodness. While the fudge icing is beginning to set, yet still a little warm, scatter a thick layer of chopped up Ghirardelli white chocolate peppermint bark bars over the top. The peppermint will begin to melt as well, and that is the perfect time to top the white chocolate with some more crushed peppermint candies. All you gotta do now is wait for the icing and peppermint bark topping to set and firm up before lifting them out of the pan and cutting them into squares. I really think y'all are going to love these because you get to enjoy everything... layers of moist red velvet brownies, melt-on-your-tongue chocolate fudge icing, the texture of set peppermint bark, and the slight crunch/crackle/pop of the refreshing peppermint candies. Go on ahead and try to tell me who doesn't love red velvet + brownies + fudge frosting + peppermint bark... you can't because it's impossible :) So, it might be a little late to make now since the holiday season has passed us, but I could eat these bad boys all year long!! Enjoy :)


For the Red Velvet Brownies:
2 Large Eggs
2T Mayo
1 Stick of Unsalted Butter
2t Vanilla Extract
¼C Unsweetened Cocoa Powder (preferably high-quality)
Heavy Pinch of Salt (or to taste)
1T Red Food Coloring (or more until you reach your preferred, desired red color)
1t White Vinegar
¾C AP Flour 
2T Buttermilk Powder

For the Chocolate Fudge Icing:
1 Stick of Butter
1/3C Dark Cocoa Powder (preferably high-quality)
1 Box of Confectioners’ Sugar
1/3C Milk
Splash of Espresso
1t Vanilla
Pinches of Fleur de Sel, For Sprinkling (optional; but we love the balance)

For the Peppermint Bark Topping:
1-2C Chopped Ghirardelli White Chocolate Peppermint Bark (depending on your preference on how minty you want the brownies to taste, as well as how thick of a topping you want)
Extra Crushed Peppermint Candies, Crushed (for extra flavor and a nice crunch)

Directions:
1. Preheat your oven to 350 degrees and line 13x9 sized baking pan with foil (let it hang over top of pan) and spray with nonstick cooking/baking spray. Set it aside while you make the brownie batter.
2. For the Red Velvet Brownies: Whisk together the cocoa powder and boiling water together in large bowl until smooth. Add unsweetened chocolate and whisk until chocolate is melted. Whisk in melted butter and oil. (Mixture may look curdled.) Add eggs, yolks, and vanilla and continue to whisk until smooth and fully incorporated. Whisk in sugar until fully incorporated. Add flour and salt and mix with rubber spatula until combined.
3. Baking the Red Velvet Brownies: Scrape batter into prepared pan and bake until toothpick inserted halfway between edge and center comes out with just a few moist crumbs attached, 30 to 45 minutes (depending on the size of your pan and heat of your oven). Transfer the warm brownies to wire rack and let cool for 20-30 minutes.
4. To Make the Fudge Icing: Melt the butter in a large saucepan. Stir in the cocoa, keeping the mixture hot. Add in the remaining ingredients quickly and beat until smooth. Spread warm icing on the cooled brownies, and sprinkle with a little fleur del sel (optional).
5. Finishing the Brownies: While them icing begins to firm (yet is just slightly warm), scatter the chopped up white chocolate peppermint bark all over the fudge icing until you have a thick layer that begins to melt on top. Since the white chocolate is beginning to melt, sprinkle the tops of that with crushed up peppermint candies.
6. Serving the Brownies: Once the icing and peppermint back set, lift the brownies out of the pan, using the parchment paper, and cut them into squares. Serve immediately at y'all's Christmas parties!


Monday, April 8, 2013

Salted Margarita Pie (in jars) with Pretzel Cookie Crust, Boozy White Chocolate-Key Lime Pie Filling, & Whipped Cream

Salted Margarita Pie (in jars) with Pretzel Cookie Crust, Boozy
White Chocolate-Key Lime Pie Filling, & Whipped Cream
Holy crap y'all, when did it get so hot outside? It's seriously hot as the dickens. But, you know what that means, SUMMER FOOD. Grilled burgers, fresh seafood, homemade ice cream + sorbet, fruity drinks, and key lime pie. I'm partial to my Deep Dish Key Lime Meringue Pie because it never disappoints. Well, here's an upgraded recipe of this summer dessert classic. Salted Margarita Pie is just the boozy sister of key lime pie with a couple unique twists. Instead of a boring 'ole graham crackers, a pretzel cookie crust is made and it certainly shines throughout the dish. I love its crumbly + crunchy texture and its' lightly salted flavor. It's so good that it makes you wonder why this crust isn't used for every pie you make. What makes this pie extra special is the filling... how can you go wrong with ingredients like white chocolate, freshly squeezed margarita mix, citrus zest, and booze? You can't. And guess what, it's made with not just one kind of booze, but TWO. Tequila and Cointreau spike this luscious custard and give it a margarita flair. I know that some of you are thinking that white chocolate sounds like an odd addition in a tart pie, but I think it balanced the strong taste of alcohol and citrus with its' sweetness and creamy finish. For a while now, I have been wanting to make a dessert in a mason jar because I love the retro vibe and easy portability. We actually made it for the Jimmy Buffet concert that we went to in February and it was the perfect treat to snack on, and it's actually quite simple! All you have to do is pack in the pretzel cookie crust and pour in an even layer of margarita pie filling and bake until it has just set. The jars of pie are finished with homemade whipped cream and a sprinkle of mixed citrus sea salt, which perfectly mimics the effortlessly wonderful salted rim of a margarita. So, you can't miss that step! This dessert would be awesome for a picnic or a day at the beach, that's for sure. All that's left for y'all to do is grab a spoon and start diggin' at it. Trust me, your mouth will be watering in anticipation, trying to get at the bottom layer of salty-pretzel-cookie-goodness!! Enjoy :)
Perfect Layering.
Homemade whipped cream with mixed citrus sea salt & fresh lime rounds...
The best part: Salty Pretzel Cookie Crust
Go on and get in there!
For the Pretzel Cookie Crust:
8T + 4T Unsalted Butter, 8T at Room Temperature & 4T Melted
1/3C + 1T Light Brown Sugar, Packed
3T Sugar
1 Egg Yolk
½C AP Flour
1½C Pretzels (crushed into the size of small peas or old-fashioned rolled oats)
1/8t Baking Powder
Pinch of Baking Soda
½t + ¼t Salt

For the White Chocolate Key Lime Pie Filling Spiked with Tequila & Cointreau:
2 14oz Cans of Sweetened, Condensed Milk
11oz Melted White Chocolate
6 Egg Yolks (you can save the egg whites and make a meringue topping if you like)
1C Homemade Margarita Mix (but freshly squeezed citrus juice would be fine)
3 Limes, Zested
4T High Quality Clear Tequila
2T Cointreau
Green Food Coloring (to your liking)
Homemade Mixed Citrus Sea Salt, small lemon pieces

For the Whipped Cream:
1C Heavy Whipping Cream
1T Sugar
1t Vanilla Extract
Freshly Grated Lime Zest & Mixed Citrus Sea Salt, For Garnishing

Directions:
1. For the Pretzel Cookie Crust: Preheat oven to 350°F. Line a baking sheet with parchment paper and spray with Pam. In the bowl of a standing mixer, combine 8T room temperature butter, 1/3C light brown sugar, and sugar in medium bowl. Beat the mixture until light and fluffy, occasionally scraping down sides of bowl, about 2 minutes. Add egg yolk; beat until pale and fluffy. Add in the pretzel pieces, flour, baking powder, baking soda, and salt and beat until well blended, about 1 minute. Turn the pretzel cookie mixture out onto prepared baking sheet; press out evenly to almost the edges of pan. Bake until light golden on top, 15-18 minutes. Transfer baking pan to rack and cool cookie completely. Using hands, crumble oat cookie into a food processor and process until it becomes wet sand, and then add melted butter, salt, and brown sugar. Pulse until mixture is moist enough to stick together. Transfer cookie crust mixture into mason jars. Using fingers, press mixture evenly into the bottom of the jars. Place pie dishes with crust on rimmed baking sheet.
2. For the Key Lime Pie Filling: In a large mixing bowl, whisk together the condensed milk, melted white chocolate, egg yolks, key lime juice (or homemade margarita mix), tequila, and triple sec until well blended. And then add in the fresh lime zest (or lemon zest may substituted) & green food coloring (to you liking). Pour the margarita pie filling into the pretzel crust filled mason jars. Bake in the oven for 20-30 minutes (depending on your oven), or until the pie filling is set, but still jiggles slightly. Remove the pie from the oven and let the filling cool & set slightly. Cover with the lids and bands and refrigerate for at least two hours or until chilled & set.
3. For the Whipped Cream: Just before serving, whip cream until soft peaks form. Fold in sugar and vanilla, whipping until stiff peaks form. Garnish pie jars with whipped cream, freshly grated lime zest, and a sprinkle of homemade mixed citrus sea salt, if using. Serve immediately. This makes roughly six 12oz Salted Margarita Pie in Jars.

Tuesday, November 6, 2012

"Apple Pie" Caramel Apples Dipped in Homemade Vanilla Bean-Bourbon Caramel, Rolled in Cinnamon Sugar, Dunked in Vanilla Bean White Chocolate & a Homemade Milk Crumb Topping

"Apple Pie" Caramel Apples Dipped in Homemade Vanilla Bean-Bourbon Caramel,
Rolled in Cinnamon Sugar, Dunked in Vanilla Bean White Chocolate & a Homemade Milk Crumb Topping
I always loved making caramel apples as a kid. Of course, we did it the easy way... either melting store-bough caramels with a little cream or even buying those sheets of caramel that you just wrapped the apple in. And ya know, they were always good to us, we couldn't ever tell the difference. But, now that I've gotten older, I'm all about making everything from scratch and I scoff at the idea of buying caramel, when it is so delicious when you brew it up on your own. And you can add flavors to it that make it so wonderfully amazing. I decided to make a Vanilla Bean-Bourbon Caramel as the base for all of our apples, and then I went crazy with the toppings!! I eventually came up with the idea of making an "apple pie" inspired caramel apple. What's more autumn-y + cozy than apple pie people?? I can't think of anything else. So, I began to brainstorm about how to make this lonely caramel apple into a slice of apple pie. I knew I would need a cinnamon-sugar rolling mixture that would mimic the filling used in a typical pie (and you could also use an apple pie spice or any other spices to bump up the flavor as well). I got a little stuck with how I could make a crust-like component. I finally landed on using a Homemade Milk Crumb Topping, which I used on my Spiced Carrot Cake Doughnuts with Liquid Cheesecake Filling, Vanilla Glaze, White Chocolate Coating, & Milk Crumb Topping, and it was just the perfect addition. It really does taste like that buttery pie crust that we have all grown to love since we were kids. At this point, I thought that I had all the components nailed down, but I couldn't stop thinking about how I wanted to make this caramel apple "a la mode". So, I made a Vanilla Bean White Chocolate to act like the ice cream on top of a warm slice of pie. The best idea I ever had... trust me. Decorating is so much fun and you can make them any way you like, just let your creativity flow!! Enjoy :)


For the Vanilla Bean-Bourbon Caramel:
2C Granulated Sugar
1C Heavy Cream
¾C Bourbon
½C Light Corn Syrup
4T Unsalted Butter
2t Vanilla
1-2 Vanilla Beans, Split & Scraped for Seeds
½t Salt (plus extra fleur de sel for sprinkling on the caramel after dipping, this is optional)
8-10 Small/Medium Apples, Scrubbed & Dried & Stems Removed (I like tart Granny Smith)
8-10 Sticks, For the Apples

For the Milk Crumb Topping:
1 ½C Milk Powder
½C AP Flour
¼C Cornstarch & Sugar
½t Salt
1 Stick of Unsalted Butter, Melted
6oz White Chocolate, Melted

For the Cinnamon-Sugar Mixture:
½C Sugar
2T Brown Sugar
1t Cinnamon (or Apple Pie Spice can be substituted, as well as the addition of any other spices)

For the Vanilla Bean White Chocolate:
12oz White Chocolate Chips
1-2 Vanilla Beans, Split & Scraped for Seeds (depending on how much you like vanilla)

Directions:
1. Remove the stems from the apples and place a stick inside each of them. Line a baking sheet with wax paper and lightly spray with Pam. Place the apples into the refrigerator and chill the apples for at least an hour, this way the caramel will hold onto the apple better.
2. For the Milk Crumb Topping: Preheat the oven to 250 degrees and line a sheet pan with parchment paper. Whisk to combine 1C Milk Powder with the flour, cornstarch, sugar, and salt. Add the melted butter and use a spatula to toss the mixture until small clusters form. Spread these clusters onto your parchment covered baking sheet and bake for 20 minutes. Add the remaining ½C of Milk Powder and toss, and then crush the large clusters with a fork. Pour the 6oz of melted white chocolate over the crumbs and t oss until large crumbs form again. Place the crumbs in the refrigerator or freezer to let the white chocolate harden. If the crumbs are too large, crush with a fork or spin them briefly in a food processor. Pour the crumbs into a bowl to dip the caramel apples into later.
3. For the Vanilla Bean-Bourbon Caramel Apples: In a medium saucepan, combine sugar, cream, bourbon, corn syrup, butter, vanilla, vanilla bean seeds and salt. Heat over medium high heat, stirring until combined and bring to a boil. Attach a candy thermometer to the side and cook without stirring until temperature reaches 245 degrees F. If the mixture starts bubbling up at first (it may because of the cream, do NOT take your eyes off of it), stir a bit with a pastry brush and reduce heat until it's a bit more caramel in color. The entire caramel process took me about 20-25 minutes, but may be a bit longer or shorter depending on your heat level and pan, so watch carefully. Once it reaches 245 degrees, remove from the heat. Keeping the candy thermometer in the caramel, bring the temperature down to 200 degrees, and then immediately dip apples into the caramel, let the excess caramel drip off, flip them upside down for a few seconds and twirl them around to keep the bottoms flat. You can also scrape off any excess caramel with a knife or spoon, so that you won’t have a pool of caramel on your plate (you can dip them in sprinkles or chocolate or whatever if you like at this time, but I like to do them in multiple layers). Place on wax paper. Let sit in the fridge until firm, about 30 minutes.
4. For the Cinnamon-Sugar Mixture: In a small, deep bowl, mix together the sugar, brown sugar, and cinnamon until well incorporated. Once the apples have been dipped into the caramel, immediately roll them into the cinnamon-sugar mixture. Place them into the refrigerator to harden for the next layer.
5. For the Vanilla Bean White Chocolate: I n a small bowl, melt the white chocolate in a microwave or over a bowl of simmering water. If using the microwave, only heat for 20-second intervals, stirring in between each. Once melted, stir in vanilla seeds. Keep warm & melted until all the caramel apples have been dipped in them. Remove the caramel apples, once again, from the refrigerator, and submerge them into the vanilla bean white chocolate (I did mine about ½ to ¾ of the way up). Immediately dip the white chocolate covered-caramel apples into the milk crumb topping.
6. Let the layers of caramel, chocolate, and toppings firm up before enjoying.

Tuesday, October 2, 2012

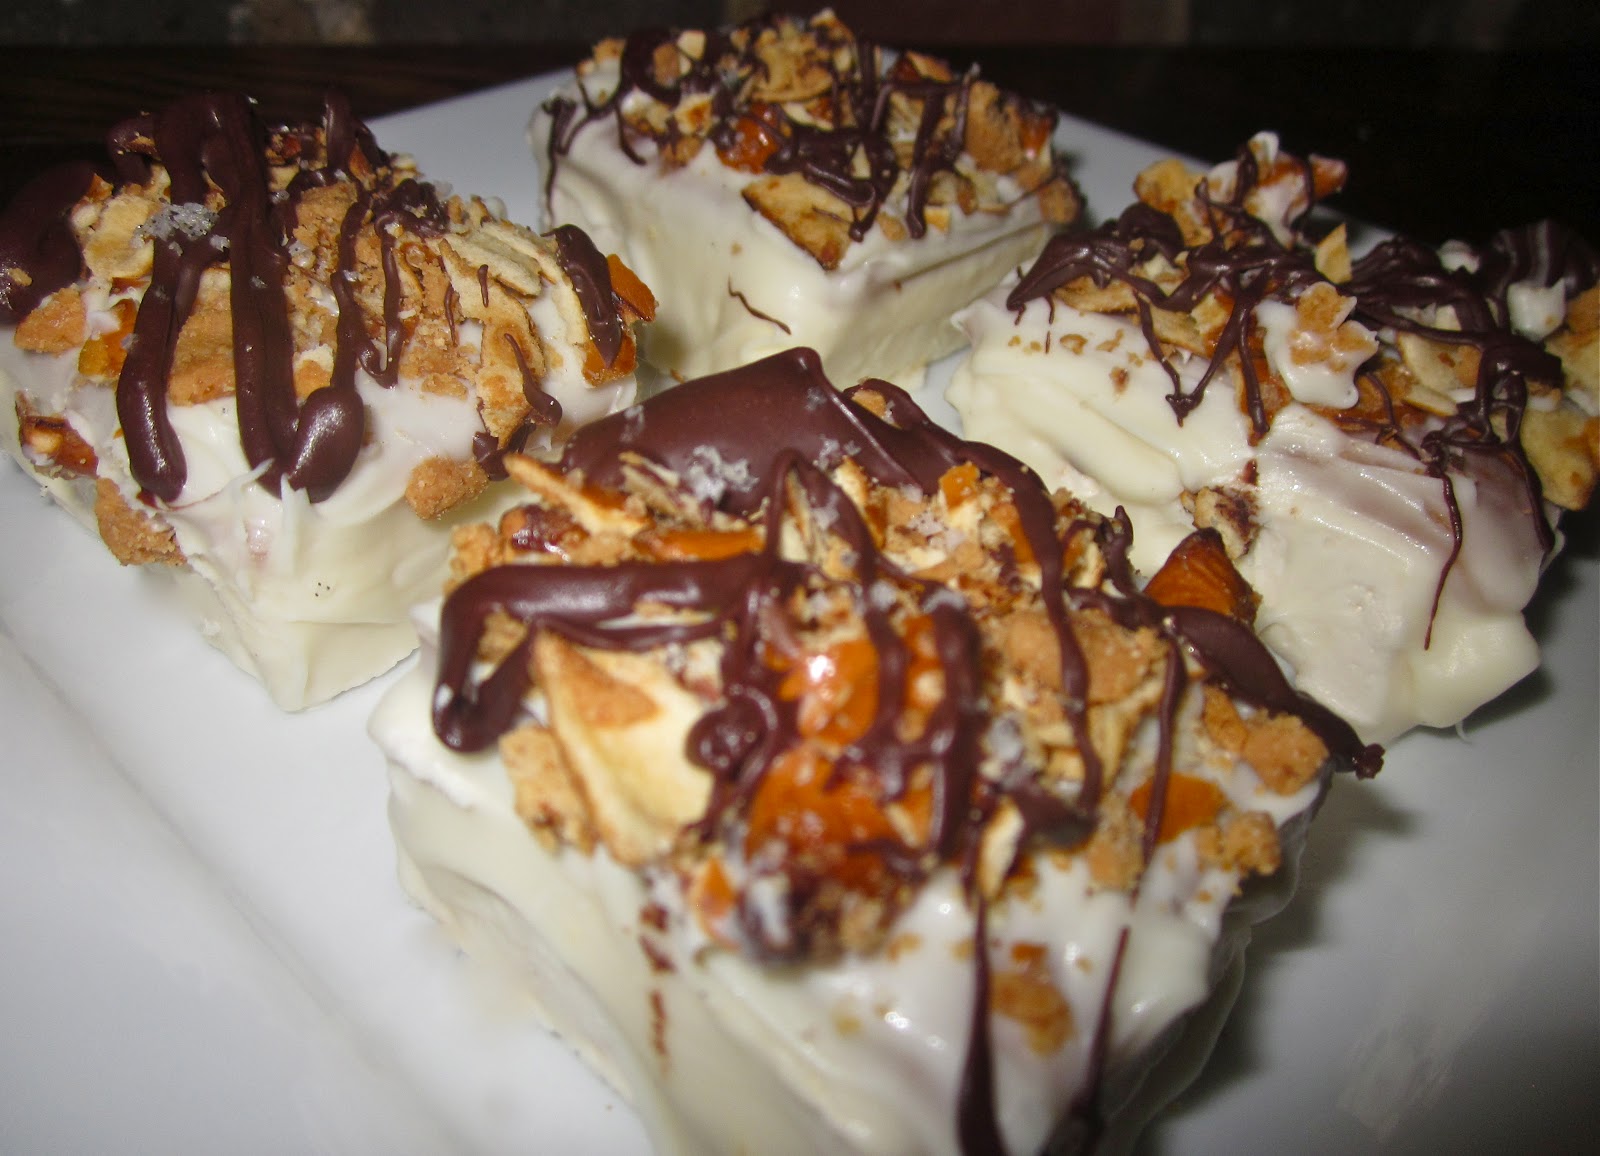
Dark Chocolate Covered Stout Marshmallows with Caramel & Crushed Peanut Butter Pretzel Topping

Dark Chocolate Covered Stout Marshmallows with Caramel & Crushed Peanut Butter Pretzel Topping
It's my midterm week, and it's absolutely dreadful. I feel like every single teacher has assigned five projects for me to complete before Thursday. Ugh, c'est la vie. But luckily enough for me, I get to head up to our family mountain house for an extra-long weekend. We're bringing friends with us and it will be filled with cookouts, hiking, drinking, and bonfires. This of course calls for homemade marshmallows for some daggum s'mores. I always make Vanilla Bean Marshmallows, but this time I decided I would also make some beer marshmallows for some variety. I know, beer flavored 'mallows? Are you in heaven yet? They do exist and they are utterly delicious. The ones we will be using for s'mores will be plain, but I ended up making a batch of some geeked out beer marshmallows that would knock anyone's socks off!! I topped the pillowy squares with a homemade layer of chewy caramel, and then dipped them into tempered dark chocolate, so that they were completely coated. While the chocolate was still soft, I garnished them with crushed peanut butter pretzels, a drizzle of white chocolate, and a sprinkle of vanilla bean fleur de sel. And then, I went all crazy and added some potato chips to a few, and they were awesome!! I will leave it up to you with how over-the-top you want to make yours... I mean you could easily just make the beer marshmallows and call it a day. I won't hate!! Anyway, we will be enjoying these this weekend, so I'll make sure to come back and post some of the pictures of these epic s'mores, just you wait!! Enjoy :)
Crushed Pretzels & Salty Potato Chips... The perfect marshmallow topping. 
For some variety, I made some white chocolate covered marshmallows... 
And then drizzled them with dark chocolate :) 
This is one big bite... Do you see the caramel layer??
For the Beer Marshmallows:
3 ½ Envelopes Unflavored Gelatin
1C Chocolate Stout Beer, Divided (It needs to be cold and flat for this recipe)
2C Sugar
½C Dark Corn Syrup
¼t Salt
2 Large Egg Whites
1T Vanilla

For the Caramel Layer:
2C Sugar
2C Heavy Cream
1C Light Corn Syrup
½t Salt (plus a little extra for sprinkling the top of the finished caramel)
4½T Unsalted Butter

For the Dark Chocolate Coating:
10oz 70% Bittersweet Chocolate, Coarsely Chopped
Peanut Butter Pretzels, Roughly Chopped For Garnishing
Fleur de Sel, For Sprinkling (optional)

For the Marshmallows:
Prepared Beer Marshmallows
Dark Chocolate Coating 
Melted White Chocolate, Optional
Vanilla Bean Fleur de Sel, For Sprinkling (optional)
Peanut Butter Pretzels, Roughly Chopped For Garnishing (or potato chips can be substituted)

Directions:
1. To flatten the beer, take the cap off the bottle and leave open overnight, or pour beer into a bowl and whisk vigorously to remove some carbonation… just make sure it is cold.
2.  For the Marshmallows: Oil bottom and sides of a 13x9 rectangular metal baking pan and dust bottom and sides with some confectioners’ sugar. In bowl of a standing electric mixer or in a large bowl sprinkle gelatin over ½C cold beer, and let stand to soften. In a 3-quart heavy saucepan cook granulated sugar, corn syrup, second ½C of cold beer, and salt over low heat, stirring with a wooden spoon, until sugar is dissolved. Increase heat to moderate and boil mixture, without stirring, until a candy or digital thermometer registers 240°F, about 12 minutes. Remove pan from heat and pour sugar mixture over gelatin mixture, stirring until gelatin is dissolved.With standing or a hand-held electric mixer beat mixture on high speed until fluffy, thick, and nearly tripled in volume, about six minutes if using standing mixer or about 10 minutes if using hand-held mixer. In separate medium bowl with cleaned beaters beat egg whites (or reconstituted powdered whites) until they just hold stiff peaks. Beat whites and vanilla (or your choice of flavoring) into sugar mixture until just combined. Pour mixture into baking pan and don’t fret if you don’t get it all out (learning from my mess of a first round). Sift ¼C confectioners sugar evenly over top. Chill marshmallow, uncovered, until firm, at least three hours, and up to one day.
3. Run a thin knife around edges of pan and invert pan onto a large cutting board. Lifting up one corner of inverted pan, with fingers loosen marshmallow and ease onto cutting board. With a large knife trim edges of marshmallow and cut marshmallow into roughly one-inch cubes. (An oiled pizza cutter works well here too.) Sift remaining confectioners’ sugar back into your now-empty baking pan, and roll the marshmallows through it, on all six sides, before shaking off the excess and packing them away.
4. For the Caramel Wrapping: Lightly butter an 18" X 13" sheet pan. In a large heavy sauce pan (the caramel will more than triple in volume, so you need plenty of space) over medium heat combine sugar, corn syrup, salt, and 1C heavy cream. Stirring constantly with a silicon spatula or wooden spoon, bring the mixture to a boil. This will take some time. It is important that you don't turn up the heat because candy requires patience. Once the mixture boils add the remaining 1C cream in a slow trickle so that you do not cool your caramel mixture and it continues to boil uninterrupted. Reduce heat to medium-low and allow it to boil for 5-6 minutes without stirring. Add butter one tablespoon at a time, stirring after each melts. Clip on your candy thermometer and allow to boil over medium-low heat until the mixture just hits 250°F (or the Firm Ball stage) stirring occasionally. This should take about 30-40 minutes; if your temperature is climbing too quickly you might need to reduce heat all the way to low. By the same token, if you're not hitting 250°F by 40 minutes you might want to increase the heat a bit. Once you've hit the right temperature, quickly remove from heat and pour into your prepared pan or onto the greased stone slab, spreading it out in an even layer. To prevent any crystallization, don't scrape the pan as you pour, just allow what clings to the pan to remain in it (you can scrape it into a smaller dish and eat it later, odds are it won't be crystallized). Allow your molten caramel to cool to room temperature. Once it has cooled, invert the caramel out of the pan onto a cutting board. Using a sharp knife, cut the caramel into squares (exactly the same size as your marshmallows) and place a caramel square on top of a marshmallows until all of them have been covered. Let the caramel sit on the marshmallows in the refrigerator for about an hour (this will help the caramel stick to the marshmallows). After they have chilled, begin to cover them in chocolate. 
5. For the Dark Chocolate Coating: Melt ¾ of the chopped chocolate in a metal bowl set over a saucepan of barely simmering water. Remove the bowl from the pan and add the remaining chocolate, stirring until smooth. Cool the chocolate until a thermometer inserted at least ½inch into the chocolate registers 80 degrees. Return the water in the pan to a boil and remove it from heat. Set the bowl with cooled chocolate over the pan and reheat, stirring, until the thermometer registers 88-91 degrees as necessary. Remove the bowl from the pan. Stick a marshmallow on a fork or skewer and submerge in the melted chocolate, letting the excess drip off and scraping the back of the fork against the rim of the bowl if necessary.  Place the coated marshmallow onto a parchment lined baking sheet to stand until the chocolate is set, about 1 hour. Make sure to top the marshmallows with crushed pretzels and a sprinkle of fleur de sel while the chocolate is still soft. Repeat with the remaining marshmallows until all of them have been coated with chocolate.

Monday, September 24, 2012

Chewy Red Velvet Cookies with White Chocolate Chips, Birthday Cake Oreo Truffle Pieces, & Cheesecake Filling

Chewy Red Velvet Cookies with White Chocolate Chips, Birthday Cake
Oreo Truffle Pieces, & Cheesecake Filling
I've been wanting to make Red Velvet Cookies for a while now, but homemade... all from scratch. No box mixes. I struggled for a while trying to make a recipe that would yield chewy cookies because all of the other ones I had made were quite cakey. No thank you. Don't y'all worry your little hearts, I finally got one for ya! And trust me, they are worth it. The dough is a bright red color, which is exactly what I wanted, but it also has Birthday Cake Oreo Truffle Pieces and white chocolate studded throughout. Yes, you heard me right... BIRTHDAY CAKE OREO TRUFFLE PIECES in a cookie. This is perfect because it gives the cookie a chocolate flavor (that is known for from red velvet cake) and it also lends a slightly "birthday cake" taste to it. The fun doesn't stop there because when you bite into the center, there is a creamy cheesecake filling. We loved these cookies, even though it took me three previous batches to perfect it, and I can't wait to make them again. And for all y'all Alabama, UGA, and Falcons fans out there, it'd be a perfect tailgatin' dessert. Oh, don't you forget about Christmas either because these will definitely be on the list!! Enjoy :)
Those Dark Areas on the Cookies are Birthday Cake Oreo Truffles  
Don't forget the white chocolate chips...
Ain't that red color purdy??

For the Birthday Cake Oreo Truffle Pieces:
21 Birthday Cake Oreos, Finely Crushed
4oz Cream Cheese, Softened

For the Cheesecake Filling:
4oz Cream Cheese, Softened
2C Confectioners’ Sugar, Sifted
2T Powdered Buttermilk (optional, this can be left and the texture is still great)
1t Vanilla

For the Chewy Red Velvet Cookies:
2 ¼C AP Flour
1T Unsweetened Cocoa Powder
½t Baking Soda
1t Vanilla Bean Fleur de Sel (scant)
1 ½ Sticks of Unsalted Butter, Softened
1C Light Brown Sugar
½C Sugar
1 Large Egg + 1 Egg Yolk
2t Vanilla
1oz Red Dye (to the color of your preference)
12oz White Chocolate, Roughly Chopped into Chunks
Prepared Birthday Cake Oreo Truffle Pieces
Prepared Cheesecake Filling, Chilled

Directions:
1. For the Birthday Cake Oreo Truffle Pieces: Line a small baking dish with foil and set it aside. Crush Oreo cookies in a food processor or blender until finely ground, and then in a medium bowl, mix with softened cream cheese until truffle forms. Press into foil-lined baking dish and flatten with hands. Place in freezer for 30 minutes. Once chilled, remove the Oreo truffles from the freezer and cut into small pieces. Keep chilled until you are ready to fold into the cookie batter.   
2. To Make the Cheesecake Filling: Using a mixer, combine cream cheese, powdered sugar, powdered buttermilk, and vanilla extract. Mix until smooth. Using a teaspoon, scoop out cheesecake filling and place on a plate. Continue scooping out cheesecake filling into teaspoon balls until you have as many as you need for the cookies (I made about 25). Place plate in the freezer and freeze for at least two hours. After they have chilled, I rolled them with my hands, so that they were a smooth, round shape.  
3. For the Red Velvet Cookies:In the bowl of an electric mixer, beat together the butter and sugars until smooth. Add in the egg and egg yolk, one at a time, making sure each one has been blended completely before adding the next. Add in the vanilla and the red dye and blend until everything is incorporated. In a separate bowl, sift together the flour, cocoa powder, baking soda, and salt. Blend in this sifted flour mixture into the red batter until just incorporated. Fold in the white chocolate chips, followed by gently folding in the Oreo Truffle pieces (make sure not to blend too much or they will mix into the cookie dough). Chill the cookie dough into the refrigerator for at least 2 hours, but preferably overnight.
4. Preheat the oven to 350 degrees and line baking sheets with parchment paper or Silpats.
5. To Assemble the Cookies: Take about 1 scoop of the red velvet cookie dough and flatten it in your hands. Place one of the cheesecake filling balls in the center and wrap the cookie dough around the filling. Gently roll into a ball and place onto the prepared baking sheets. Repeat with the remaining ingredients. Bake for 10-14 minutes (depending on the size of your cookie dough balls) or until the cookies have started to set in the center, but are crisp on the outsides.
6. Let the cookies cool on the baking sheet for 5 minutes, and then remove them to a cooling rack to cool completely. Let the cookies set before enjoying.