Showing posts with label Cookies. Show all posts

Saturday, September 26, 2015

Saturday Down South: University of Alabama-Inspired Houndstooth Pudding Trifle with Homemade Red Velvet Pudding, Cream Cheese Whipped Cream, Crushed Double Stuffed Oreos, + Red Velvet Cake Sprinkles

The Haute + Heirloom blogger has returned, yay!! I know I have been gone for-like-ever and I apologize for that, but I have been extremely busy and my personal life is in shambles. I hate that I haven't posted some of my new recipes, but I'm back, and the recipes are even BETTER. It's a 100% guarantee, mmk? As many of my followers know, we are huge football fans. Obviously, Alabama comes in first in the ranking, and just behind them comes University of Georgia + the Atlanta Falcons. So if you're a Georgia gal like me, this dessert is perfect for all three teams and all of your buddies will love you for making a pan of this trifle during the long day of tailgatin'. Trust me on that one. My usual go-to dessert had always been my Gourmet Banana Pudding, but I wanted something festive to celebrate with... and this is certainly festive. If you didn't know already, Alabama's team colors are crimson + white, but the school has incorporated the pattern of houndstooth into the scheme as well. The tradition of houndstooth comes from the greatest college football coach of all time, Bear Bryant. He wore a houndstooth hat to every single game, and well, it caught on like wildfire. Now it's almost impossible to not see someone with houndstooth on during the game day. So, when I first started concocting this dish in my head, it became clear to me that I wanted the same idea that I use for banana pudding. Instead of creamy vanilla bean pudding, there is a luscious + homemade red velvet pudding. You have to know by now that my obsession with "red velvet desserts"is quite unhealthy and I tend to go overboard, but hey who's counting anyway. Next, I used crushed up Double Stuffed Oreos rather than the homemade shortbread because I needed the contrast of the black + white cookies to represent the houndstooth concept. And hell, who doesn't like Oreos... I sure do!! What's even better about them is that if you let the pudding trifle sit in the refrigerator for 1-4 hours (or overnight if you need to) like we did, the cookies begin to soften to the texture of the Oreos in cookies + cream ice cream. They literally, like, melt in your mouth. Lastly, you have to make the "frosting" type whipped cream layer. It has the tang of a cream cheese frosting (which is what all red velvet cakes must have), the sweetness from the sweetened condensed milk, the delightful cloud-like fluff from the Cool Whip, oh and don't forget that vanilla bean that is added in because that is so much better than vanilla extract. One fun ingredient I found for this dessert are some of Betty Crocker's yummy Red Velvet Cake Sprinkles. And let's be honest, sprinkles make every dessert so much better, it's a scientific fact. To be frank, these are double the fun because they are sprinkles that taste like cake.... woah, woah, WOAH. Mind Blown. These Red Velvet Cake Sprinkles also give the dish a little crunch with each bite. Textures galore here, folks!! I hope y'all enjoy this pudding trifle as much as we did because it's already on our tailgate menu for the Alabama-LSU game in Tuscaloosa in November. So go on, start cookin' it :)
the beginning of making the homemade red velvet pudding
assembling like a beast
check out those layers, guys
The Close Up: Amazing Betty Crocker Red Velvet Cake Sprinkles
And the best shot of them all... a perfect spoonful of every glorious layer :)
For the Classic Pudding Mix:
½C Cornstarch
¼C Buttermilk or Milk Powder (I used buttermilk since it’s a key component in red velvet cake)
1C Cake Flour (AP Flour can be substituted if you don’t have it)
1 ½C Sugar
1t Kosher Salt  

For the Homemade Red Velvet Pudding:
3C Whole Milk, Divided
¾C Classic Pudding Mix (above; you will have leftover mix, but now you can make more of it)
5T Cocoa Powder, Sifted
Generous Pinch of Salt
¼C Sugar
2 Eggs
1T White Vinegar
2T Salted Butter
2t Vanilla Extract
1T Cream Cheese Emulsion
Red Food Coloring (use as much as you want until you reach your desired red color)

For the Cream Cheese Whipped Cream:
8oz Cream Cheese, Softened
1 Can of Sweetened, Condensed Milk
1T Cream Cheese Emulsion
¼C Heavy Whipping Cream
16oz Cool Whip, Defrosted
1 Vanilla Bean, Split + Scraped for Seeds (if you don’t have vanilla bean, sub in 2t vanilla extract)
Generous Pinch of Salt  (or to taste)

For the Houndstooth Trifle:
Prepared Homemade Red Velvet Pudding, Completely Chilled
Prepared Cream Cheese Whipped Cream, Completely Chilled
1 Box of Double Stuffed Oreos, Crushed into Bite Size Pieces
1 Container of Betty Crocker Red Velvet Cake Sprinkles (chocolate sprinkles can be subbed in)

Directions:
1. For the Classic Pudding Mix: Combine the cornstarch, flour, buttermilk powder, sugar, and salt. Whisk the mixture until it is a cohesive mixture is formed. Set this pudding mix aside. If you have any remaining pudding mix left, store it in an airtight container.
2. For the Homemade Red Velvet Pudding: Pour 2 ½C of whole milk into a medium sized saucepan or pot. Turn on the stove to low heat and allow the milk to get hot (with some slight steaming), but make sure the milk does not start boiling! While the milk is heating, get another mixing bowl and whisk together the pudding mix, sifted cocoa powder, sugar, 2 eggs, a generous pinch of salt, white distilled vinegar, and the remaining ½C of whole milk. While whisking, make sure it is a smooth, creamy, chocolate liquid. Once the milk is hot, add in the chocolate liquid to the hot milk and whisk vigorously (so that the eggs won’t cook and curdle). Then add in the salted butter, vanilla extract, cream cheese emulsion, and red dye. Increase the heat to medium or medium-low while whisking continuously because the pudding could easily burn. Cook and whisk until the pudding mixture starts to thicken, this usually takes about 8-12 minutes, depending on the thickness that you prefer. During the cooking period, make sure to taste test it to see if it needs more salt or vanilla (do it to taste) When it has reached your desired consistency, turn off the heat and remove the pan from the burner. It will continue to thicken a little more as it cools and sits. Press a piece of plastic wrap onto the top of the pudding; this will help the pudding to remain smooth and also prevents it from developing a “skin” on top.  Cool the pudding until it is completely chilled and store in the refrigerator until you need to use it.
3. For the Cream Cheese Whipped Cream: Place the softened cream cheese, vanilla bean seeds, heavy whipping cream, cream cheese emulsion, and a pinch of salt into the bowl of a standing mixer with the whisk attachment. Beat the cream cheese at medium speed until it smooth and slightly whipped, about 1-2 minutes. With the mixer still on, pour in the can of sweetened, condensed milk and mix until it is a cohesive, creamy mixture (also make sure to scrape down the sides and the bottom of the bowl to get any remaining cream cheese that is stuck). This should take another 1-2 minutes. Lastly, gently fold in the defrosted (yet still cold) Cool Whip, so that it is completely incorporated, but still has a light and airy texture. Cool the refrigerator until you are ready to use it.
4. Assembling the Houndstooth Pudding Trifle: Get your favorite serving piece (preferably a glass trifle dish, so that you can see every layer) and begin the layering process. Start off with a base of crushed double stuffed Oreo cookies. Next, dollop some of the homemade red velvet pudding all over the cookies and then gently smooth it out, so that the Oreos are completely covered. Following the same method as the pudding, dollop the cream cheese whipped cream on top of the red velvet pudding and smooth the top as well. Spread some of the red velvet sprinkles evenly over the cream cheese whipped cream. Repeat the layering process of crushed cookies, red velvet pudding, cream cheese whipped cream, and red velvet sprinkles until you have run out of all of the different components. 
5. You can enjoy the pudding now, but I personally prefer to let it sit in the refrigerator, so that the pudding and whipped cream have firmed up, while the cookies are soft (think of the softened textures of Oreos in cookies + cream ice cream). You can chill it from 1-4 hours… or even overnight if you want or need to! Besides that, it’s time to chow down on your festive football dessert. And hey, it’s also great for UGA + Falcons fans as well!!

Tuesday, June 4, 2013

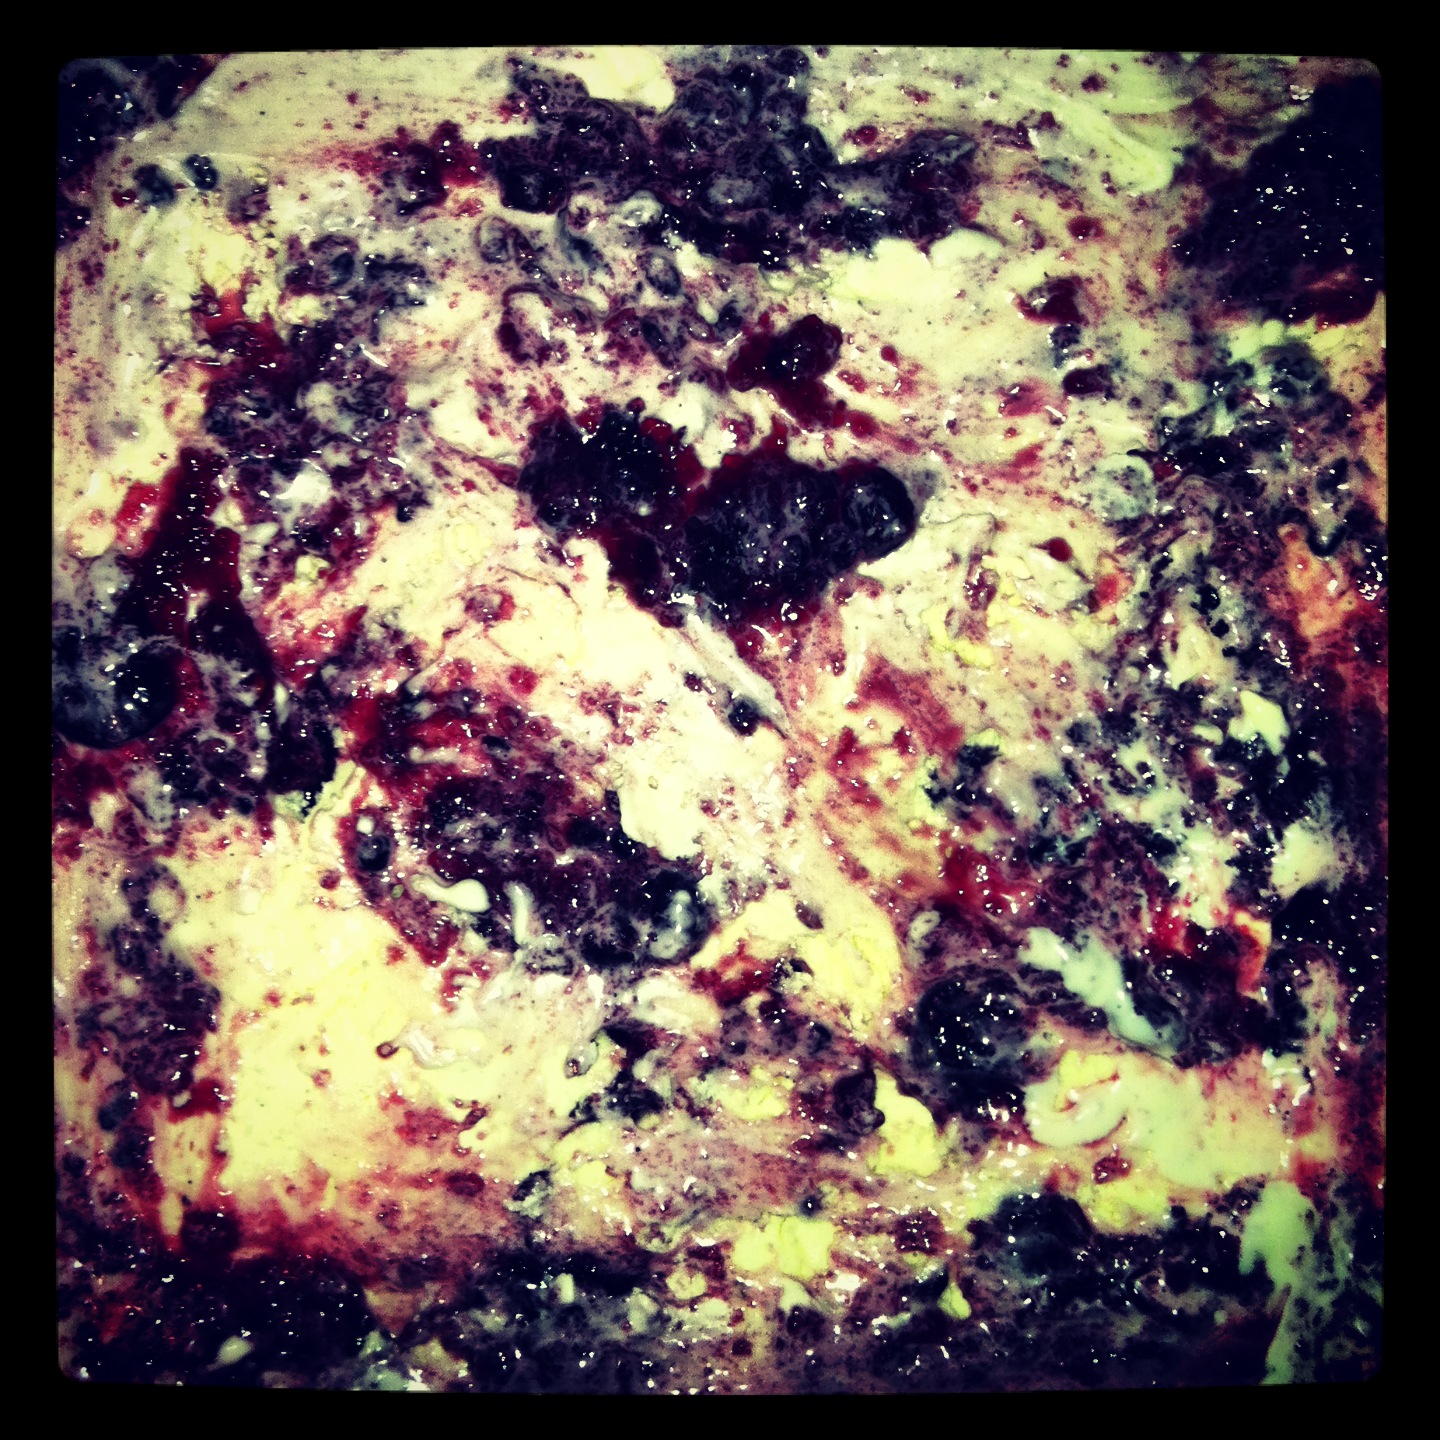
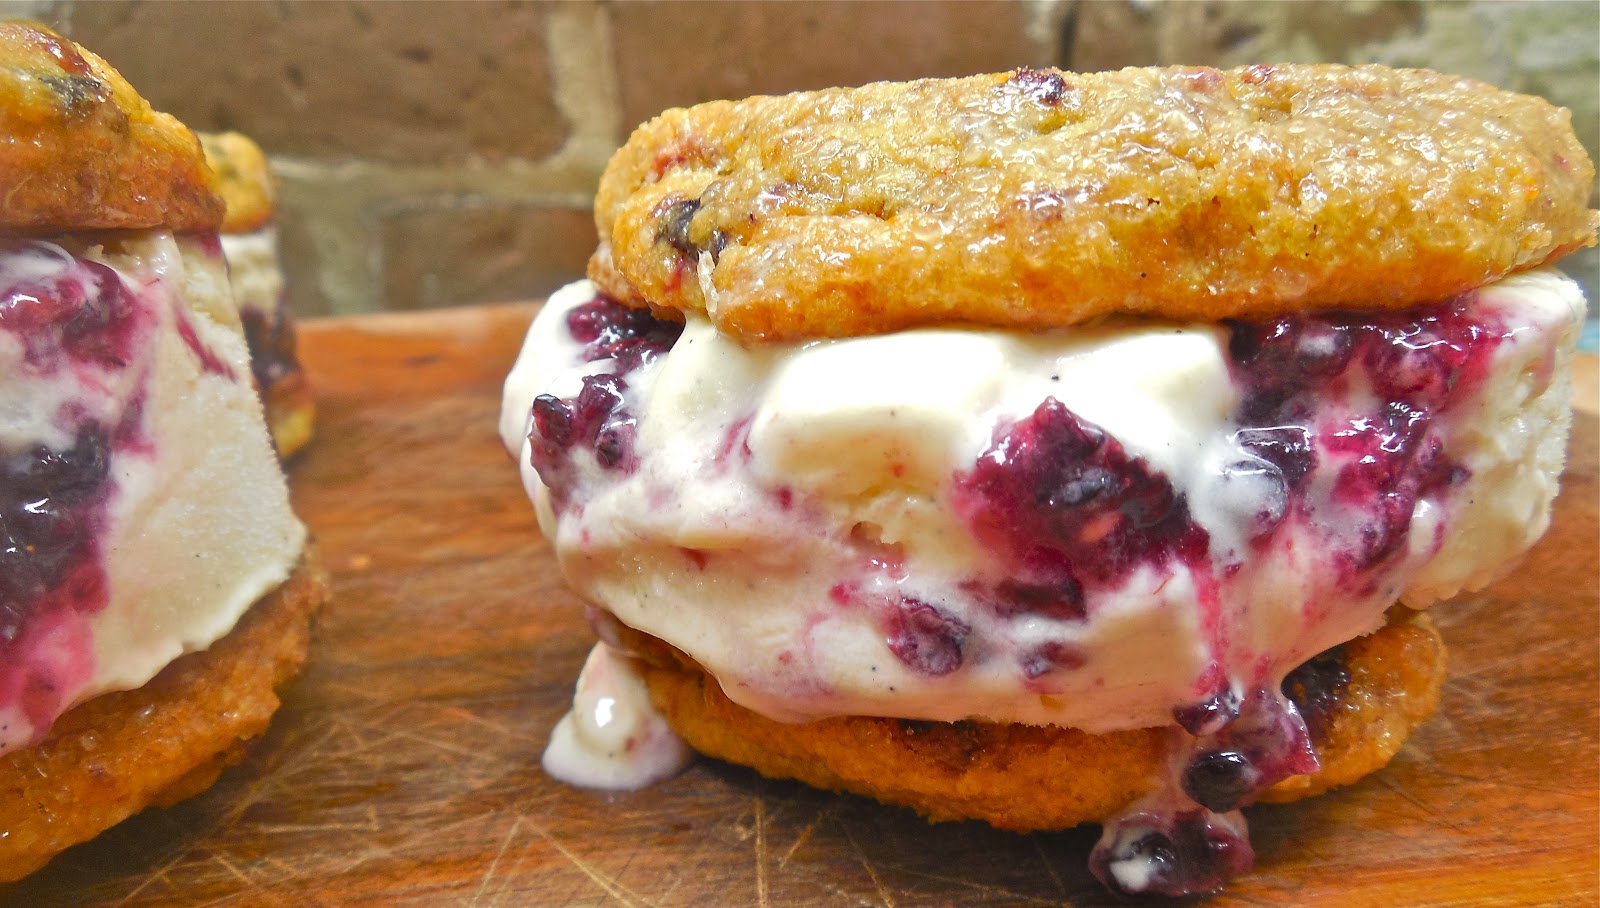
Summer Staples : Roasted Summer Berry Swirled Buttermilk Ice Cream Sandwiches with Rehydrated Berry-Sweet Corn Cookies + Lemon Curd Center

Summer Staples : Roasted Summer Berry Swirled Buttermilk Ice Cream Sandwiches with
Rehydrated Berry-Sweet Corn Cookies + Lemon Curd Center
I've been on a really big ice cream sandwich kick as of this summer. It's really the perfect cool treat during a hot day. Especially when you have a homemade cookie and a killer creamy-icy filling... it can't be beat! These summer treats start with Momofuku's famous sweet corn cookie that has been dialed up a notch with some vanilla bean rum rehydrated summer berries. The chilled cookie dough is then rolled in raw bourbon vanilla sugar, which gives it the perfect crackly-crunchy exterior. These cookies are truly fabulous on their own and I can guarantee you'll want to make them over and over again like I have in the last month. They taste like a mixture between cornbread + yellow cake. It's divine and you just have to make them! Better yet, make them with ice cream stuffed in between the middle. This ice cream is Southern to its core because it has the ever-so-popular buttermilk as the base. It's perfectly tangy and is balanced amazingly with the swirls of sweet berry preserves. But what I'm most excited about is the lemon curd center. With the use of my handy-dandy doughnut cutter, I was able to cut out perfectly round ice cream fillings, and then pop our the center and fill it with creamy lemon curd. It's the  best little surprise when you bite into the ice cream sandwiches and get a lemony burst of flavor! All of these components work together brilliantly and quite frankly, I can't wait to use this doughnut-ice cream filling technique for sandwiches in the future!! Enjoy :)


For the Roasted Summer Berry Swirled Buttermilk Ice Cream:
1 Stick Unsalted Butter, Melted & Cooled Slightly
2C Heavy Cream
1C Buttermilk, Well-Shaken
6 Egg Yolks
1C Sugar
½t Salt
2T Buttermilk Powder, Sifted
1t Vanilla
2T Vanilla Bean Infused Rum (or any kind of infused booze that is clear)
1 Whole Vanilla Bean, Split & Scraped for Seeds
Homemade Roasted Summer Berry Jam (or any other kind of preserves may be used)
Homemade or Store-Bought Lemon Curd, For the Center Filling

For the Rehydrated Berry-Sweet Corn Cookies:
2 Sticks of Unsalted Butter, Room Temperature
1 ½C Sugar
1 Egg
1 1/3C AP Flour
¼C Corn Flour
2/3C Freeze Dried Corn Powder
¾t Baking Powder
¼t Baking Soda
1 ½t Salt
½C Each of Dehydrated or Freeze Dried Berries (blueberries, raspberries, & strawberries)
2-3T Vanilla Bean Infused Rum (or just enough to barely rehydrate the berries until soft)
Raw Bourbon Vanilla Sugar, For Rolling the Cookies in

Directions:
1. For the Roasted Summer Berry Swirled Buttermilk Ice Cream: In a saucepan, bring the cream, buttermilk, sifted buttermilk powder, vanilla bean pods, and vanilla bean seeds to a simmer. In a bowl, whisk together the egg yolks, sugar, and salt until fluffy. Slowly whisk in the melted butter. Once combined, gradually and slowly into the simmering milk. Pour this mixture back into the saucepan and cook over low heat, until thickened (it should coat the back of a spoon). Strain the custard into a bowl that is placed into an ice bath. Stir in the vanilla bean infused rum and vanilla. Cool the custard base until completely chilled. Once the mixture is chilled, freeze in an ice cream maker according to the manufacturer’s instructions. As soon as the mixture is done churning, pour or scoop in one-third of the ice cream into a large container, and then spoon some of the summer berry preserves on top of the ice cream. Using the spoon, smooth it out into any even layer and swirl it some for a pretty marbling effect. Repeat this process until all of the ice cream and preserves have been use. Once it has been assembled, store in the freezer until firm, at least 4 hours.
2. For the Rehydrated Berry-Sweet Corn Cookies:In a small bowl combine the dried summer fruit with the vanilla bean infused rum. Using a spoon, toss the berries and liquid together until they are completely coated. Let them sit and plump up while you make the cookie dough batter. Combine the butter and sugar in the bowl of a standing mixer, fitted with the paddle attachment, and cream together on medium-high for about 2 to 3 minutes. Scrape down the sides of the bowl, add the egg, and beat for 7 to 8 minutes. Reduce the mixer speed to low and add the flour, corn flour, corn powder, baking soda, baking powder, and salt. Mix just until the dough comes together, beat no longer than 1 minute. Scrape down the sides of the bowl. Add in the rehydrated berries and gently beat them in until they are just incorporated. Using an ice cream scoop, portion out the cookie dough onto a Silpat-lined sheet pan. Pat the tops of the cookie dough balls until they are flat on top. Wrap the sheet pan tightly in plastic wrap and refrigerate for about 12-24 hours. Do not bake your cookies from room temperature or they will not bake up properly.
3. Baking the Cookies:Remove the chilled cookie dough balls from the refrigerator and immediately roll them in the raw sugar (this will give them a crackly crust, yet chewy interior). Heat the oven to 350 degrees. Arrange the chilled dough a minimum of 4 inches apart on Silpat-lined sheet pans. Bake for 18 minutes. The cookies will puff, crackle, and spread. After 18 minutes, they should be faintly browned on the edges yet still bright yellow in the center; give them an extra minute if not. Cool the cookies completely on the sheet pans before transferring to a plate or to an airtight container for storage. At room temp, the cookies will keep fresh for 5 days.
4. Preparing the Ice Cream Center:Using a doughnut cookie cutter, cut out rounds of the buttermilk ice cream. And then using a knife or spoon, push or scoop out the center of the ice cream. Place the hollowed out rounds onto parchment paper and freeze them again to re-harden or re-firm the texture of the ice cream. Once it has frozen again, place the ice cream rounds onto a cookie and spoon some lemon curd into the hollowed out center. Top with another cookie and enjoy before it melts!

Sunday, April 14, 2013

"Movie Theatre Cookies" or Buttered Popcorn and M&M Cookies with Vanilla Bean Fleur de Sel

"Movie Theatre Cookies" or Buttered Popcorn and M&M Cookies with
Vanilla Bean Fleur de Sel
I think what I love about food most, is its ability to evoke childhood memories and the comfort it supplies to the people eating it. Every recipe is carefully planned and executed, and then enjoyed in the presence of your closest friends + family around a dinner table or at party. Hey, it ain't too shabby either if you decide to snuggle up in your PJ's in bed with a big bowl of hot soup during a cold winter day. Even more importantly, as kids, our brains were racing and creativity flowed out of us, and that's when we mashed things together, plopped about 20 things into a bowl, or came up with some crazy concoction that sometimes made us gag. I remember when I had just become old enough to be left at home, without a babysitter, for the afternoon or night. Those were the days I looked forward to, not because I liked being alone, but because I had the kitchen all to myself. One creation that I have never forgotten was mini M&M's on top of pizza. Like what was I thinking? That does not sound like a promising culinary future, my friends. But by far, one of my favorite flavor combinations involved a Sunday afternoon at the movie theatre. Alongside a frozen slushie, I had to have a big 'ole bag of extra buttered popcorn and a bag of M&M's. Once we all got situated in our seats, that bag of rainbow colored chocolate candies were then dumped into the popcorn bag, shaken lightly until it was completely tossed, and then devoured. The hot, buttered, + salty popcorn melted the candies ever-so-slightly, so that every little kernel had a light chocolate covering. Yum... double yum actually. Fast forward like 10 years, and now I'm developing recipes for my very own blog. Well, recently I purchased Smitten Kitchen's cookbook. If y'all don't have it, I encourage you to go out tomorrow and buy it! I love the simplicity of her recipes, as well as the culinary range she showcases. While looking through the book, I came across cookies that were loaded with popped popcorn. So friggin' brilliant. And from there, I immediately I knew I wanted to create my own inspired adaptation. I used the base of my go-to gourmet chocolate chunk cookie recipe (just slightly dumbed down and simplified) and substituted the chopped gourmet chocolates with colorful M&M's. I found Easter M&M's at the grocery store and couldn't resist the idea of girly pastel colored cookies. Deb's recipe went the all natural buttered popcorn route, where as I had (yes, had to) have the fake, over-the-top, decadently rich "movie theatre flavored" buttered popcorn. Yeah, go grab one of the microwavable bags that tells you that it contains more fake butter flavoring than the actual kernels themselves. This is the only way for me to truly bring travel back in time for the ultimate "picture show"(it's a southern saying, don't make fun) snack. I sprinkled on some of my fancy vanilla bean fleur de sel and it was sweet-and-salty cookie perfection. So, make a warm batch of these for a movie marathon at home or tuck away some of them into a plastic bag and sneak 'em into the movie theatre. I promise I won't tattle, if you don't. Deal? Deal. I loved the nostalgia of the cookies and will make them over + over again!! Enjoy :)


crispy cookie edges. extra buttery popcorn. colorful chocolate candies. fancy salt. 
For the Movie Theatre Cookies:
2 Sticks of Unsalted Butter, Softened
1 Stick of Unsalted Butter, Melted
½C Granulated Sugar (I used vanilla bean sugar, but it’s up to you)
1 ¾C Light Brown Sugar, Packed
1 Vanilla Bean, Split & Scraped for Seeds
2 Eggs + 1 Egg Yolk
1t Vanilla
¼t Butter Extract
1t Sea Salt
2C AP Flour
1 ½C Bread Flour (or you can substitute it for all AP Flour)
1 ½t Baking Soda
4C M&M Candies (I crushed up 1C of the candies with a rolling pin for candy bits)
6-8C Movie Theatre Buttered Popcorn (already popped, kernels removed)
Vanilla Bean Fleur de Sel, For Sprinkling (optional)

Directions:
1. Preheat the oven to 350 degrees F and line a baking sheet with parchment paper and spray with Pam, then set aside.
2. In a small saute pan, melt the butter, and then set it aside to cool slightly before adding it to the mixing bowl. Cream the 2 sticks of butter & chilled melted butter with the sugar, brown sugar, and vanilla bean until light and fluffy (about 3 minutes). Scrape down the sides of the mixer then add the two eggs and egg yolk one at a time, incorporating each one completely before adding the next. Scrape down the bowl. Mix in the vanilla, butter extract, and sea salt.
3. In a separate bowl, whisk together the bread flour, AP Flour, and baking soda.
4. With the mixer on the lowest speed, slowly add the flour mixture to the butter mixture until just incorporated (don’t over mix).
5. Beat in the M&M candies until it’s completely incorporated and the chocolate is evenly dispersed throughout the dough. Lastly, lightly fold in the popped, buttered popcorn (this will take some time since the dough is quite thick and there are so many ingredients, but just keep working it in until it’s distributed throughout; it is alright if the popcorn breaks up some, but try to maintain most of its texture). Scoop the dough into medium-large balls (or I used an ice cream scoop), and then using your fingers, crimp the tops to make them more jagged (this will help them look more homemade and rustic). Because the cookies are quite large, I only put 6 cookies per sheet tray, so that when they cook & spread, they will not touch each other.
6. Sprinkle the vanilla bean fleur de sel on top of the cookie dough balls, then bake the for 10-12 minutes (cook them for 5-6 minutes, then rotate the pan 180 degrees, and cook for another 5-6 minutes), until it is slightly golden brown on the edges, but still soft (slightly undercooked) on the inside. Leave the cookies on the sheet tray for 10 minutes, so that the cookies will finish baking.
7. Once the cookies have rested on the sheet tray, move the finished cookies to a cooling rack, and let them completely cool completely before eating.

Wednesday, December 12, 2012

Red Velvet "Crack Pie" with Chocolate-Oat Cookie Crust + Whipped Cream Cheese

Red Velvet "Crack Pie" with Chocolate-Oat Cookie Crust + Whipped Cream Cheese
It's finally Christmastime, and I have nearly missed another week :( But, the good news is that I have felt well enough to be cleared to head back to Savannah!! Jumpin' for joy, here. It's so much easier to cook in your own home, ya know? I mean, you know where everything is, what dishes to use, how hot the oven is, who will eat all of my creations before I can style them for a picture, etc. You know, REAL BIG LIFE PROBLEMS. Ha, that's debatable. So, don't worry, I have a bunch of recipes coming your way because I am actually hosting my First Annual Friendsgiving-Christmas Party. And yes, I realized Thanksgiving as come and gone, but I didn't get to eat all of the yummy food, so I'm going to be that slightest bit selfish and make my friends have a "Friendsgiving" with me... with some Christmas thrown in there too!! I'm making a Porchetta, my new favorite "bread pudding" dressing, southern sweet potato casserole, pan fried brussels sprouts with vanilla-pecan butter + pomegranate reduction, eggnog, a very special White Russian recipe, and too many pies to count. The first pie that will be featured is Red Velvet Crack Pie with Chocolate-Oat Cookie Crust + Whipped Cream Cheese. Y'all have all heard of "Crack Pie" right? Well, if not it a sugary-sweet pie from the famous Momofuku Milk Bar in NYC. I bought their cook book, and I just knew I had to make it. The classic is fabulous and please if you're going to make a pie, definitely make that one. But, I couldn't help myself in making my very own variation... Red Velvet. I mean, I turn everything into red velvet, it's actually unhealthy. I started off by making the oatmeal-cookie crust, chocolate, very chocolatey, since that's an important piece of the whole pie. I substituted in buttermilk, some buttermilk powder, and red dye for coloring. Lastly, I made a whipped cream cheese for garnishing the top of the pie, like a cake would have frosting. All of these components come together to make one heck of a Red Velvet "Crack Pie" y'all. And man, this pie is sweeeeeeet, but I think that's what the Milk Bar was looking for... so it would be like crack to kids!! Enjoy :)


For the Chocolate-Oat Cookie Crust:
8T + 4T Unsalted Butter, 8T at Room Temperature & 4T Melted
1/3C + 1T Light Brown Sugar, Packed
3T Sugar
1 Egg Yolk
½C AP Flour
¼C Unsweetened Dark Cocoa Powder
1oz Unsweetened Baker’s Chocolate, Finely Grated
1½C Old Fashioned Rolled Oats
1/8t Baking Powder
Pinch of Baking Soda
½t + ¼t Salt

For the Red Velvet Crack Pie Filling:
1 ½C Sugar
¾C Light Brown Sugar, Packed
¼C Milk Powder
¼C Corn Powder
2T AP Flour + 1T Buttermilk Powder
1T Cornstarch
1 ½t Salt
2 Sticks of Unsalted Butter, Melted & Cool Slightly
¾C Buttermilk, Well-Shaken
½t Vanilla
Red Dye, To Your Liking
8 Large Egg Yolks
Confectioners’ Sugar, For Dusting
Unsweetened Whipped Cream or Whipped Cream Cheese, For Serving

Directions:
1. For the Oat Cookie Crust: Preheat oven to 350°F. Line a baking sheet with parchment paper and spray with Pam. In the bowl of a standing mixer, combine 8T room temperature butter, 1/3C light brown sugar, and sugar in medium bowl. Beat the mixture until light and fluffy, occasionally scraping down sides of bowl, about 2 minutes. Add egg yolk; beat until pale and fluffy. Add oats, flour, cocoa powder, finely grated chocolate, baking powder, baking soda, and salt and beat until well blended, about 1 minute. Turn the oat cookie mixture out onto prepared baking sheet; press out evenly to almost the edges of pan. Bake until light golden on top, 15-18 minutes. Transfer baking pan to rack and cool cookie completely. Using hands, crumble oat cookie into a food processor and process until it becomes wet sand, and then add melted butter, salt, and brown sugar. Pulse until mixture is moist enough to stick together. Transfer cookie crust mixture to two 9-inch-diameter glass pie dishes. Using fingers, press mixture evenly onto bottom and up sides of pie dishes. Place pie dishes with crust on rimmed baking sheet.
2. For the Crack Pie Filling:Position rack in center of oven and preheat to 350°F. Combine both sugars, milk powder, corn powder, AP flour, buttermilk powder, and salt in the bowl of a standing mixer. Add melted butter and beat for 2-3 minutes until all the dry ingredients are moist. Add buttermilk, vanilla, and red dye (to your liking), and then continue mixing until well blended. Scrape the sides of the bowl. Beat in the egg yolks until just combined, do not aerate the mixture. Mix on low speed until glossy and homogenous. Pour filling into the two crusts evenly.
3. For Baking: Bake the pies for 15 minutes only. Open the oven door and reduce oven temperature to 325°F, and then close the door when the temperature has reduced. Continue to bake pie until filling is brown in spots and set around edges but center still moves slightly when pie dish is gently shaken, about 10-20 minutes longer (this strongly depends on the temperature of your oven at home, you will need to check back on the pie until it reaches the just barely-shaken consistency). Cool pie 2 hours in pie dish on rack. Refrigerate uncovered overnight. Once chilled, wrap with plastic wrap to store.
4. Serve the pie cold with sifted confectioners’ sugar over the top and a dollop of whipped cream cream!!

Monday, September 24, 2012

Chewy Red Velvet Cookies with White Chocolate Chips, Birthday Cake Oreo Truffle Pieces, & Cheesecake Filling

Chewy Red Velvet Cookies with White Chocolate Chips, Birthday Cake
Oreo Truffle Pieces, & Cheesecake Filling
I've been wanting to make Red Velvet Cookies for a while now, but homemade... all from scratch. No box mixes. I struggled for a while trying to make a recipe that would yield chewy cookies because all of the other ones I had made were quite cakey. No thank you. Don't y'all worry your little hearts, I finally got one for ya! And trust me, they are worth it. The dough is a bright red color, which is exactly what I wanted, but it also has Birthday Cake Oreo Truffle Pieces and white chocolate studded throughout. Yes, you heard me right... BIRTHDAY CAKE OREO TRUFFLE PIECES in a cookie. This is perfect because it gives the cookie a chocolate flavor (that is known for from red velvet cake) and it also lends a slightly "birthday cake" taste to it. The fun doesn't stop there because when you bite into the center, there is a creamy cheesecake filling. We loved these cookies, even though it took me three previous batches to perfect it, and I can't wait to make them again. And for all y'all Alabama, UGA, and Falcons fans out there, it'd be a perfect tailgatin' dessert. Oh, don't you forget about Christmas either because these will definitely be on the list!! Enjoy :)
Those Dark Areas on the Cookies are Birthday Cake Oreo Truffles  
Don't forget the white chocolate chips...
Ain't that red color purdy??

For the Birthday Cake Oreo Truffle Pieces:
21 Birthday Cake Oreos, Finely Crushed
4oz Cream Cheese, Softened

For the Cheesecake Filling:
4oz Cream Cheese, Softened
2C Confectioners’ Sugar, Sifted
2T Powdered Buttermilk (optional, this can be left and the texture is still great)
1t Vanilla

For the Chewy Red Velvet Cookies:
2 ¼C AP Flour
1T Unsweetened Cocoa Powder
½t Baking Soda
1t Vanilla Bean Fleur de Sel (scant)
1 ½ Sticks of Unsalted Butter, Softened
1C Light Brown Sugar
½C Sugar
1 Large Egg + 1 Egg Yolk
2t Vanilla
1oz Red Dye (to the color of your preference)
12oz White Chocolate, Roughly Chopped into Chunks
Prepared Birthday Cake Oreo Truffle Pieces
Prepared Cheesecake Filling, Chilled

Directions:
1. For the Birthday Cake Oreo Truffle Pieces: Line a small baking dish with foil and set it aside. Crush Oreo cookies in a food processor or blender until finely ground, and then in a medium bowl, mix with softened cream cheese until truffle forms. Press into foil-lined baking dish and flatten with hands. Place in freezer for 30 minutes. Once chilled, remove the Oreo truffles from the freezer and cut into small pieces. Keep chilled until you are ready to fold into the cookie batter.   
2. To Make the Cheesecake Filling: Using a mixer, combine cream cheese, powdered sugar, powdered buttermilk, and vanilla extract. Mix until smooth. Using a teaspoon, scoop out cheesecake filling and place on a plate. Continue scooping out cheesecake filling into teaspoon balls until you have as many as you need for the cookies (I made about 25). Place plate in the freezer and freeze for at least two hours. After they have chilled, I rolled them with my hands, so that they were a smooth, round shape.  
3. For the Red Velvet Cookies:In the bowl of an electric mixer, beat together the butter and sugars until smooth. Add in the egg and egg yolk, one at a time, making sure each one has been blended completely before adding the next. Add in the vanilla and the red dye and blend until everything is incorporated. In a separate bowl, sift together the flour, cocoa powder, baking soda, and salt. Blend in this sifted flour mixture into the red batter until just incorporated. Fold in the white chocolate chips, followed by gently folding in the Oreo Truffle pieces (make sure not to blend too much or they will mix into the cookie dough). Chill the cookie dough into the refrigerator for at least 2 hours, but preferably overnight.
4. Preheat the oven to 350 degrees and line baking sheets with parchment paper or Silpats.
5. To Assemble the Cookies: Take about 1 scoop of the red velvet cookie dough and flatten it in your hands. Place one of the cheesecake filling balls in the center and wrap the cookie dough around the filling. Gently roll into a ball and place onto the prepared baking sheets. Repeat with the remaining ingredients. Bake for 10-14 minutes (depending on the size of your cookie dough balls) or until the cookies have started to set in the center, but are crisp on the outsides.
6. Let the cookies cool on the baking sheet for 5 minutes, and then remove them to a cooling rack to cool completely. Let the cookies set before enjoying.