Showing posts with label Baked. Show all posts

Wednesday, November 19, 2014

Cranberry Pepper Jelly + Goat Cheese Baked Brie Bites

Cranberry Pepper Jelly + Goat Cheese Baked Brie Bites
Thanksgiving is just around the corner, y'all. I can't even contain my excitement, literally. I also have Friendsgiving this weekend, which is a great way to test some of my recipes out before the big show. And speaking of this fabulous holiday, every year I realize that one course is often neglected... the appetizers to nosh on while all the important stuff is still cooking. We normally have some charcuterie out, as well as a plate of different cheeses and crackers, but I think it could really do some sprucing up ya'know? Well, my friend, these are the perfect little bites that people can pick up and go multitask. It combines my recently posted homemade cranberry pepper jelly and it's not only perfect with turkey or on leftover sandwiches, but the condiment is great in this too! If you don't feel like making the cranberry pepper jelly (which is completely understandable), then you can sub in almost any jam... cherry, apricot, peach, etc. But I love the profile of the spicy cranberry component and it perfectly fits the season/holiday. As for the brie... I found a great goat cheese brie that, quite frankly, we have been addicted to lately; however, regular brie works just as well!! We personally don't like the rind (on any cheese for that matter), so we chose to remove it. If you don't mind or prefer it, then leave it on, no worries here. Now all you gotta do is buy some frozen puff pastry at the grocery store and cut it into squares and let the layering begin. You have to make sure that you don't over-stuff the squares, so that it seals properly and all of the fillings don't ooze out every where while baking. We purchased a poptart cutter and used that to seal it, but you can use any shape cutter and that will work just as well, just make sure to use a fork to close up the edges. After that, I brush mine with some egg wash, to help the browning, and sprinkle it with some fleur de sel or raw sugar (depending on if I want something more savory or sweet). Once you bake them, they will puff up gorgeously and turn the most perfect golden brown. I let mine cool just a tad, so that the cheese won't be a melty mess, but they are best served warm. Don't you worry though, they are great at room temperature too. I think these will be a great addition to your upcoming Thanksgiving parties. I mean think about it, it's practically a grown-up poptart, yay!! Enjoy :)
layers of puff pastry, goat cheese brie, + cranberry pepper jelly
using our adorable poptart cutter to make hand-held baked brie bites
place them on a baking sheet and brush with some egg wash 
bake them until they are golden brown and devour all of them immediately
For the Baked Brie Bites:
2 Sheets of Store-Bought Puff Pastry, Thawed & Still Cold
4oz Goat Cheese or Classic Brie, Cold
Homemade Cranberry Pepper Jelly
1 Large Egg, Beaten
Splash of Heavy Cream
Fleur de Sel or Raw Sugar, For Sprinkling

Directions:
1. Prepping the Puff Pastry: All-butter, store bought puff pastry usually comes frozen and folded into thirds. We’re going to use these folded thirds to our advantage.  Cut the puff pastry into thirds along the creases. Cut each panel into four pieces.  They’ll be 2 1/4-inch tall and 3-inches wide. One sheet of puff pastry will yield 12 rectangles. Cut each rectangle in half. You’ll have 24 little rectangles that will create 12 little rectangle pockets.
2. Preheat the oven to 375 degrees and line a baking sheet with a silpat. Set this aside.
3. Making the Jelly-Brie Bites: Combine beaten egg and splash of heavy cream. Brush 12 of the small rectangles with egg wash. Place a small sliver of Brie (we like the rind removed, but it can be left on and it’ll still taste great) on top of the egg wash (and stick).  Top with a small spoonful of the homemade cranberry pepper jelly. Take another square of puff pastry and press between your fingers to make the rectangle slightly bigger. Place puff pastry on top of the cheese and jam.  Use a fork to press the edges together or you can use a pop tart cutter like I had.  The egg wash will act as glue. Make sure to seal the edges well by crimping with the fork.  Prick the tops of the pastry lightly with a fork in order to let the steam escape the inside of the pastry. Place the stuffed puff pastry squares onto the prepared baking sheet and brush the tops with some of the egg wash. If you want you can sprinkle with a little fleur de sel (or even some raw sugar for a sweeter pastry).
4. Bake for 12-15 minutes or until the pastry has puffed and turned to a beautiful golden brown. Remove them from the oven and allow them to cool slightly before serving. These baked Brie bites taste best warm, but are also fine at room temperature!

Sunday, November 2, 2014

"Mountain Man Pleasing Chicken" with Peach Preserve-Honey Mustard Marinated Chicken, Colby Jack Cheese, Mushrooms, + Bacon

"Mountain Man Pleasing Chicken" with Peach Preserve-Honey Mustard Marinated Chicken,
Colby Jack Cheese, Mushrooms, + Bacon
This is one of those feel good meals... that the men in your life will thank you for. And on top of all of that it's something you marinate a day before or overnight and slop it all into a baking dish until it's cooked through + perfectly browned. After the chicken is done, you top it with some slices of Colby Jack cheese, browned mushrooms, & smoky bacon and bake it again, under the broiler, till the cheese is melty and beginning to crisp around the edges (a.k.a. the best part). If you're smart like us, you'll drizzle a little bit of that peach preserve-honey mustard marinade on the chicken before you start layering on the cheese, mushrooms, and bacon. It adds a little extra sweet + savory taste and boosts up that flavor profile just a tad bit more. First, you start by marinating the chicken in a homemade sauce; it is composed of different mixed mustards (or whatever you have on you), maple syrup, peach preserves, apple cider vinegar, worcestershire, garlic cloves, seasonings, and sprigs of fresh rosemary. I like the balance between the mustard + peach, it's like a fruity honey mustard... and who doesn't like that? Also, don't leave out the fresh rosemary, pretty pretty please? I love the aromatic element it brings to the whole dish. 

marinating the chicken thighs in garlic, rosemary, and peach preserve-honey mustard 
You can start this whenever you want, but the longer it marinates, the better it tastes. Marinate + bake the chicken thighs in the same pan, so you don't waste a bunch of different dishes. Less clean up=happy people, agreed? Agreed. Yes this dish is simple. But it packs a lot of flavor AND it has cheese + bacon on it, which automatically makes it, "man-pleasing chicken". Make it tomorrow, make it next weekend, or make it whenever you can. It's perfect for Autumn/Fall weather too!! Enjoy :)
after baking...
it looks perfectly brown + juicy
garnish it with chives and serve it with potatoes, and you're good to go
For the Marinated Chicken:
6 Boneless, Skinless Chicken Thighs
2/3C Mixed Mustards (I used Dijon, honey mustard, and yellow mustard)
1/3C Maple Syrup
1 Jar of Peach Preserves
2T Apple Cider Vinegar
Couple Dashes of Worcestershire Sauce
4 Cloves of Garlic, Thinly Sliced
2-4 Sprigs of Fresh Rosemary
Salt, Fresh Cracked Pepper, & Red Pepper Flakes (for sprinkling the chicken)

For the Chicken Topping:
6 Slices of Colby Jack Cheese (one slice per chicken thigh)
Sautéed Mushrooms (I like a good golden brown color)
12 Slices of Cooked Bacon (two slices per chicken thigh)
Leftover Peach Preserve-Honey Mustard Marinade, For Drizzling
Fresh Minced Chives, For Garnishing

Directions:
1. Preparing the Marinated Chicken: Spray a 13x9-baking dish with Pam and lay the chicken thighs into the pan. Season the tops of them with some salt & fresh cracked pepper. Thinly Slice 4 cloves of garlic and scatter them across the chicken.
2. Making the Marinade: Whisk together the mustards (of your choice), maple syrup, peach preserves, apple cider vinegar, and Worcestershire sauce until thoroughly combined (this should make about 2C of marinade). Pour half of the mixture over the chicken, so that they are completely covered (save the remaining marinade for another batch or use all of it for a double batch). Top the entire dish with the fresh sprigs of rosemary. Cover and marinate for 4-6 hours.
3. Baking the Chicken: Preheat the oven to 450 degrees. Remove the tin foil from the baking dish and place the chicken in the hot oven. Cook them for roughly 30-40 minutes. Allow the chicken to rest in the pan for at least 5 minutes.
4. Finishing the Chicken: Increase the heat of the oven to broil and remove the chicken from the baking dish and place onto a silpat-line baking pan. Spoon a little of the extra marinade over each chicken thigh, and then top with two slices of cooked bacon, a slice of Colby jack cheese, and a pile of sautéed mushrooms. Drizzle a little more sauce on top. Broil in the oven (while keeping a close eye, so that nothing burns) for about 5-10 minutes or until the cheese has completely melted and everything looks gorgeously brown.
5. Spoon a little more marinade over the top if you wish and garnish with chives. Enjoy it while it’s still hot!

Monday, November 12, 2012

Sour Cream + Onion Baked Steak Fries

Sour Cream + Onion Baked Steak Fries
It's been a month of me being sick today. Another day, another doctor. But, that won't slow me down. Even though I have lost almost 20 pounds from not being able to eat, I still am cooking up a storm. My family must love when I come home because I just constantly cook meals for everyone and I enjoy doing it. On Saturday, a recipe for a yummy patty melts. And what is better than a burger + some french fries? For my Mountain Man, it couldn't get any better. But, they are quite the deathly pair with all that oil and fatty, meaty goodness. So, why not switch it up and bake some steak fries. I really liked this because I love sour cream + onion potato chips, and these fries really pack a flavorful punch. But, hey you don't feel as bad because they are oven-baked. Yes, they might not be as crispy as a deep fried fry, but sometimes you really just don't all that mess to deal with. Here's your solution!! Enjoy :)

For the Sour Cream & Onion Baked Steak Fries:
2.5lbs Yukon Gold Potatoes, Cut into Wedges
4T Olive Oil or Vegetable Oil
2t Fresh Garlic, Minced
3T Powdered Buttermilk
1 ½T Onion Powder
1t Garlic Powder
Salt & Pepper, To Taste
3 ½T Fresh Dill, Finely Chopped
1T Fresh Parsley, Finely Chopped
1T Fresh Chives, Minced
2T Parmesan Cheese, Freshly Grated

Directions:
1. Preheat oven to 450 degrees F. Line a baking sheet with aluminum foil and place a wire rack on top. Spray with non-stick spray.
2. Add potato wedges to a large bowl and coat with olive oil and minced garlic, using your hands to toss in order to coat evenly. In a small bowl, combine powdered buttermilk, onion powder, garlic powder, salt, pepper and dill together and mix well. Sprinkle three quarters of the mixture evenly over the potato wedges, coating completely. Place potatoes on the wire rack and sprinkle with Parmesan.
3. Bake for 20 minutes, flipping and tossing once, then for 15-20 minutes more, until golden and crispy. Remove and immediately toss with remaining sour cream and onion mix, and even more fresh dill, fresh parsley, and fresh chives.
4. Place the fries onto a serving plate and garnish with even more freshly grated Parmesan cheese all over the top (the more, the better). Enjoy immediately while they are still crispy and warm.

Friday, February 24, 2012

San Francisco Style Herbed-Garlic Fries

I came across this recipe on Pinterest, and I knew that I just had to try them. I especially loved that they are baked in the oven. After they are golden brown and crispy, you toss the fries in a fresh garlic-herb-oil mixture, so they are nicely coated. Obviously, I served them along side our All-American Burgers, and they were the perfect addition. Surprisingly these are really easy to make, unlike a lot of french fry recipes that require soaking and double-frying. Try these fries sometime soon, you won't eat plain fries ever again!! Enjoy :)

San Francisco Style Herbed-Garlic Fries
For the Fries:
1lb Russet Potatoes, Cut into Sticks
1T Vegetable Oil
Salt & Pepper, For Tossing

For the Herbed-Garlic Topping:
2t Vegetable Oil
1 Whole Garlic Clove, Finely Chopped
1T Fresh Parsley, Minced
1t Fresh Rosemary, Minced
Salt & Pepper, For Sprinkling

Directions:
1. For the Fries: Preheat the oven to 450 degrees. Coat a large baking sheet with non-stick spray. Toss the potatoes with the oil, salt and pepper. Arrange in a single layer on a baking sheet. Roast the potatoes, turning every 10 minutes, until browned and tender, about 30-35 minutes.
2. For the Herbed-Garlic Topping: Whisk together the oil, garlic, herbs, salt, and pepper until combined. Toss the hot fries in the mixture until completely coated.
3. Place the tossed fries onto a plate and drizzle with some more of the garlic and herb oil. Serve hot and enjoy.


Saturday, October 29, 2011

Pumpkin Doughnut French Toast Casserole with Salted Caramel Sauce

So, when I made those Buttermilk-Glazed Pumpkin Doughnuts a couple days ago, we had some left over. The recipe made a lot, and the two of us couldn't possibly eat them all. So I figured why not turn them into a french toast casserole for the next morning. I have made a lot of french toast casseroles, but none of them had featured doughnuts. This is just a win-win in my book. And even if you don't use my pumpkin doughnuts, you can always go buy any doughnuts you like to substitute! But, I especially loved the golden orange color of the casserole, it just screams fall. And always make sure to drizzle some delicious salted caramel sauce on top! Enjoy :)
Pumpkin Doughnut French Toast Casserole with Salted Caramel Sauce
For the Baked Fresh Toast Casserole:
4 Large Eggs
1C Half & Half
½C Whole Milk
¼C Pure Pumpkin Puree
1t Brown Sugar
½t Vanilla
½t Cinnamon
¼t Salt
10 Leftover Buttermilk-Glazed Pumpkin Doughnuts, Cut into Cubes & Dried
Homemade Salted Caramel Sauce or Maple Syrup

Directions:
1. For the bread, you need to cut the doughnuts into bite size cubes and place them onto a baking sheet. Let the cubes become stale for 4-6 hours. Once the cubes are stale, spray a baking dish (we did individual ramekins) and stuff them into the dish and press down, so that it is fully packed.
2. To Make the Batter: In a medium mixing bowl, whisk together the eggs, half & half, milk, pumpkin, brown sugar, vanilla, cinnamon, and salt until completely incorporated & creamy. Pour the batter over the bread cubes and press down so that the batter soaks into all of the cubes.
3. Cover the dish with tinfoil and let it sit overnight in the refrigerator.
4. The next morning, preheat the oven to 350 degrees.
5. Bake the casserole for 45 minutes to an hour, depending on the size of your baking dish.
6. Serve hot with Salted Caramel Sauce or Maple Syrup.

Monday, September 19, 2011

Hawaiian Moink Balls with Hoisin Glaze

Have you ever heard of moink balls? I heard about them two years ago while tailgating on the Quad at Alabama. They are very similar to the Candied Bacon-Wrapped Smoked Sausages with BBQ Sauce that I made at the beginning of this month. Basically a moink ball is a bacon wrapped meatball, and the glory of it is that you can make your own meatball or just find something store-bought. Also, you can make all different kinds of flavors for these moink balls. I decided to make Hoisin Glazed-Hawaiian Moink Balls with pineapple and red onion. Other flavors I want to make are buffalo chicken, BBQ, and thai. This is a great make-ahead appetizer that you could also easily serve at a party as well. Enjoy :)
Hawaiian Meatballs with Pineapple, Wrapped in Bacon, Glazed in Hoisin Sauce
Hawaiian Moink Balls with Hoisin Glaze
For the Moink Balls:
1 Slice of White Sandwich Bread
1 ½T Milk
1t Soy Sauce
½C Red Onions, Finely Chopped
1 ¼lbs Ground Pork
½C Panko Breadcrumbs 
3 Cloves of Garlic, Finely Grated
1T Ginger, Finely Grated
½C Crushed Pineapple (drained of excess juice)
1 Large Egg, Lightly Beaten
1t Toasted Sesame Oil
Salt & Pepper, To Taste
Vegetable Oil, For Frying
20 Pineapple Chunks
10 Slices of Bacon, Cut in Half
Toothpicks, For Securing & Serving
¼C Brown Sugar
Hoisin or Teriyaki Sauce, For Glazing  

Directions:
1. To Make the Hawaiian Meatballs: Tear the sandwich bread into small pieces, and then toss with the milk and soy sauce in a large bowl, and let it sit for 10 minutes. Add the red onions, ground pork, panko breadcrumbs, garlic, ginger, crushed pineapple, egg, sesame oil, salt, and pepper. Mix until combined.  Gently form the ground mixture into 16 golf ball-size meatballs. Put the meatballs on a baking sheet, cover with plastic wrap, and refrigerate for 1 hour. Heat about 2 inches of oil in a large saucepan over medium heat and cook the meatballs until browned and almost cooked through, about 5-7 minutes. Transfer to a paper towel-lined plate to drain until they have cooled completely.
2. To Make the Hawaiian Moink Balls: Preheat the oven to 400 degrees and line a baking sheet with tin foil and spray with Pam, and then set aside. While the oven is preheating, assemble the moink balls. Grab a cooled, cooked Hawaiian meatball, and top it with 1 pineapple chunk, wrap it with a slice of bacon, and then stick a toothpick through the center to hold all of the components together. Place the finished wrapped moink balls onto the prepared baking sheet and sprinkle them with a little bit of brown sugar.
3. To Cook the Hawaiian Moink Balls: Bake the moink balls for 20 minutes and then flip them over and cook for another 20 minutes. During the last 10 minutes of baking begin glazing them with hoisin or teriyaki sauce, so that they will caramelize while baking.

Thursday, September 8, 2011

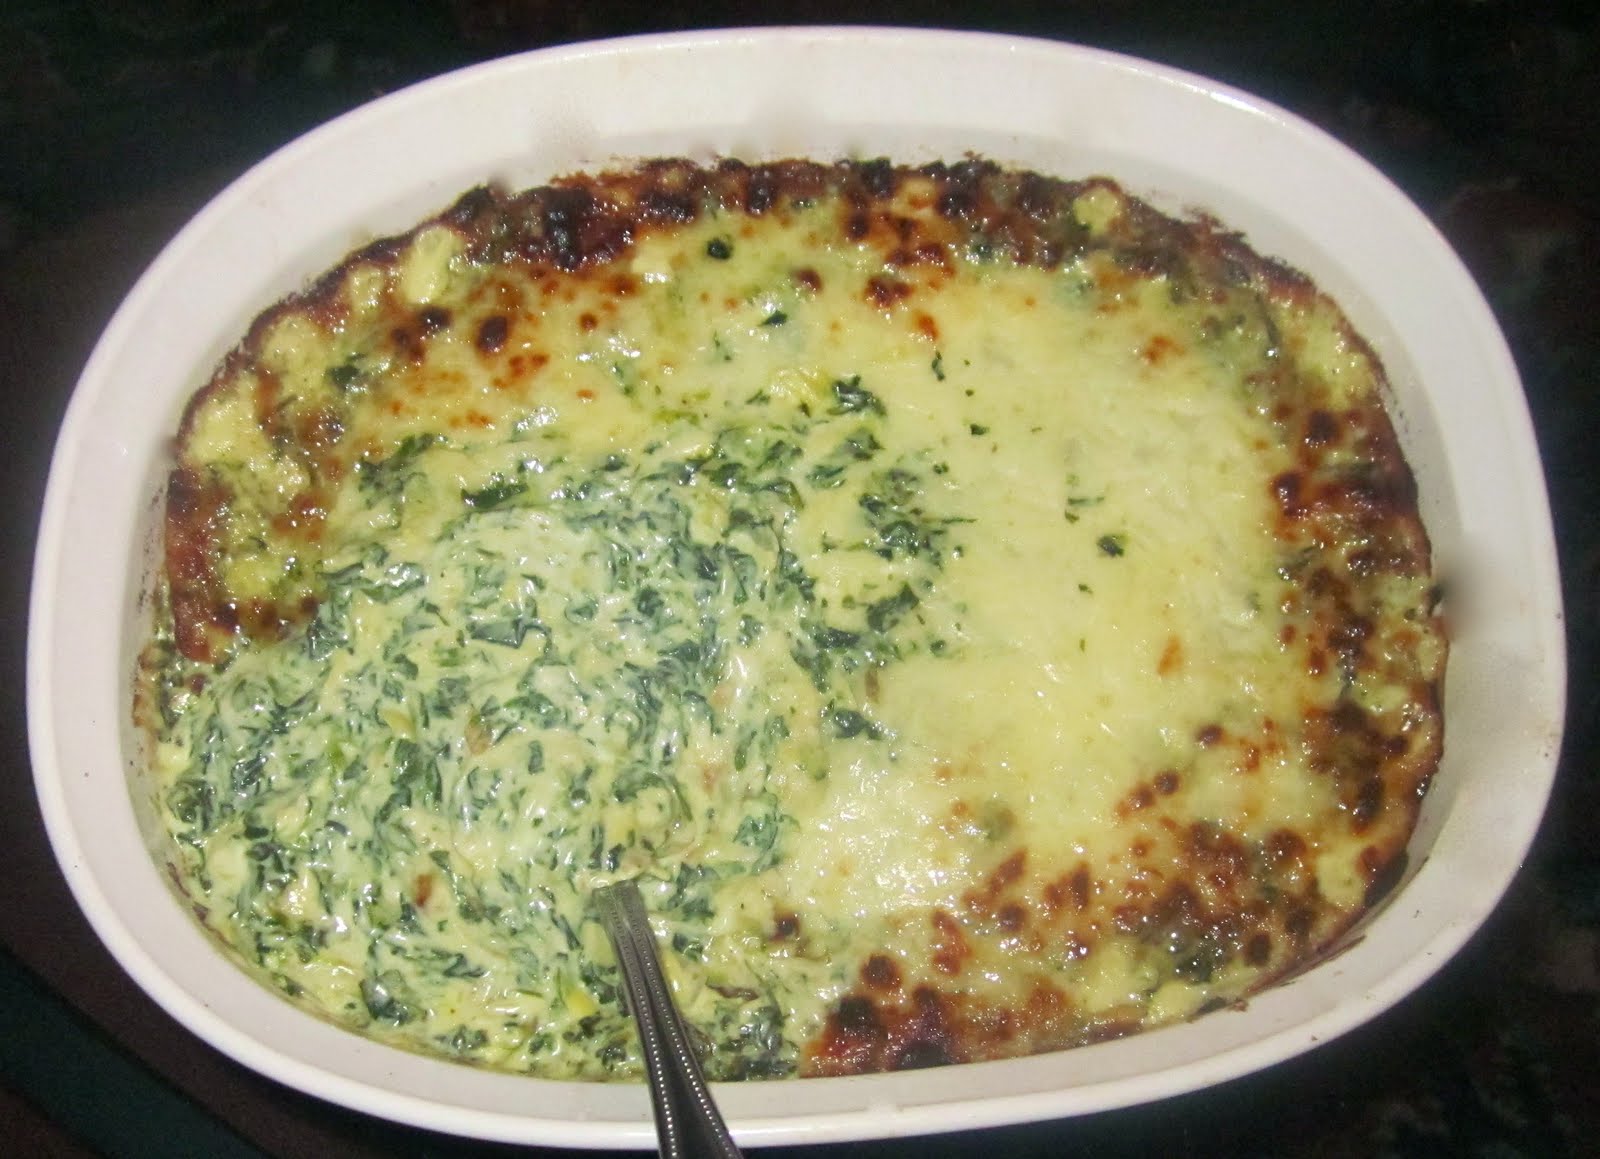
Crazy-Good Spinach-Artichoke Dip

One of my favorite appetizers has got to be Spinach-Artichoke Dip. It's just so good. Even people who don't like spinach, love spinach-artichoke dip. Well, over the years, I have had a hard time finding a recipe that I really loved. Some weren't creamy enough... some were too creamy. I wanted a complex dip, but simple enough that it was easy to make. And this recipe is a little more than just throwing everything in a bowl and mixing it together, but that's okay because the extra steps are worth it. I finally developed this recipe and have tweaked it enough that I think that it's perfect for me. I've made it a few times and I always get really good feedback. What makes my Spinach-Artichoke Dip "crazy-good" is that I make a roux and then fold it into a cream cheese-mayo-sour cream-cheese mixture (most dips don't include a roux). You can either make this dip right before you want to eat it or make it a day or two before and just pop it into the oven when you need it. I typically serve it with tortilla chips, but I have served it with toasted bread as well! Enjoy :)
Crazy-Good Spinach-Artichoke Dip
For the Spinach-Artichoke Dip:
2 10oz Boxes of Frozen Spinach, Chopped & Strained of Liquid
1T Unsalted Butter
2T Onion, Minced
2 Cloves of Garlic, Minced
1T AP Flour
1t Garlic Salt
1t Chili Powder
¼t Cayenne
Salt & Pepper, To Taste
1 ¼C Whole Milk
1t Lemon Juice
1t Worcestershire
1 ¼C Parmesan Cheese, Grated
¼C Sour Cream
¼C Mayo
1 8oz Block of Cream Cheese, Softened
8oz Sharp White Cheddar Cheese, Shredded
1 14oz Can of Artichoke Hearts, Squeezed Dry & Roughly Chopped (I used a little more)
1C Mozzarella Cheese, Shredded

Directions:
1. Preheat the oven to 350 degrees and butter a baking dish, and set it aside.   
2. For the Spinach Artichoke Dip: Melt the butter in a large saucepan over medium heat. Add the onion, garlic, and salt. Cook until the onion is soft, about 2 minutes. Add the flour & seasonings, and cook, stirring, until lightly toasted, about 1 minute. Whisk in the milk and cook, whisking constantly, until thickened, about 1 minute. Remove from heat and stir in the lemon juice, Worcestershire, and 1C Parmesan until blended. And then return the pot to medium heat and add the spinach and cheddar until the cheese melts and the dip is heated through. In a mixing bowl, beat together the sour cream, mayo, artichokes, and cream cheese until well combined. Once combined, mix in the warm spinach mixture into the blended cream cheese mixture.   
3. Once combined, add the spinach dip into a buttered baking dish and cover the top with the shredded mozzarella cheese and the remaining Parmesan cheese, and then cover with tin foil. Bake in the oven for 30 minutes, remove the foil, and then bake for another 10 minutes or until the top is golden brown and bubbly (I like to broil mine a little to get that extra golden topping).
4. Serve immediately with chips or toasted bread.