Showing posts with label Alabama Favorites. Show all posts

Saturday, September 26, 2015

Saturday Down South: University of Alabama-Inspired Houndstooth Pudding Trifle with Homemade Red Velvet Pudding, Cream Cheese Whipped Cream, Crushed Double Stuffed Oreos, + Red Velvet Cake Sprinkles

The Haute + Heirloom blogger has returned, yay!! I know I have been gone for-like-ever and I apologize for that, but I have been extremely busy and my personal life is in shambles. I hate that I haven't posted some of my new recipes, but I'm back, and the recipes are even BETTER. It's a 100% guarantee, mmk? As many of my followers know, we are huge football fans. Obviously, Alabama comes in first in the ranking, and just behind them comes University of Georgia + the Atlanta Falcons. So if you're a Georgia gal like me, this dessert is perfect for all three teams and all of your buddies will love you for making a pan of this trifle during the long day of tailgatin'. Trust me on that one. My usual go-to dessert had always been my Gourmet Banana Pudding, but I wanted something festive to celebrate with... and this is certainly festive. If you didn't know already, Alabama's team colors are crimson + white, but the school has incorporated the pattern of houndstooth into the scheme as well. The tradition of houndstooth comes from the greatest college football coach of all time, Bear Bryant. He wore a houndstooth hat to every single game, and well, it caught on like wildfire. Now it's almost impossible to not see someone with houndstooth on during the game day. So, when I first started concocting this dish in my head, it became clear to me that I wanted the same idea that I use for banana pudding. Instead of creamy vanilla bean pudding, there is a luscious + homemade red velvet pudding. You have to know by now that my obsession with "red velvet desserts"is quite unhealthy and I tend to go overboard, but hey who's counting anyway. Next, I used crushed up Double Stuffed Oreos rather than the homemade shortbread because I needed the contrast of the black + white cookies to represent the houndstooth concept. And hell, who doesn't like Oreos... I sure do!! What's even better about them is that if you let the pudding trifle sit in the refrigerator for 1-4 hours (or overnight if you need to) like we did, the cookies begin to soften to the texture of the Oreos in cookies + cream ice cream. They literally, like, melt in your mouth. Lastly, you have to make the "frosting" type whipped cream layer. It has the tang of a cream cheese frosting (which is what all red velvet cakes must have), the sweetness from the sweetened condensed milk, the delightful cloud-like fluff from the Cool Whip, oh and don't forget that vanilla bean that is added in because that is so much better than vanilla extract. One fun ingredient I found for this dessert are some of Betty Crocker's yummy Red Velvet Cake Sprinkles. And let's be honest, sprinkles make every dessert so much better, it's a scientific fact. To be frank, these are double the fun because they are sprinkles that taste like cake.... woah, woah, WOAH. Mind Blown. These Red Velvet Cake Sprinkles also give the dish a little crunch with each bite. Textures galore here, folks!! I hope y'all enjoy this pudding trifle as much as we did because it's already on our tailgate menu for the Alabama-LSU game in Tuscaloosa in November. So go on, start cookin' it :)
the beginning of making the homemade red velvet pudding
assembling like a beast
check out those layers, guys
The Close Up: Amazing Betty Crocker Red Velvet Cake Sprinkles
And the best shot of them all... a perfect spoonful of every glorious layer :)
For the Classic Pudding Mix:
½C Cornstarch
¼C Buttermilk or Milk Powder (I used buttermilk since it’s a key component in red velvet cake)
1C Cake Flour (AP Flour can be substituted if you don’t have it)
1 ½C Sugar
1t Kosher Salt  

For the Homemade Red Velvet Pudding:
3C Whole Milk, Divided
¾C Classic Pudding Mix (above; you will have leftover mix, but now you can make more of it)
5T Cocoa Powder, Sifted
Generous Pinch of Salt
¼C Sugar
2 Eggs
1T White Vinegar
2T Salted Butter
2t Vanilla Extract
1T Cream Cheese Emulsion
Red Food Coloring (use as much as you want until you reach your desired red color)

For the Cream Cheese Whipped Cream:
8oz Cream Cheese, Softened
1 Can of Sweetened, Condensed Milk
1T Cream Cheese Emulsion
¼C Heavy Whipping Cream
16oz Cool Whip, Defrosted
1 Vanilla Bean, Split + Scraped for Seeds (if you don’t have vanilla bean, sub in 2t vanilla extract)
Generous Pinch of Salt  (or to taste)

For the Houndstooth Trifle:
Prepared Homemade Red Velvet Pudding, Completely Chilled
Prepared Cream Cheese Whipped Cream, Completely Chilled
1 Box of Double Stuffed Oreos, Crushed into Bite Size Pieces
1 Container of Betty Crocker Red Velvet Cake Sprinkles (chocolate sprinkles can be subbed in)

Directions:
1. For the Classic Pudding Mix: Combine the cornstarch, flour, buttermilk powder, sugar, and salt. Whisk the mixture until it is a cohesive mixture is formed. Set this pudding mix aside. If you have any remaining pudding mix left, store it in an airtight container.
2. For the Homemade Red Velvet Pudding: Pour 2 ½C of whole milk into a medium sized saucepan or pot. Turn on the stove to low heat and allow the milk to get hot (with some slight steaming), but make sure the milk does not start boiling! While the milk is heating, get another mixing bowl and whisk together the pudding mix, sifted cocoa powder, sugar, 2 eggs, a generous pinch of salt, white distilled vinegar, and the remaining ½C of whole milk. While whisking, make sure it is a smooth, creamy, chocolate liquid. Once the milk is hot, add in the chocolate liquid to the hot milk and whisk vigorously (so that the eggs won’t cook and curdle). Then add in the salted butter, vanilla extract, cream cheese emulsion, and red dye. Increase the heat to medium or medium-low while whisking continuously because the pudding could easily burn. Cook and whisk until the pudding mixture starts to thicken, this usually takes about 8-12 minutes, depending on the thickness that you prefer. During the cooking period, make sure to taste test it to see if it needs more salt or vanilla (do it to taste) When it has reached your desired consistency, turn off the heat and remove the pan from the burner. It will continue to thicken a little more as it cools and sits. Press a piece of plastic wrap onto the top of the pudding; this will help the pudding to remain smooth and also prevents it from developing a “skin” on top.  Cool the pudding until it is completely chilled and store in the refrigerator until you need to use it.
3. For the Cream Cheese Whipped Cream: Place the softened cream cheese, vanilla bean seeds, heavy whipping cream, cream cheese emulsion, and a pinch of salt into the bowl of a standing mixer with the whisk attachment. Beat the cream cheese at medium speed until it smooth and slightly whipped, about 1-2 minutes. With the mixer still on, pour in the can of sweetened, condensed milk and mix until it is a cohesive, creamy mixture (also make sure to scrape down the sides and the bottom of the bowl to get any remaining cream cheese that is stuck). This should take another 1-2 minutes. Lastly, gently fold in the defrosted (yet still cold) Cool Whip, so that it is completely incorporated, but still has a light and airy texture. Cool the refrigerator until you are ready to use it.
4. Assembling the Houndstooth Pudding Trifle: Get your favorite serving piece (preferably a glass trifle dish, so that you can see every layer) and begin the layering process. Start off with a base of crushed double stuffed Oreo cookies. Next, dollop some of the homemade red velvet pudding all over the cookies and then gently smooth it out, so that the Oreos are completely covered. Following the same method as the pudding, dollop the cream cheese whipped cream on top of the red velvet pudding and smooth the top as well. Spread some of the red velvet sprinkles evenly over the cream cheese whipped cream. Repeat the layering process of crushed cookies, red velvet pudding, cream cheese whipped cream, and red velvet sprinkles until you have run out of all of the different components. 
5. You can enjoy the pudding now, but I personally prefer to let it sit in the refrigerator, so that the pudding and whipped cream have firmed up, while the cookies are soft (think of the softened textures of Oreos in cookies + cream ice cream). You can chill it from 1-4 hours… or even overnight if you want or need to! Besides that, it’s time to chow down on your festive football dessert. And hey, it’s also great for UGA + Falcons fans as well!!

Saturday, September 21, 2013

Tailgatin' Thursday : Yellow Hammer Hunch Punch (just a few days late)

A Big 'Ole Glass of Yellow Hammer Hunch Punch on Alabama Game Day :)
So, this is a continuation of my postings of tailgatin' recipes every week for football saturday's. Even though I am a few days late, it's still a football saturday, so I think I'm A-OK. And fun fact alert: yesterday was "National Punch Day". No no no, don't go putting your dukes up just yet. It's not that kind of a punch day. And to be honest, let's hope there never is one. We are here to celebrate the kind of punch that has a little kick of booze. By booze, you know I mean a'whole'heck of it. Like many, many bottles to be exact. While at the University of Alabama, I enjoyed this cocktail every game day weekend. Most of the time at the bars on the strip, often on the Quad tailgating, but I had never made it myself without the assistance of others. The drink became famous from the bar, Gallette's. It is always served in a yellow cup with a splash of grenadine and a cherry to top it off. The exact recipe for hunch punch is a complete secret, but I definitely know there is orange juice, pineapple, and banana flavoring. What are alcohols are in this concoction, you may ask. Well, the cast of characters are the following: Bacardi 151, Everclear, Malibu Black Rum, Creme de Banana Liqueur, and Gin. Don't get it twisted y'all, you're gonna get slamdamnhammered off of these. Yes, slamdamnhammered is a technical term. Proven Fact. Now when you make this stuff, you're going to have to tinker it a bit and taste as you go. A little more simple syrup... a touch more banana liqueur... maybe some cold water/cold pineapple juice to dilute it a tad. Just let go and make it until it tastes good. But, I will say that I tend to make it slightly stronger than I would actually like because once you let it marinate + meld overnight, it certainly mellows a bit. Also, when you make it the next day, it will be sweetened with grenadine, crushed ice, sprite, and a cherry. This stuff goes super quickly, but don't you worry, there is a whole BUNCH of it!! Enjoy and Roll Tide :)
Making the Hunch Punch the night before in a big water cooler 
ALWAYS be careful with the punch... baby seat + belt not included in the recipe.
For the Hunch Punch:
1 Gallon of Fresh Squeezed Orange Juice
2 of the 59oz Dole Pineapple-Orange-Banana Juices
2C Pineapple Juice
1L of Rose’s Sweet & Sour Mix
1-2C Simple Syrup, Depending on How Sweet You Like It (I used homemade vanilla bean)
750mL Bacardi 151 Proof
750mL Everclear Grain Alcohol
1.75L Malibu Black Rum
1-2C Crème de Banana Liqueur, depending on Your Banana Preference (Dekuyper brand)
1C Gin (of your choice)
Cold Water or Cold Pineapple Juice, optional (to dilute the mixture if it is too strong)

For Serving:
Crushed Ice
Generous Gulp of Grenadine Syrup
Splash of Sprite, For Topping
Maraschino Cherries, For Garnishing

Directions:
1. To Make the Hunch Punch: Pour everything into a large jug (we had to use a water cooler because it makes so many gallons). Taste the first batch and determine whether you need to add more simple syrup, banana liqueur, and cold water/cold pineapple juice (if needed). Stir to combine and mix thoroughly. Once you have reached your desired taste, refrigerate overnight. I tent to air on the side of caution and make it stronger than you would typically like because once the flavors meld overnight, it will mellow out a lot. Also, when you make a glass of the hunch punch, it will be diluted with crushed ice, grenadine, and sprite to sweeten it as well.
2.  To Make a Glass: Get a clear plastic cup and pour in a generous glug of grenadine syrup (the more, the sweeter), and then top it with a big ‘ole handful of crushed ice. Gently pour/ladle/drizzle the liquid slowly into the glass almost to the top of the glass. This will make a “sunset effect” in the glass. Finish the drink with a splash of sprite and a cherry! Enjoy all day long :) 

Sunday, November 4, 2012

The Ultimate Fried Chicken Biscuit with a Homemade Black Pepper-Buttermilk Biscuit, Spicy Fried Chicken Breast, Smoked Cheddar Cheese, Red Eye Glazed Bacon, & a Fried Egg

The Ultimate Fried Chicken Biscuit with a Homemade Black Pepper-Buttermilk Biscuit,
Spicy Fried Chicken Breast, Smoked Cheddar Cheese, Red Eye Glazed Bacon & a Fried Egg
Way back from my days at the University of Alabama, my Mountain Man & I would always make a mammoth breakfast sandwich right as we woke up. This kept us full until lunchtime tailgate food and it also became a superstitious tradition that had to be repeated every game day Saturday. Well, back then, it was all store-bought ingredients, but dang, it was still pretty darn tasty. I finally got around to revamping that boring 'ole lucky breakfast sandwich into something even greater. The bagel changed into a Homemade Black Pepper-Buttermilk Biscuit that is perfectly flaky and buttery. I added a fried egg, so that the runny yolk would add some richness and moisture. Then, I made a spicy battered chicken breast, very similar to Chickfila, so it gives a a yummy spiciness to burn the tongue a bit. I wasn't quite sure what cheese would complement all these flavors, but I eventually picked a smoked cheddar because I thought it would balance these strong components and bring them all together. But what's the best part, you ask? Well, it's the Red Eye Glazed Bacon. I know some of y'al might not know of Southern Red Eye Gravy, but it's delicious and certainly a staple at breakfast down here in the South. So, I thought to myself, "why not reduce down some red eye gravy and turn it into a glaze?" Well, I did and it was awesome. I first cooked up the thick cut bacon until crispy, and then used a brush to cover the bacon slices all over. They became sticky-icky, sweet yet salty, but candied in nature. And what's not good about candied bacon? I declare that candied bacon should be on each + every dish in America. Okay, that's slightly extreme, but I'd probably do it in my household... that's for sure!! Well, I hope y'all enjoy this Ultimate Fried Chicken Biscuit because we sure did :)
Runny Fried Egg
Lots of Red Eye Glazed Bacon
There's everything just slightly peaking out...
Ahhh, the first bite is so good

Homemade Black Pepper-Buttermilk Biscuits:
2 ½C AP Flour
½T + ¼t Baking Powder
2t Salt
4T Butter, Cut into Cubes & Chilled
½C + 6T Chilled Buttermilk (you might need a little more depending on the texture)
Extra Butter, Melted (for brushing)
Fresh Cracked Pepper, For Garnishing

For the Spicy Fried Chicken:
4 Chicken Cutlets (season them with paprika, cayenne, chili powder, & Cajun spices)
1 Egg
½C Milk
1T Hot Sauce
¾C AP Flour
¼C WW Flour
1T Dry Milk
1T Powdered Sugar
1t Paprika
¼t Baking Soda & Dry Mustard

For the Red Eye Glazed Bacon:
8 Slices of Thick Cut Applewood Smoked Bacon
½C Coffee
¼C Coca Cola & Beef Broth
1T Honey
Salt & Pepper (if needed)
Splash of Water (if needed because the flavor might be too strong for some people)
 
For the Ultimate Fried Chicken Biscuits:
Prepared Homemade Buttermilk Biscuits, Warm
Spicy Fried Chicken Cutlets, Warm
Prepared Red Eye Glazed Bacon
Slices of Smoked Cheddar Cheese
Fried Eggs (or they can be cooked any way you like, scrambled eggs would be great too)

Directions:
1. For the Homemade Buttermilk Biscuits: Preheat oven to 500 degrees F. Put the flour, baking powder and salt in a mixing bowl. Whisk well to combine. Add the cold butter and, working quickly, coat in flour, and then using a pastry cutter, cut in the butter until it is coarsely blended and the flour-butter mixture resembles pea-sized crumbs, but small pieces of butter still remain. Make a well in the flour mixture and pour in the buttermilk. Stir quickly, just until the dough is blended and begins to mass. The dough should be soft and a bit sticky and there should not be large amounts of unincorporated flour in the bowl. If dough is too dry, add a few tablespoons more buttermilk. Turn dough immediately onto a generously floured surface, and with floured hands knead briskly 8 to 10 times until cohesive dough is formed. Gently flatten the dough with your hands so it is of an even thickness. Then, using a floured rolling pin, roll it out to a uniform thickness. With a dinner fork dipped in flour, pierce the dough completely through at 1/2-inch intervals. Lightly flour a large biscuit cutter and stamp out rounds. (Do not twist the cutter when stamping out biscuits.) Cut the biscuits from the dough as close together as you can for a maximum yield. Arrange cut biscuits on a heavy, ungreased or parchment-lined baking sheet so that they almost touch (I throw away the scrapes and don’t re-roll them because they become tough in texture). Brush the biscuits with melted butter and sprinkle heavily with fresh cracked pepper. Bake in upper third of the oven for 8 to 12 minutes until crusty golden brown. (Check about 6 minutes into baking and rotate pan if needed to ensure even cooking.) Remove from the oven and brush with more melted butter. Serve hot.
2. For the Spicy Fried Chicken: Place each cutlet between plastic wrap and pound until they are about ¼inch thick. Season the chicken heavily with spicy seasonings (you can make them as spicy as you like). Next, you have to set up a battering station. I use 2 pie tins. For the first station, I whisk together the eggs, milk, and hot sauce. For the second station, I mix the AP & WW Flours, dry milk, powdered sugar, baking soda, dry mustard, paprika, salt, and pepper. Meanwhile, heat about two inches of peanut oil to 325 degrees in a skillet. Working in batches, dip the chicken into the egg mixture, turning to coat, then dredge in the flour mixture, making sure to shake off any excess flour. Fry the chicken in the hot oil until golden brown and crispy, about 4-5 minutes. Drain on paper towels and sprinkle with salt.
3. For the Red Eye Glazed Bacon: In a saucepan, heat the coffee, cola, and honey on medium high until the mixture simmers. Reduce the heat just enough to maintain a simmer. Cook this mixture for 30 minutes or until it is a thick syrup (add a splash of water or seasonings if needed). Pour into a jar and let it cool completely (to plain taste, this might not be the most amazing glaze, but when brushed on bacon, it really brings it over the top, just trust me on this one). Cook the bacon in a skillet until golden brown & crispy. Transfer the bacon to a paper towel lined plate and let them drain of excess oil. Repeat with any extra bacon slices. Once the bacon is cool enough to touch, remove the paper towels, and brush heavily with the red eye gravy glaze (on all slides). It is important to make sure they are completely glazed. Next, immediately layer onto the biscuits.
4. Assembling the Biscuits: Cut a buttermilk biscuit in half and top the bottom biscuit slice with a piece of spicy fried chicken, smoked cheddar cheese slice, red eye glazed bacon, and a fried egg. Enjoy immediately while still hot.

Saturday, November 3, 2012

Tuscaloosa Tollhouse Whiskey Pie with Vanilla Bean Pâte Brisée & Homemade Vanilla Bean Ice Cream

Tuscaloosa Tollhouse Whiskey Pie
It's gameday yet again, folks. The best day of the week. I normally focus on dips, wings, fried food, burgers, dogs, etc. But, you always gotta have a dessert, and this is a go-to classic in T-Town. When you're walking through the Quad, almost every table or tent has one of these pies. It's a mix between a pecan pie and a chocolate chip cookie, but even better, it has whiskey in it. Oh take me home to Sweet Home Alabama, y'all because booze should belong in anything + everything. This pie I made is adapted from the guys at Baked Bakery in NYC (one of the guys actually went to the University of Alabama). Well, one tablespoon of whiskey just wasn't gonna do it for me, so I bumped it up to a fourth cup, ha. And lemme tell you, it tastes oh-so-good. I also substituted roasted, chopped pecans for walnuts... simply for the fact that I like them better. And for good measure, I practically doubled the chocolate chips in the recipe because everything is better with more chocolate, duh. You gotta bake this baby a pretty good while, so you just need to keep checking it until a toothpick of knife comes out clean. But, I will say this, do NOT over bake it. I like mine a little gooey, so I like to make sure it's slightly underdone, so as it sets it will remain luscious and soft. This pie is good at room temperature, chilled, or even better if it has been nuked in the microwave until the chocolate re-melts and it gets all gooey again. I also decided to make my own homemade vanilla bean ice cream and it just brought it over the top. I really fell in love with my recipe for this ice cream. I plan on using it in many of my recipes in the future. It is just like an uber vanilla ice cream (I think if I ever have an ice cream line, that would have to be it's name because of its overwhelmingly amazing vanilla flavor). So y'all, go make this for your next tailgate, or heck, it wouldn't be too shabby for Thanksgiving either. Now, let's hope that my Bama Boys can pull out a big win against LSU tonight. ROLL TIDE ROLL!! Enjoy :)


For the Vanilla Bean Pâte Brisée (makes 3 pie crusts):
3 ¾C AP Flour (plus extra for rolling)
3 Sticks of butter, Cut into ½inch Cubes & Chilled
1 ½t Salt
1T+1 ½t Sugar
12-18T Ice Water, Very Cold
3 Vanilla Beans, Sliced & Scraped for Beans

For the Tuscaloosa Tollhouse Whiskey Pie:
¾C AP Flour
1T Cornstarch
½C Sugar
½C Brown Sugar
2 Eggs, Room Temperature
1 ½ Sticks Unsalted Butter, Cut into Pieces & Softened
1t Vanilla
¼C Jack Daniels Whiskey
1C Pecans, Roasted & Finely Chopped
2C Chocolate Chunks (I prefer Bittersweet or Semisweet)
¼t Vanilla Bean Fleur de Sel

For the Homemade Vanilla Bean Ice Cream:
1 Stick Unsalted Butter, Melted & Cooled Slightly
2 ½C Heavy Cream
½C Whole Milk
6 Egg Yolks
1C Sugar
½t Salt
1t Vanilla
2T Vanilla Bean Infused Rum (or any kind of infused booze that is clear)
1-2 Whole Vanilla Beans, Split & Scraped for Seeds 

Directions:
1. Preheat the oven to 350 degrees and spray a pie dish with Pam and set it aside.
2. To Make the Vanilla Bean Pâte Brisée: Start by cutting the sticks of butter into ½inch cubes and placing in the freezer bag, along with the flour, salt, and sugar. Place the bag of flour into the freezer and chill for at least 1-2 hours. In a food processor, pour the frozen flour bag in, as well as the scraped vanilla beans, and pulse 6-8 times until the mixture resembles a course meal, with pea size pieces of butter. Add water 1T at a time, pulsing until the mixture just begins to clump together. If you pinch of some of the crumbly dough and it holds together then it’s ready. Remove the dough from the machine and place on a clean surface. Carefully split the dough into three even pieces and shape into discs. Do not over knead the dough. You should still be able to see little bits of butter in the dough. Sprinkle the discs with a little flour on all sides and wrap it in plastic wrap and refrigerate one of the dough discs for at least 2-3 hours (freeze the other two dough discs for another pie in the future).
3. Preparing the Pie Crust: Remove the disc from the refrigerator and let it sit at room temperature for 5-10 minutes. Sprinkle some flour on top of the disk. Roll out with a rolling pin on a lightly floured surface to a 12inch circle (roughly ¼ inch thick). Place the rolled out disc into the prepared pie dish, lining up the fold with the center of the pan, trimming the excess and crimping the edges. Cover with plastic wrap and freeze for 2-3 hours.
4. For the Homemade Vanilla Bean Ice Cream: In a saucepan, bring the cream, milk, vanilla bean pods, and vanilla bean seeds to a simmer. In a bowl, whisk together the egg yolks, sugar, and salt until fluffy. Slowly whisk in the melted butter. Once combined, gradually and slowly into the simmering milk. Pour this mixture back into the saucepan and cook over low heat, until thickened (it should coat the back of a spoon). Strain the custard into a bowl that is placed into an ice bath. Stir in the vanilla bean infused rum and vanilla. Cool the custard base until completely chilled. Once the mixture is chilled, freeze in an ice cream maker according to the manufacturer’s instructions. As soon as the mixture is done churning, transfer to a bowl or airtight container. Store in the freezer until firm.
5. For the Tollhouse Whiskey Pie Filling: In a medium bowl, whisk the flour and sugars together. Set aside. In a bowl of an electric mixer, fitted with the whisk attachment, beat the eggs until foamy on high, about 3 minutes. Replace the whisk attachment with the paddle attachment, and with the mixer on low, a little at a time add the flour mixture. Turn the mixer on high and beat for 2 minutes or until everything is mixed together well. Scrape down the sides of the bowl and add the butter. Beat on high until everything is combined. Scrape once more, being sure to get to the bottom, and add in all the whiskey. Beat on high again for 1 minute until all the ingredients are incorporated. Remove the bowl from the mixer and fold in the chopped pecans and the chocolate chunks (but save some for sprinkling over the top).
6. Pour the filling into the frozen pie shell and spread evenly. It will be pretty thick, so be gentle. Top the pie with a sprinkling of some more chocolate chunks.
7. Bake for 30 minutes, then cover the edges of the crust loosely with aluminum foil and continue to back for 30-45 minutes, or until a knife inserted into the center comes out clean. If there are clumps of batter sticking to the knife, it is not done yet. So, return it to the oven and continue cooking (while occasionally checking) until a knife comes out clean (but, I still like to have my pie a little gooey, so I don’t like to overcook it). My pie took about an hour to an hour and a half. Transfer the baked pie to a wire rack to cool before serving.
8. Once cooled, serve a slice of the pie with a big scoop of homemade vanilla bean ice cream. It is also even better when you reheat the pie in the microwave and the chocolate melts again.

Saturday, October 27, 2012

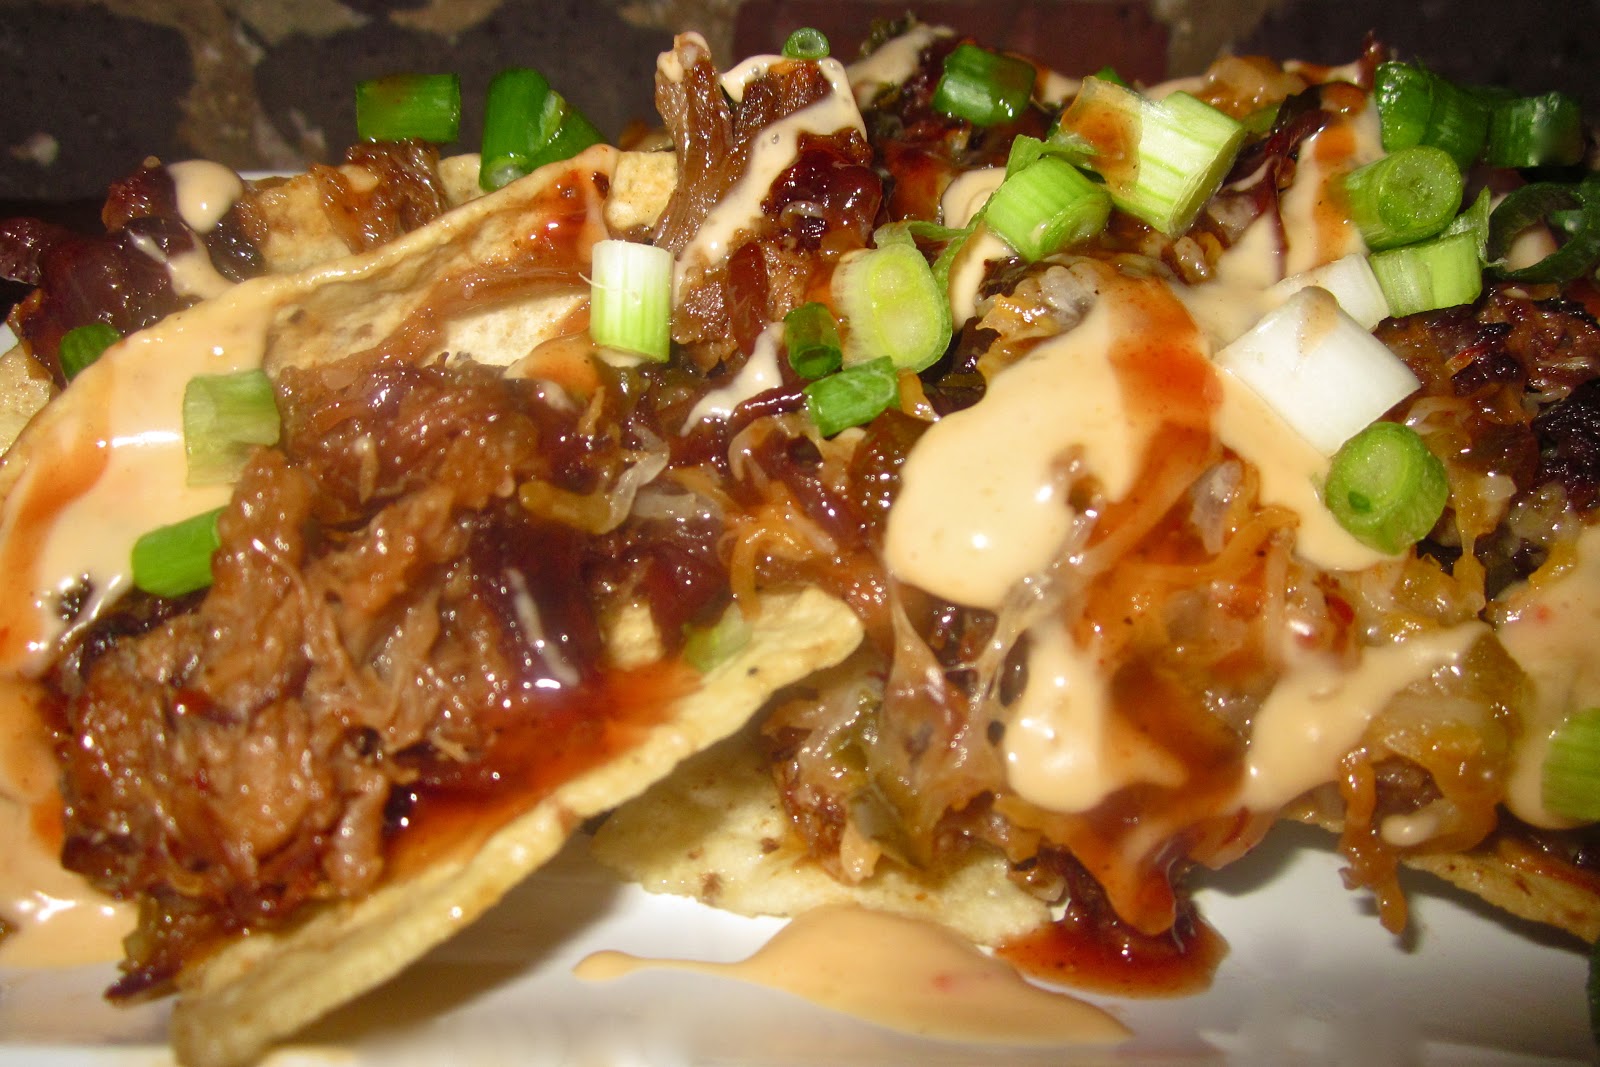
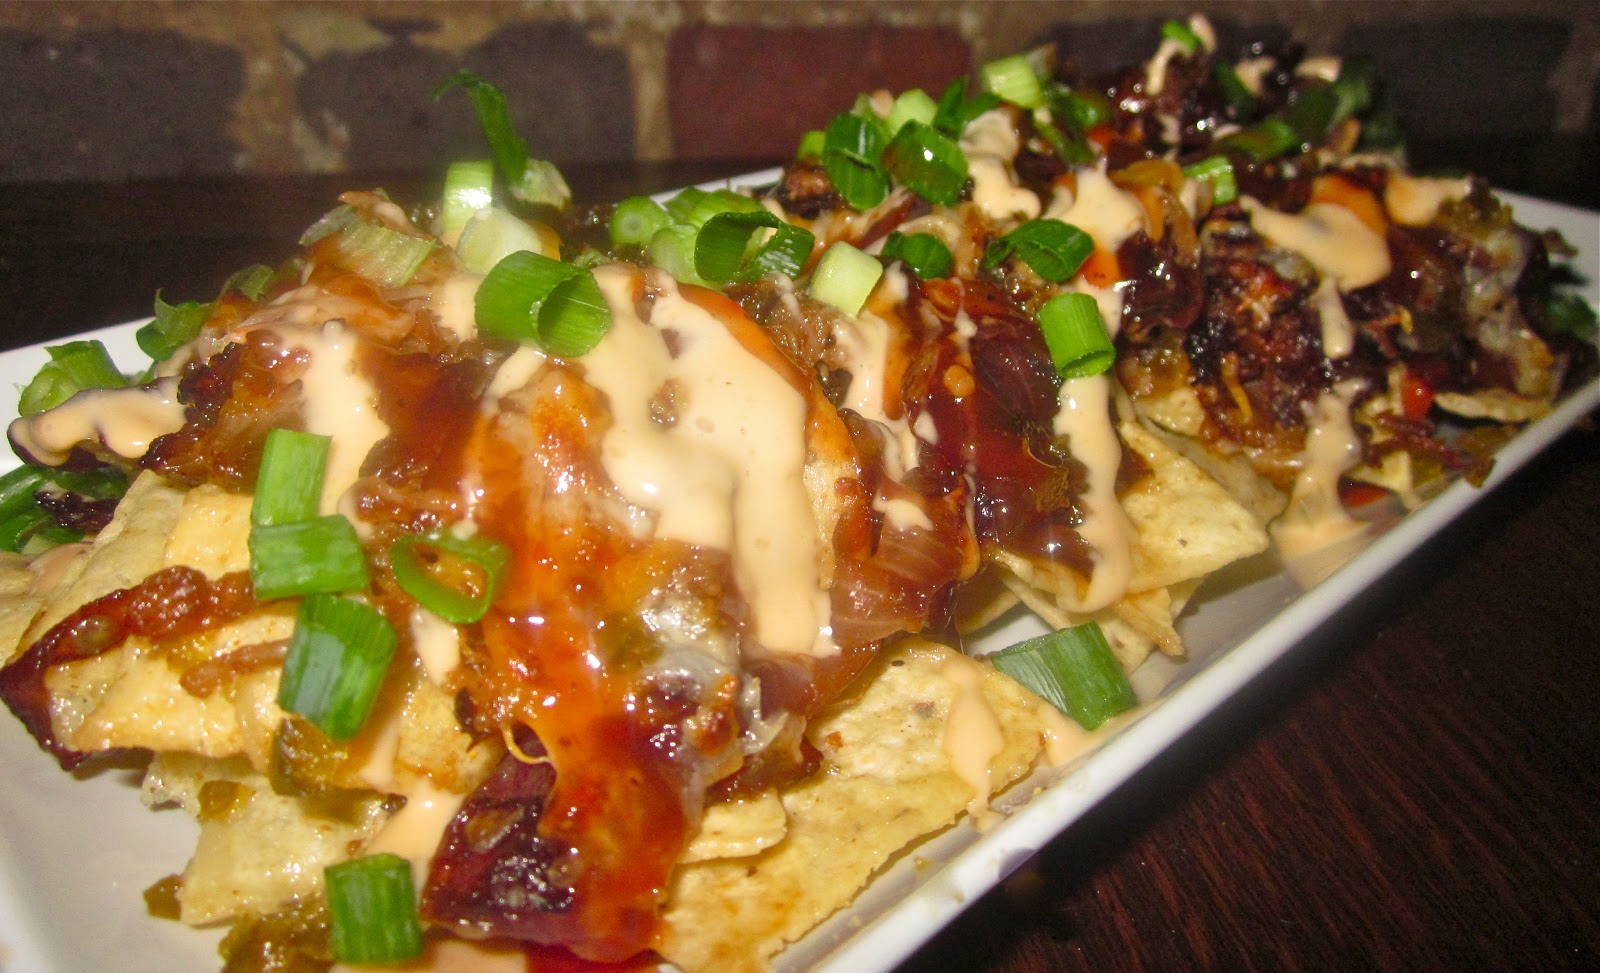
Title Town's Famous BBQ Nachos with Pulled Pork, Pan Fried Red Onions, Candied Jalapenos, Pimento Cheese-Beer Nacho Cheese Sauce, & Green Onions

Title Town's Famous BBQ Nachos with Pulled Pork, Pan Fried Red Onions,
Candied Jalapenos, Pimento Cheese-Beer Nacho Cheese Sauce, & Green Onions
Have y'all missed me?? I know, I know... I've been gone for like two weeks. I'm like deathly ill and I've actually been in the hospital since Monday, but I have had a fever above 102 since October 14th. Crazy, right? So, forgive me, I have not been in the posting mood. But, I'm trying to get back into the swing of things and what's better than my favorite, tailgatin' recipes. And these hit home for me. Every game day in Tuscaloosa involved tailgating on the quad, partying with friends, and then ending the night with a night out on the Strip at the bars. Well, at one of our favorite hangouts, there was a small BBQ stand that made the best BBQ nachos. Can you think of anything else that would be better than nachos after a long day? Nope. So, I knew that I would eventually make my own version, kicked up just a bit. Big Bad Wolves' Nachos were pretty simple... chips, pulled pork, nacho cheese sauce, and jalapenos. Well, mine are loaded with pulled pork, BBQ sauce, pan fried red onions, candied jalapenos,  green onions, and a homemade Pimento Cheese-Beer Nacho Cheese Sauce. These are so good y'all and just perfect for game day. I mean, it's a rule that you gotta have these while visiting T-Town (or Title Town) as we call it. Now, let's hope that the good 'ole Crimson Tide will pull out a win for us tonight because I sure need one to make me feel better. I hope y'all are all doing great and I promise I won't disappear for that long again!! Enjoy :)


For the Pan Fried Red Onions:
2 Medium Red Onions, Sliced
4T Unsalted Butter
¼C Vegetable Oil
Salt & Pepper, To Taste
  
For the Pimento Cheese-Beer Nacho Cheese Sauce:
12oz Beer
1C Sharp Yellow Cheddar Cheese, Shredded
½C Pepperjack Cheese, Shredded
½C Colby Jack Cheese, Shredded
1T AP Flour
8oz Cream Cheese, Room Temperature
1 Clove of Garlic, Minced
4oz Pimentos, Drained & Diced
Salt & Pepper, To Taste

For the BBQ Nachos:
Tortilla Chips
Pulled Pork, Warmed & Tossed in BBQ Sauce
Your Favorite BBQ Sauce, For Drizzling
Shredded Pepperjack Cheese, For Topping
Prepared Pan Fried Red Onions
Prepared Pimento Cheese-Beer Nacho Cheese Sauce, Warm
Candied Jalapenos, For Garnishing
Minced Green Onions, For Garnishing
Sour Cream (optional)

Directions:
1. For the Pan Fried Red Onions: Cut the onions in half and then slice them into thin half-rounds. Heat the butter and oil in a large sauté pan over medium heat. Add the onions, salt, and pepper and sauté for 10 minutes. Reduce the heat to medium-low and cook, stirring occasionally, for 20 more minutes until the onions are browned and caramelized. Allow the onions to cool.
2. For the Pimento Cheese-Beer Nacho Cheese Sauce: Add the beer to a saucepan over medium heat and bring it to a boil. While you are waiting, toss the shredded cheese with the flour. Once the beer is simmering, whisk in the cheese and all of the remaining ingredients. Whisk until all the cheese has melted and you have a smooth, creamy sauce. Keep warm until ready to serve.
3. For the BBQ Nachos: Preheat the oven to 400 degrees and line a baking sheet with tin foil and spray with Pam. Pour tortilla chips onto the prepared pan and top with the shredded cheese and BBQ pulled pork. Bake in the oven for 15-20 minutes or until the cheese is just melted and the chips have started to crisp up. Remove the chips from the oven and immediately transfer them to a serving platter. Top the nachos with the pan fried red onions, spoonfuls of nacho cheese sauce, candied jalapenos, a little more pulled pork, a drizzle of BBQ sauce, and green onions.
4. Enjoy while still warm and with a dollop of sour cream.

Wednesday, October 10, 2012

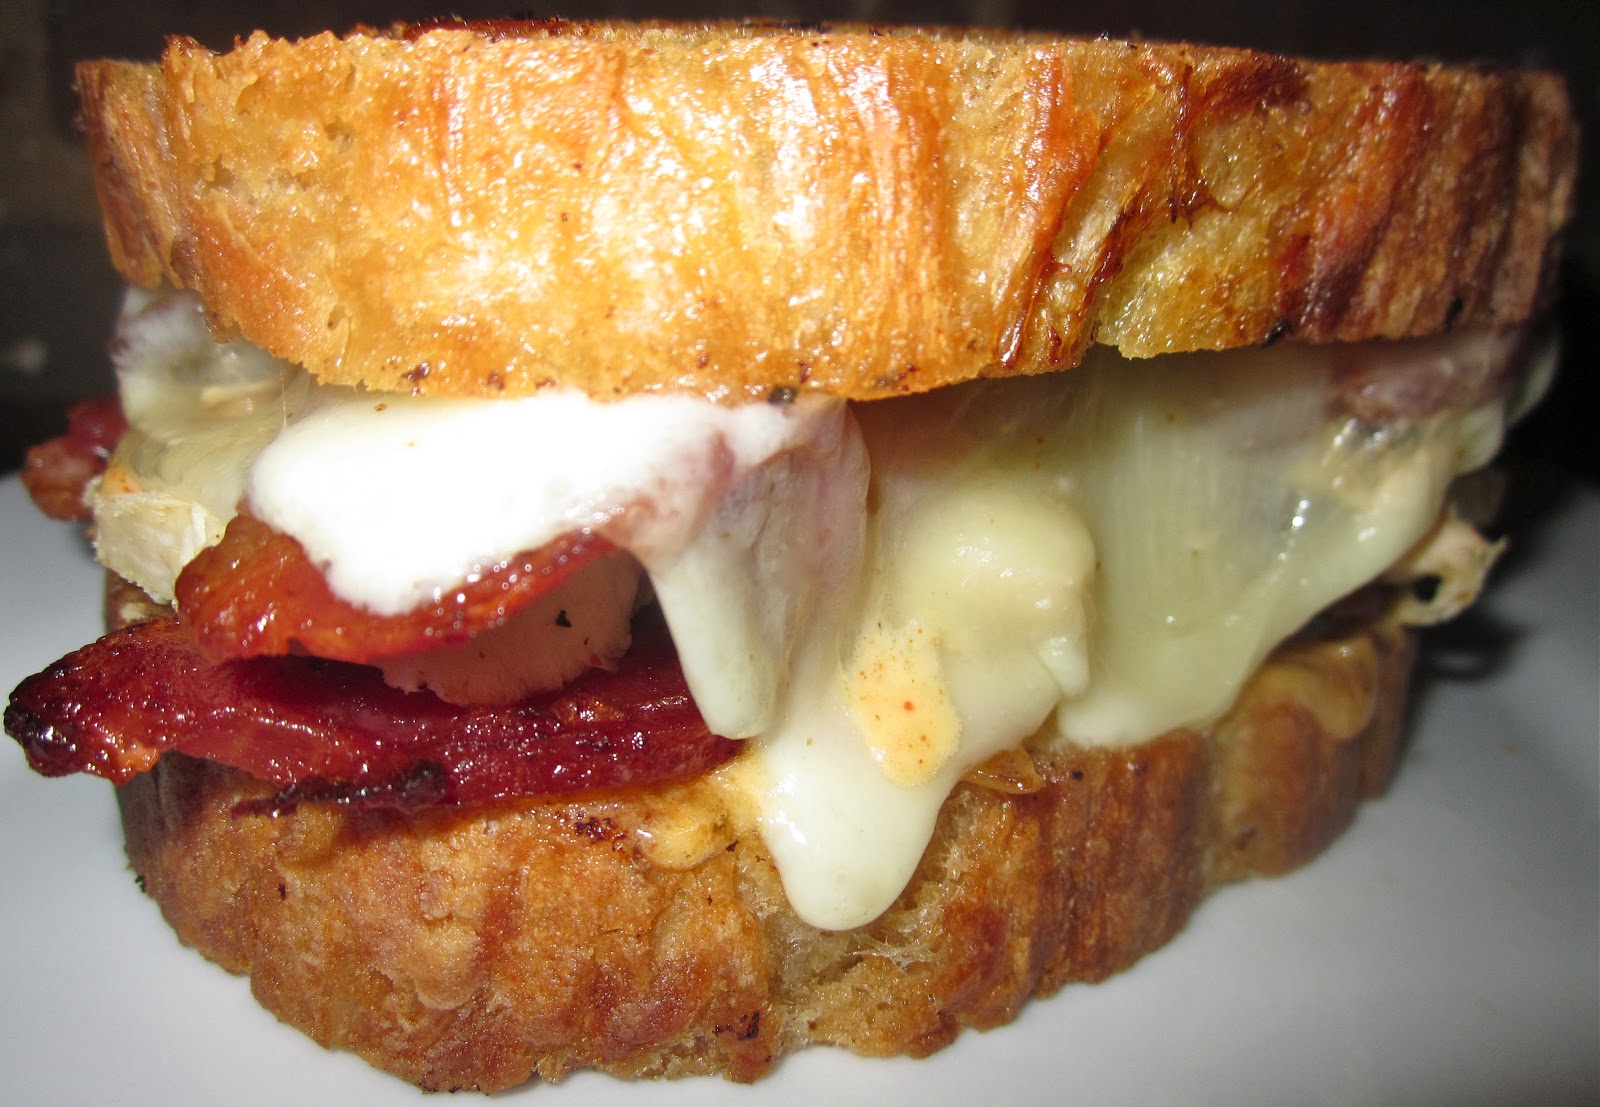
Alabama White BBQ Chicken Sandwich

Alabama White BBQ Chicken Sandwich
While I was at the University of Alabama, there were a couple restaurants that we loved. And one go-to restaurant for us was Newk's... a sandwich, salad, and pizza joint. It always had good food at affordable prices, which is a plus for college students. My favorite sandwich was the Newk's Q. This consisted of roasted chicken, crispy bacon, smoked provolone, and a classic Alabama White BBQ Sauce. It always hit the spot, especially after a night of drinking. Have y'all ever been to Newk's? And did you love it as much as we did? This would be one great sandwich for tailgating or a day of watching football!! Enjoy :)

For the Sandwich:
4 Slices of French Country Bread, Fried in Bacon Fat
Leftover Dry-Rubbed Beer Can Chicken, Sliced & Warmed
Homemade Alabama White BBQ Sauce
8 Slices of Applewood Smoked Bacon, Cooked until Crispy
4 Slices of Smoked Provolone Cheese
Red Onions, Sliced & Caramelized

Directions:
1. Fry the pieces of bread in leftover bacon fat until golden brown and crispy. Keep warm.
2. Spread some Alabama White BBQ Sauce on both slices of bread, and then top one slice of bread with a slice of smoked provolone cheese, warmed Dry-Rubbed Beer Can Chicken, crispy bacon slices, caramelized red onions, an extra drizzle of sauce, and one last slice of cheese. Stack the sandwich together and either finish cooking in a sauté pan or in the oven until the cheese has melted and the sandwich is warmed through.
3. Enjoy while warm. 

Saturday, July 14, 2012

Dry-Rubbed Beer Can Chicken with Alabama White BBQ Sauce

Dry-Rubbed Beer Can Chicken with Alabama White BBQ Sauce
Have y'all ever had Beer Can Chicken? It was one of my favorite meals growing up. I think it was because of the sheer amazement and excitement that a whole chicken was stuffed with a beer can and then cooked on the grill to absolute perfection. It's almost like it is poached on the inside from the beer, but crispy & smoky from the grill. My dad was the ultimate grill-master, me? Not so much. So, I decided to try and make Beer Can Chicken in the oven. Well people, it was so good. So good that we made it the next night. And well, we don't do that a lot. First, you gotta rub the chicken down with your favorite dry rub. I'm partial to mine because it's smoky, sweet, & a little bit spicy. And it goes good on anything, especially this chicken and BBQ. Then, you shove a bunch of fresh herbs and lemon inside the chicken, which just gives it the best herby & lemony flavor. Well, after that you just pop it in the oven until it's golden brown & crispy, then cut it into pieces (or if you are disgusting like us, pick off half the meat and eat it straight). I drizzled our chicken with a classic Alabama White BBQ Sauce, which a lot of people have not heard of, but it is dear to my heart. It is a mayo based sauce, that is super vinegary & peppery, and it goes perfectly on chicken. Most people in Alabama actually marinate the chicken in the sauce and then grill 'em up... and that's super good too (so try that soon as well). We served our Dry-Rubbed Beer Can Chicken with Mexican Grilled Corn, which I'll post in a day or so!! Enjoy :)
Look at the gorgeous brown skin...
And that yummy drizzle of Alabama White BBQ Sauce... 
Here's some chicken without the sauce.
Here's the chicken right out of the oven, beer can still in baby. 
For the Dry Rub:
1T Salt
2T Brown Sugar
2t Garlic Powder
2t Onion Powder
1t Ground Cumin
1t Chili Powder
1t Black Pepper
Vegetable Oil
3-4lb Whole Chicken (sometimes referred to as a young or fryer chicken)

For the Beer Can Chicken:
Prepared Dry Rubbed Chicken
1 Can of Beer (your choice of beer)
2 Fresh Rosemary Sprigs
3 Fresh Thyme Sprigs
Handful of Fresh Parsley
½ Lemon, Sliced Thinly
1 Small Vidalia Onion, Quartered
3 Garlic Cloves, Smashed

For the Alabama White BBQ Sauce:
1C Mayo
1t Dijon Mustard
¼C Apple Cider Vinegar
3 Drops of Worcestershire
1T Sugar
¼t Cayenne, Paprika, Onion Powder, & White Pepper
2t Prepared Horseradish
1 Large Clove of Garlic, Finely Minced
1T Lemon Juice
Salt & Pepper, To Taste  (I like a lot of pepper for this recipe)

Directions:
1. For the Dry Rub: Remove the chicken from the refrigerator and its packaging. Wash and dry the chicken completely. In a small bowl, combine all of the spices and seasonings to make the dry rub. Rub a little bit of vegetable oil and the seasoning mixture all over the chicken until it is completely coated and covered. Stuff the inside of the bird with the lemon, onions, garlic, and parsley. Let this marinate at room temperature for 30 minutes to an hour.
2. Preheat the oven to 350 degrees and line a roasting pan with tin foil. Set out and open a beer to allow it to get to room temperature (making sure to pour out half of the beer for your drinking pleasure). Stick the sprigs of rosemary and thyme into the beer can. Place the beer can into the center of the lined roasting pan, and then slip the chicken on top of the can, using its legs as a tripod, so it will stand up straight.
3. Cook the beer can chicken in the preheated oven for 1 hour, rotating it halfway to ensure even cooking (It’s also yummy to baste the chicken in some of the beer reduction every 20-30 minutes or so). After an hour of cooking, bump the oven heat up to 450 degrees. Cook the chicken at this high temperature for 10-15 minutes, turning the pan to make sure the chicken skin crisps and browns evenly on all sides. After the chicken skin has crisped, remove the chicken from the oven and let it rest for 10 minutes. The juices should run clear and the temperature of the thigh meat should be about 170 degrees when checked with a meat thermometer. Gently remove the hot beer can from the chicken and place onto a cutting board. Cut the chicken into pieces, brush with some more beer reduction, and serve with the Alabama White BBQ Sauce.