Showing posts with label Most Popular. Show all posts

Thursday, September 8, 2011

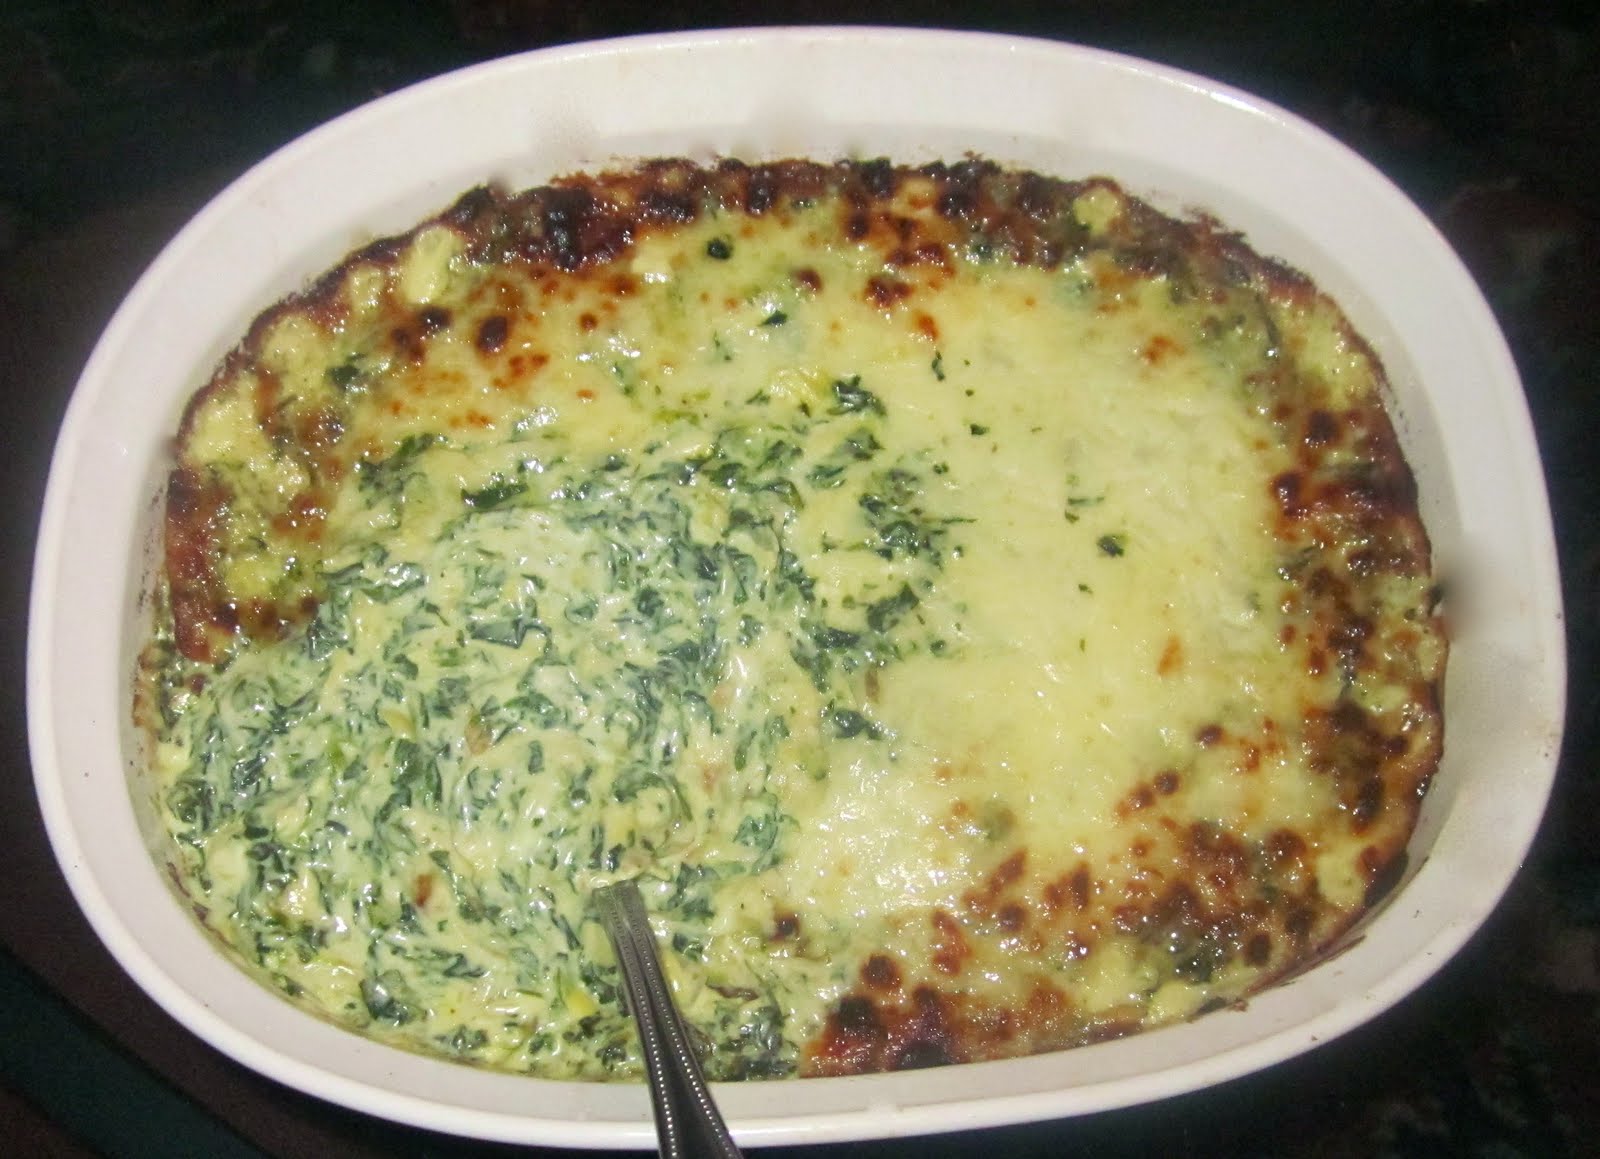
Crazy-Good Spinach-Artichoke Dip

One of my favorite appetizers has got to be Spinach-Artichoke Dip. It's just so good. Even people who don't like spinach, love spinach-artichoke dip. Well, over the years, I have had a hard time finding a recipe that I really loved. Some weren't creamy enough... some were too creamy. I wanted a complex dip, but simple enough that it was easy to make. And this recipe is a little more than just throwing everything in a bowl and mixing it together, but that's okay because the extra steps are worth it. I finally developed this recipe and have tweaked it enough that I think that it's perfect for me. I've made it a few times and I always get really good feedback. What makes my Spinach-Artichoke Dip "crazy-good" is that I make a roux and then fold it into a cream cheese-mayo-sour cream-cheese mixture (most dips don't include a roux). You can either make this dip right before you want to eat it or make it a day or two before and just pop it into the oven when you need it. I typically serve it with tortilla chips, but I have served it with toasted bread as well! Enjoy :)
Crazy-Good Spinach-Artichoke Dip
For the Spinach-Artichoke Dip:
2 10oz Boxes of Frozen Spinach, Chopped & Strained of Liquid
1T Unsalted Butter
2T Onion, Minced
2 Cloves of Garlic, Minced
1T AP Flour
1t Garlic Salt
1t Chili Powder
¼t Cayenne
Salt & Pepper, To Taste
1 ¼C Whole Milk
1t Lemon Juice
1t Worcestershire
1 ¼C Parmesan Cheese, Grated
¼C Sour Cream
¼C Mayo
1 8oz Block of Cream Cheese, Softened
8oz Sharp White Cheddar Cheese, Shredded
1 14oz Can of Artichoke Hearts, Squeezed Dry & Roughly Chopped (I used a little more)
1C Mozzarella Cheese, Shredded

Directions:
1. Preheat the oven to 350 degrees and butter a baking dish, and set it aside.   
2. For the Spinach Artichoke Dip: Melt the butter in a large saucepan over medium heat. Add the onion, garlic, and salt. Cook until the onion is soft, about 2 minutes. Add the flour & seasonings, and cook, stirring, until lightly toasted, about 1 minute. Whisk in the milk and cook, whisking constantly, until thickened, about 1 minute. Remove from heat and stir in the lemon juice, Worcestershire, and 1C Parmesan until blended. And then return the pot to medium heat and add the spinach and cheddar until the cheese melts and the dip is heated through. In a mixing bowl, beat together the sour cream, mayo, artichokes, and cream cheese until well combined. Once combined, mix in the warm spinach mixture into the blended cream cheese mixture.   
3. Once combined, add the spinach dip into a buttered baking dish and cover the top with the shredded mozzarella cheese and the remaining Parmesan cheese, and then cover with tin foil. Bake in the oven for 30 minutes, remove the foil, and then bake for another 10 minutes or until the top is golden brown and bubbly (I like to broil mine a little to get that extra golden topping).
4. Serve immediately with chips or toasted bread.     

Wednesday, September 7, 2011

Candied Bacon-Wrapped Smoked Sausages with BBQ Sauce

In the great state of Alabama, smoked sausages & BBQ sauce are a favorite combination. I had no idea how popular it was until I attended the University of Alabama, and all my friends were obsessed with it. So, I wanted to come up with a great appetizer that is easy to make on our tailgatin' days that everyone would love. And these are by far one of my most requested recipes from my friends & family. What's so funny is that is really isn't that much of a recipe. The recipe simply calls for some smoked sausage cut into bite size pieces, then wrapped in bacon, and coated with a spicy-brown sugar seasoning mix. And then all you have to do is throw them on the grill or bake them in the oven until the bacon is crispy and the brown sugar has caramelized. I personally recommend Conecuh Smoked Sausage because that is my absolute favorite, and I just love the spicy-smoky flavor. They are simply the best. I also serve the wrapped sausages with a BBQ sauce on the side, leaving it up to you friends if they want it or not. Either way, they are great just plain or dipped in the sauce. I'm tellin' you, these don't seem like much, but oh they are. They are always devoured when I make them. I hope that they will be as addicting to you as they are to us. Enjoy :)
Candied Bacon-Wrapped Smoked Sausages with BBQ Sauce
For the Sausages:
1lb Bacon
1 Package of Conecuh Smoked Sausage, Cut into Bite-Size Pieces
1C Brown Sugar
1T Cajun Seasoning
1t Paprika, Dry Mustard, & Pepper
¼t Garlic Salt, Cayenne, & Cinnamon
Your Favorite BBQ Sauce, For Serving

Directions:
1. Preheat the oven to 400 degrees and cover a baking sheet with tin foil and spray with Pam.
2. Cut the bacon into halves and wrap each strip around the sausage pieces. Place the wrapped sausages onto wooden skewers.
3. In a mixing bowl, combine the brown sugar and seasonings. Roll the bacon wrapped sausages into the sugar-seasoning mix until well coated. Arrange them onto the prepared baking sheet and sprinkle with more sugar. Bake for 30 minutes until the bacon is crisp, the sausage is warm, and the brown sugar is caramelized, and then flip the sausages over, sprinkle with more brown sugar, and bake another 15-20 minutes until the other side has caramelized as well. 
4. Serve them with your favorite BBQ sauce on the side for dipping. Enjoy!

Wednesday, July 20, 2011

Holy Crap Brookie Bars

Before I really started cooking, I could only make two things... chicken parmesan and brookies. I made brookies all the time, especially for long road trips with my soccer friends. They were pretty much a layer of brownie batter, cookie dough, and caramel. I think that's it. And I thought I was just the best baker, hah. Well times have changed and now I could probably teach a dog to make my old brookie recipe. So, I decided the other week that I would bring the brookie back, but with a vengeance. I have dubbed these new brookies as "Holy Crap Brookie Bars" because there are so many different components and layers, I couldn't possibly think of a name that encapsulated all of its loveliness. When Mountain Man actually saw these bars, he said, "Holy Crap!". So, the Holy Crap Brookie Bars were born. Let me play this out for ya... there is a layer of brownie, followed by a layer of double stuff Oreos, that is then drizzled with homemade salted caramel sauce, and then topped with cookie dough. It is then baked to golden perfection and covered with a homemade Cookies & Cream White Chocolate-Peanut Butter Mousse (you heard me correctly) and slathered with a dark chocolate ganache. Is your mouth watering yet? Mine is. These Holy Crap Brookie Bars are just flat-out-riduclous. Enjoy :)
Holy Crap Brookie Bars
Layers of Brownie, Oreo, Caramel, Cookie Dough, Peanut Butter Mousse,  & Chocolate Ganache
For the Holy Crap Brookies:
1 16.5oz Package of Nestle Toll House Mini Brownie Bite Dough
Double Stuff Oreos (as many as you want or how many you can fit in your pan)
Homemade Salted Caramel Sauce*
1 16.5oz Package of Nestle Toll House Mini Chocolate Chip Cookie Dough
Prepared Cookies & Cream White Chocolate Peanut Butter Mousse
Prepared Chocolate Ganache Topping

For the Cookies & Cream White Peanut Butter:
10 Whole Oreo Cookies
2C Creamy Peanut Butter
1C White Chocolate Chips
2T Creamy Peanut Butter

For the Cookies & Cream Peanut Butter Mousse:
1C Cookies & Cream Peanut Butter
1 8oz Block of Cream Cheese, Room Temperature
2t Vanilla
1C Powdered Sugar (or a little more to taste... if you like it sweeter or thicker)

For the Chocolate Ganache Topping:
1 ½C Semisweet Chocolate Chunks
½C Heavy Cream
1T Unsalted Butter, Softened 

Directions:
1. Preheat the oven to 350 degrees and line a 12x8-baking dish with tin foil and spray with Pam, and then set it aside.
2. To Make the Cookies & Cream Peanut Butter Filling & Mousse: Crush the Oreos into small pieces and place into a large bowl. Add the 2C of peanut butter. Place the white chocolate chips and 2T peanut butter into a double boiled and stir until melted. Add to the bowl of Oreos and peanut butter. Stir just a little so you can see swirls throughout. Once you have made the peanut butter, take 1C of the prepared peanut butter and put it into a large mixing bowl (save the remaining peanut butter for eating or another baking project), along with the cream cheese and vanilla. Beat by hand until smooth and fluffy, and then add in the powdered sugar and beat until smooth, and then place the mousse into the refrigerator to chill at least an hour (or until thick, fluffy, and cold) before spreading onto the brownies.
3. To Make the Holy Crap Brookie Bars: Press the brownie dough into the prepared pan in an even layer. Top the brownie dough with an even layer of Oreos (as many as you can), and then drizzle with some of the salted caramel sauce (to your liking). Flatten the cookie dough and lay pieces on top of the caramel, so that the cookie dough is completely covering all of the other layers.
4. Bake the brookie bars for 30-35 minutes, depending on your oven, until the cookie dough is golden brown and cooked through. Let the brookies cool completely before spreading on the mousse and chocolate Ganache.
5. To Make the Chocolate Ganache Topping: Put the chocolate chips in a heatproof bowl. In a saucepan or in a microwave-safe measuring cup, heat the cream until starts to boil. Pour the cream over the chips and let stand for a minute. Stir well to melt chips; stir in the butter. Let the Ganache cool before spreading on top of the peanut butter mousse. Spread on the cooled Ganache onto the peanut butter mousse & cooled brownies and let it set until slightly hardened.
6. Cut the brookie bars into squares and serve immediately, and keep them refrigerated.


*You can use store-bought caramel sauce or make homemade caramel sauce. I had left over salted caramel sauce and decided to use that. I really liked how the salt added some depth to the bars. You can refer to this salted caramel sauce recipe that I have used many times. 


*Check out Sweets for a Saturday for this recipe, as well as many others!!

Friday, July 15, 2011

Cap'n Crunch Crusted Strawberry-Cream Cheese Stuffed French Toast with Strawberry Sauce

I know the title is wayyyy too long. But honestly there are so many adjectives to describe this french toast. I guess because that's how ridiculous it is. I bought a loaf of buttery brioche at a french bakery here in Savannah and decided that the best thing to make with this is some french toast. And we are huge fans of breakfast over here in the household, so this adventure was definitely a go. I made a strawberry and cream cheese filling and stuffed into thick slices of brioche, soaked it in a cinnamon batter, then coated it in crushed up Cap'n Crunch and fried it in a skillet. Once they were fried to golden perfection, I spread on some more strawberry & cream cheese and poured over hot strawberry sauce. I also served it with some Zippy Praline Bacon... umm yum, it's like pecan pie on thick cut bacon (what's more southern than that?!?) Anyway, the french toast was buttery, gooey, creamy, and fruity. Just all around great things for breakfast. Well more like dessert for breakfast, but who's counting? Enjoy :)
Cap'n Crunch Crusted Strawberry-Cream Cheese Stuffed French Toast 
Yummmmm :)
Look at that melty strawberry-cream cheese filling :)

For the Strawberry & Cream Cheese Filling:
1 8oz Package of Cream Cheese, Softened
¼C Strawberry Preserves
½C Fresh Strawberries, Cut into Small Cubes
1T Sugar

For the Strawberry Syrup:
½C Maple Syrup
½C Strawberry Preserves
½C Fresh Strawberries, Cubed
 
For the French Toast:
1 Stale Golden Brioche Loaf, Cut into Thick Slices (about 2 inches)
Prepared Strawberry & Cream Cheese Filling
1C Heavy Cream
3 Eggs
2T Honey, Warmed
1t Vanilla
½t Cinnamon
½t Ground Nutmeg 
Pinch of Salt
2C Cap’n Crunch Cereal, Crushed into a Coarse Meal
1 Stick of Butter, Cut into Tabs
Confectioners’ Sugar, For Dusting
Prepared Strawberry Syrup
Fresh Strawberries, For Garnishing

Directions:
1. The Day Before: Slice the golden brioche loaf into thick slices, about 2 inches thick. Put these slices on a pan and let them become stale throughout the day and overnight (a day before you want to make the French toast).
2. To Make the Strawberry & Cream Cheese Filling: In a small bowl, mix together the strawberries & sugar, and allow them to macerate while you make the filling. In another small bowl, mix together the softened cream cheese, strawberry preserves, and the macerated strawberries. The mixture should be creamy and well incorporated. Set this aside until ready to stuff in the bread.
3. For the Strawberry Syrup: In a small pot over medium heat, cook the maple syrup and strawberry preserves together, whisking so that it becomes a combined mixture. Add in the fresh strawberries and quickly bring this mixture to a boil to break down the fruit. Reduce the heat, so the syrup is warm for serving.
4. Stuffing the French Toast: Now that the brioche slices have become stale, it is time to make the filling pockets. Using a paring knife cut a deep slit across the top, into the middle, of each slice (approximately 4 inches long). Make sure it is deep enough to hold the filling. Grab a slice of the bread and spoon or pipe (or using a pastry icing bag) about 2T of the filling into each pocket. Make sure to close the opening by gently pressing the bread together. This will make frying them a lot easier & less messy. Set the stuffed French toast slices aside until ready to bread.
5. For the Cap’n Crunch Crust: Set up battering & breading stations. In the first dish for battering, whisk together the heavy cream, eggs, honey, vanilla, cinnamon, nutmeg, and salt until smooth & custard-like. In the second dish for breading, pour in the crushed Cap’n Crunch Cereal. Soak the stuffed French toast slices in the batter for about 30 seconds on each side (making sure the edges are moist too). Then, dredge the slices in the Cap’n Crunch. Lightly press the cereal onto each side and around the crust until they are thoroughly coated. Place the crusted slices on a parchment lined baking sheet until all the slices are coated and ready to be cooked (allow them to sit for 1-2 minutes).
6. Cooking the French Toast: Heat a pan over medium heat and melt 2T of butter (for frying 2 slices). Gently place the stuffed slices into the heated pan (only cooking two at a time so that the pan isn’t overcrowded). Cook each slice for 2-3 minutes per side or until the outside is golden brown and crunchy, but the filling is warmed & softened on the inside. Place the cooked slices back on the parchment lined baking sheet and keep warm in the oven until all the slices have been cooked and you’re ready to serve.
7. Serving the French Toast: Serve the Cap’n Crunch Crusted-Strawberry & Cream Cheese Stuff French Toast warm on a plate. Dust it with confectioners’ sugar and pour over the warmed strawberry syrup (and be crazy like me and spread some more cream cheese filling as well). Top it with fresh strawberries for garnish. Serve warm & enjoy. 


Check out Sweets for a Saturday for this recipe, as well as many others :)

Wednesday, July 13, 2011

Homemade Phish Food Ice Cream

I think that Ben & Jerry's has the best ice cream ever. I love pretty much all of their flavors, but there is one that is just a go-to for me, and that is Phish Food. I can literally sit down and eat the entire container (no lie), which is not good news for me, so every time I'm at the grocery store, I have to restrain myself from buying one of those cartons. Well, I came across a dark chocolate ganache ice cream base the other day and an automatic light bulb went off in my head... what if I made homemade Phish Food ice cream with the dark chocolate ganache ice cream, dark chocolate chunks, salted caramel sauce, and homemade marshmallow fluff. Um, wow... I had to do it. The dark chocolate base is good enough on its own. I mean it will really be my favorite chocolate ice cream ever. But by adding in homemade & slighty "gourmet" elements, this ice cream was just over the top. Even Clayton, who is a vanilla-ice cream-kinda-guy, was eating the un-frozen custard. You have this rich, dark chocolate creamy ice cream with swirls of salted caramel that balances amazingly against the sweet & fluffy marshmallow fluff. I mean y'all gotta try this. Even if it's not your go-to flavor, just try it. And if not, just make the dark chocolate ice cream. MMMmmm I love it :)
Homemade Phish Food Ice Cream 
Dark Chocolate Ganache Ice Cream with Dark Chocolate Chunks, Salted Caramel & Marshmallow Fluff Swirls 
For the Dark Chocolate Custard:
2 ½C Whipping Cream
3T Unsweetened Cocoa Powder
10oz Dark Chocolate
1C Milk
1C Sugar
Pinch of Salt
6 Large Egg Yolks
1t Vanilla

For the Salted Caramel Sauce:
1C Sugar
6T Unsalted Butter, Room Temperature
1t Sea Salt
2/3C Heavy Cream, Room Temperature

For the Homemade Marshmallow Fluff:
3 Egg Whites, Room Temperature
2C Light Corn Syrup
½t Salt
2C Confectioners’ Sugar, Sifted
1T Vanilla

For the Phish Food Ice Cream:
Prepared Dark Chocolate Custard
Prepared Salted Caramel Sauce
Prepared Marshmallow Fluff
4oz of Dark Chocolate, Chopped into Bite-Size Pieces
Sea Salt

Directions: 
1. For the Salted Caramel Sauce: In a large saucepan, bring it up to medium-high heat. Pour in sugar and keep continuously whisking until the sugar begins to melt and the lumps dissolve. This sugar will begin to turn a light caramel color, at this point add in the salt and all of the butter. The mixture will begin to bubble, but keep stirring. Finally, take the pan off the heat, and pour in the heavy cream (once again, it will bubble, but just keep stirring) and stir until it is a smooth, consistent sauce. Pour this caramel into a bowl and let it cool before folding it into the ice cream .
2. For the Homemade Marshmallow Fluff: In a large bowl of an electric mixer, add in the egg whites, corn syrup, and salt. On a high speed, mix for approximately for 5 minutes or until mixture is thick and volume has almost doubled. On a low speed, add in the powdered sugar and mix until well blended. Add in the vanilla just until mixed. Put this fluff into a bowl until you are ready to fold it into the ice cream.
3. For the Custard: Place the chopped chocolate in a large heatproof bowl. Warm 1C of the cream with the cocoa powder in a medium saucepan, whisking to thoroughly blend the cocoa. Bring to a boil and then reduce heat and gently simmer for 30 seconds, whisking constantly. Remove from heat and pour the mixture over the chopped chocolate, scraping the saucepan clean as much as possible. Let stand for 1 minute. Stir the Ganache until smooth. Add the remaining 1 ½C of cream and mix well. Place a mesh strainer atop the bowl and set aside. Warm the milk, sugar, and salt in the same saucepan. In a separate medium bowl, whisk together the egg yolks. Slowly pour the warm milk into the egg yolks, whisking lightly, but constantly, and then scrap the warmed yolks back into the saucepan. Switch to a wooden spoon and stir the mixture constantly over medium heat, making sure to scrape the bottom and corners of the pan. Stir until the mixture thickens and the custard can coat the back of a spoon. Pour the custard through the strainer into the chocolate mixture and stir until smooth, and then add in the vanilla. Continue to stir over an ice bath until cool. Refrigerate the mixture to cool thoroughly (at least 4 hours). Freeze the Custard in your ice cream machine following the manufacturer’s instructions. Once the custard is mostly frozen, fold in swirls of salted caramel sauce, dollops of homemade marshmallow fluff, and the chopped dark chocolate. I also like to fold in a little extra sea salt to bring out the natural flavoring.
4. Pour the finished custard into a container and freeze the ice cream overnight before you enjoy!

source: dark chocolate ice cream.

Check out Sweet for a Saturday for my recipe, as well as many others!!


Check out the Ice Cream Social for this recipe, as well as many other ice cream recipes!!

Sunday, July 10, 2011

Red Velvet Strawberry Shortcake Layer Cake with Cream Cheese Frosting

Red Velvet Cake is my ultimate favorite cake EVER. It's so amazing. Well I thought why not mix together two of my favorite desserts... red velvet & strawberry shortcake. Well, we did. And this cake is absolutely delicious. It is layers of my favorite red velvet cake and cream cheese poundcake with cream cheese frosting, pecans, and fresh chopped strawberries. Honestly, I don't feel like explaining it much longer because it's that good that I'm about to reach for another monster slice. Please make this cake. I'm begging you. Just do it. It's worth it... I promise. Wow, can't get over this cake, it's sooooo good. Yummy! Enjoy my friends & followers :)


The Outside of the Red Velvet Strawberry Shortcake Just Ready to be Cut Into :)


I Love All Those Pretty Layers


Red Velvet Strawberry Shortcake Layer Cake with Cream Cheese Frosting, Toasted Pecans, & Fresh Strawberries
For the Red Velvet Cake Layers:
2 ½C AP Flour
1 ½C Sugar
1t Baking Soda
1t Salt
2t Cocoa Powder
1 ½C Vegetable Oil
1C Buttermilk, Room Temperature
2 Large Eggs, Room Temperature
2T Red Food Coloring (1 oz)
1t White Distilled Vinegar
1t Vanilla

For the Cream Cheese Poundcake Layers:
1 ½ Sticks of Unsalted Butter, Softened
1 8oz Package of Cream Cheese, Softened
1 ½C Sugar
3 Large Eggs
1 ½C AP Flour
Pinch of Salt
2t Vanilla

For the Cream Cheese Frosting:
4 8oz Packages of Cream Cheese, Softened
2 Stick of Unsalted Butter, Softened
4C Confectioners’ Sugar, Sifted
2t Vanilla
Fresh Strawberries, Cut into Cubes

For the Cake:
3 Prepared Red Velvet Cake Layers
2 Prepared Cream Cheese Poundcake Layers
Prepared Cream Cheese Frosting
Fresh Strawberries, For Garnish
Toasted Chopped Pecans, For Garnish

Directions:
1. To Make the Red Velvet Cake: Preheat the oven to 350 degrees and spray 3 cake pans with Pam and set them aside. In a large bowl, sift together the flour, sugar, baking soda, salt, and cocoa powder. In another large bowl, whisk together the oil, buttermilk, eggs, food coloring, vinegar, and vanilla. Using a standing mixer, mix the dry ingredients into the wet ingredients until just combined and a smooth batter is formed. Divide the cake batter evenly among the prepared cake pans. Place the pans in the oven, evenly spaced apart. Bake, rotating the pans halfway through the cooking, until the cake pulls away from the sides of the pans, and a toothpick inserted in the center of the cakes comes out clean, about 30 minutes. Remove the cakes from the oven and run a knife around the edges to loosen them from the sides of the pans. One at a time, invert the cakes onto a cooling rack and let cool completely before layering.
2. To Make the Cream Cheese Poundcake: Preheat the oven to 300 degrees and spray 2 cake pans with Pam and set them aside. In an electric mixer, beat the butter and cream cheese at medium speed until creamy, about 2-3 minutes. Gradually add in the sugar, beating well. Add in the eggs, one at a time, until each egg is completely incorporated before adding the next; beat until just combined. Combine the flour and salt in a small bowl, and then gradually add it to the butter mixture, beating at a low speed just until blended after each addition. Stir in the vanilla. Pour the batter into the two prepared pans and bake for about 45 minutes to an hour each, or until a toothpick inserted in the center comes out clean. Cool in the pan for 10-15 minutes and then invert on a wire rack to cool completely (before layering).
3. Layer the Cake: Place 1 layer of the red velvet cake (rounded side down) in the middle of a cake stand. Using a spatula spread a thick layer of the cream cheese frosting on top of the cake layer. Scatter about ¼C of fresh strawberry pieces (pushing the fruit in slightly, so they sink into the frosting). Carefully set a layer of cream cheese Poundcake on top of the strawberry frosting layer (rounded side down) and spread another thick layer of cream cheese frosting and strawberries. Repeat this pattern until all the cake layers have been used, as well as the frosting. Make sure you end with a layer of red velvet cake.
4. To Make the Cream Cheese Frosting: In a medium mixing bowl, cream together the cream cheese and butter until light and fluffy. Mix in the vanilla, and then gradually stir in the confectioners’ sugar. Once you have finished layering & stacking the cake, spread this softened cream cheese frosting over the entire cake. This first layer of cream cheese frosting should be very thin (make sure to scrape of excess with a knife). Place the cake in the refrigerator for an hour to harden. By doing this, this will form a hard layer around the cake, which will help with the cake crumbs to not be visible in your frosting. Remove the cake from the refrigerator and spread the remaining cream cheese frosting over the cake in a thick coating (make sure it is even and smooth). Once all the frosting has been used, press the chopped pecans onto the sides of the cake for presentation. And then top with fresh cut strawberries.
5. Refrigerate the cake for 30 minutes to set up the frosting, but then let the cake come to room temperature for about 15-20 minutes before eating. 
6. Serve and enjoy this beautiful masterpiece!!

source: red velvet strawberry shortcake.

Check out Sweet for a Saturday & Everyday Sisters Blog for my recipe, as well as many others!!

Tuesday, June 28, 2011

Homemade Samoa Doughnuts

Okay, prepare yourself. I went picture-crazy with this recipe. I just couldn't decide on what picture to choose, so I pretty much chose all of them, haha. Anyway, I have a recipe on my computer to make homemade samoa girl scout cookies, tucked away for a rainy day. They are definitely one of my favorite cookies, well that and thin mints. Anyway, I found a good doughnut recipe that I had also been wanting to try, so I decided... well let's just make samoa doughnuts. The doughnuts are light and fluffy and then they are covered in chewy caramel-toasted coconut goodness. And then, dipped in chocolate and drizzled with more chocolate. I don't know how it could get any better, honestly. These babies are tasty. Yes, it was a little of a process, but it really wasn't too bad. And you won't regret the hard work with results like this. Anyway, give these a try. I promise they're delicious!!


For the Doughnuts:
1C + 2T Whole Milk, Warm
¼C Sugar
1 Package of Active Dry Yeast
2 Whole Large Eggs, Beaten
1 Stick + 2T Unsalted Butter, Melted
4C AP Flour
¼t Salt
1Q Canola Oil, For Frying

For the Glaze:
3C Confectioners’ Sugar
½t Salt
½t Vanilla
½C Milk

For the Samoa Topping:
3C Shredded Coconut, Toasted
12oz Good-Quality Chewy Caramels
¼t Salt
3T Milk
12oz Semisweet Chocolate, Roughly Chopped

Directions:

1. To Make the Dough: Make sure the milk is nice and warm, but not overly hot. Add sugar to milk. Stir to dissolve. Add yeast into a small bowl. Pour milk/sugar mixture over yeast. Stir gently, and then let it sit for 10 minutes. Melt butter in a separate bowl until butter is almost melted. Stir to finish melting so the butter won’t be overly hot. Add beaten eggs to the melted butter, stirring constantly to make sure the butter’s not too hot for the eggs. Add the egg/butter mixture to the bowl of an electric mixer fitted with a dough hook. With the mixer on medium-low speed, pour in the yeast mixture. Allow the dough hook to stir this mixture for a couple of minutes, making sure it’s thoroughly combine. With the mixer still going, add ½C increments of the flour until it is all gone. Stop the mixer, scrape the bowl, then turn the mixer on the same speed for 5 minutes. After 5 minutes, stop the mixer and scrape the bottom of the mixer. Turn on the mixer for 30 seconds. Turn off the mixer off and let the dough sit, undisturbed, for 10 minutes. After 10 minutes, transfer the dough to a lightly oiled bowl. Toss the dough to coat, then cover with plastic wrap and place straight in the fridge. Refrigerate for at least 8 hours, or overnight.
2. To Make the Doughnuts: Remove the bowl from the fridge and turn out the dough onto a lightly floured surface. Roll out to ¼inch thickness. Using a 3inch cutter, cut as many rounds as you can, then roll out the remaining dough and once again cut as many as you can (repeat until you can’t anymore). Cut holes out of each round using a 1 ½inch cutter. Cover with a large tea towel and place in a warm place in your kitchen. Allow the doughnuts to rise undisturbed for at least one hour. They should be visibly puffier and appear to be airy.
3. To Fry the Doughnuts: Heat the canola oil in your deep fryer to 375 degrees. One to two doughnuts at a time, gently grab the doughnuts and ease them into the hot oil. Allow them to cook 1 minute on each side; they will brown very quickly. Remove the doughnut from the oil with a slotted spoon, allowing all the oil to drip off. Place the doughnut immediately on paper towels, for about 5 seconds, and then flip it. Allow the doughnuts to cool slightly.
4. For the Glaze: Mix all the ingredients in a bowl until completely smooth. One by one, dip the doughnuts into the glaze until halfway submerged. Remove from the glaze, and then turn right side up on a cooling rack over a cookie sheet (to catch extra glaze). Let the glaze harden completely before adding the Samoa topping.
5. For the Samoa Topping: In a bowl, unwrap the caramels and place in large microwave safe bowl with the milk and salt. Cook on high for 3-4 minutes, stopping to stir a few times to help the caramel melt. When smooth, fold in the toasted coconut with a spatula. Using a spoon, lightly dollop and spread the Samoa topping on the cooled, glazed doughnut. While the topping sets up, melt the dark chocolate in a small bowl. Heat on high in the microwave in 30 second intervals, stirring thoroughly to prevent scorching. Dip the bottom of each doughnut into the melted chocolate and place on a clean piece of parchment paper. Transfer the remaining chocolate into a piping bag for later. Once the Samoa topping & chocolate bottom has set, drizzle the doughnuts with the remaining melted chocolate for garnish.
6. Serve immediately and enjoy!
source: samoa cookiesdoughnuts
*Please check out, Sweets for a Saturday for my link, as well as many others!!
**A big thanks to At Home With Haley for featuring my recipe on her blog :)


Photobucket

Monday, June 20, 2011

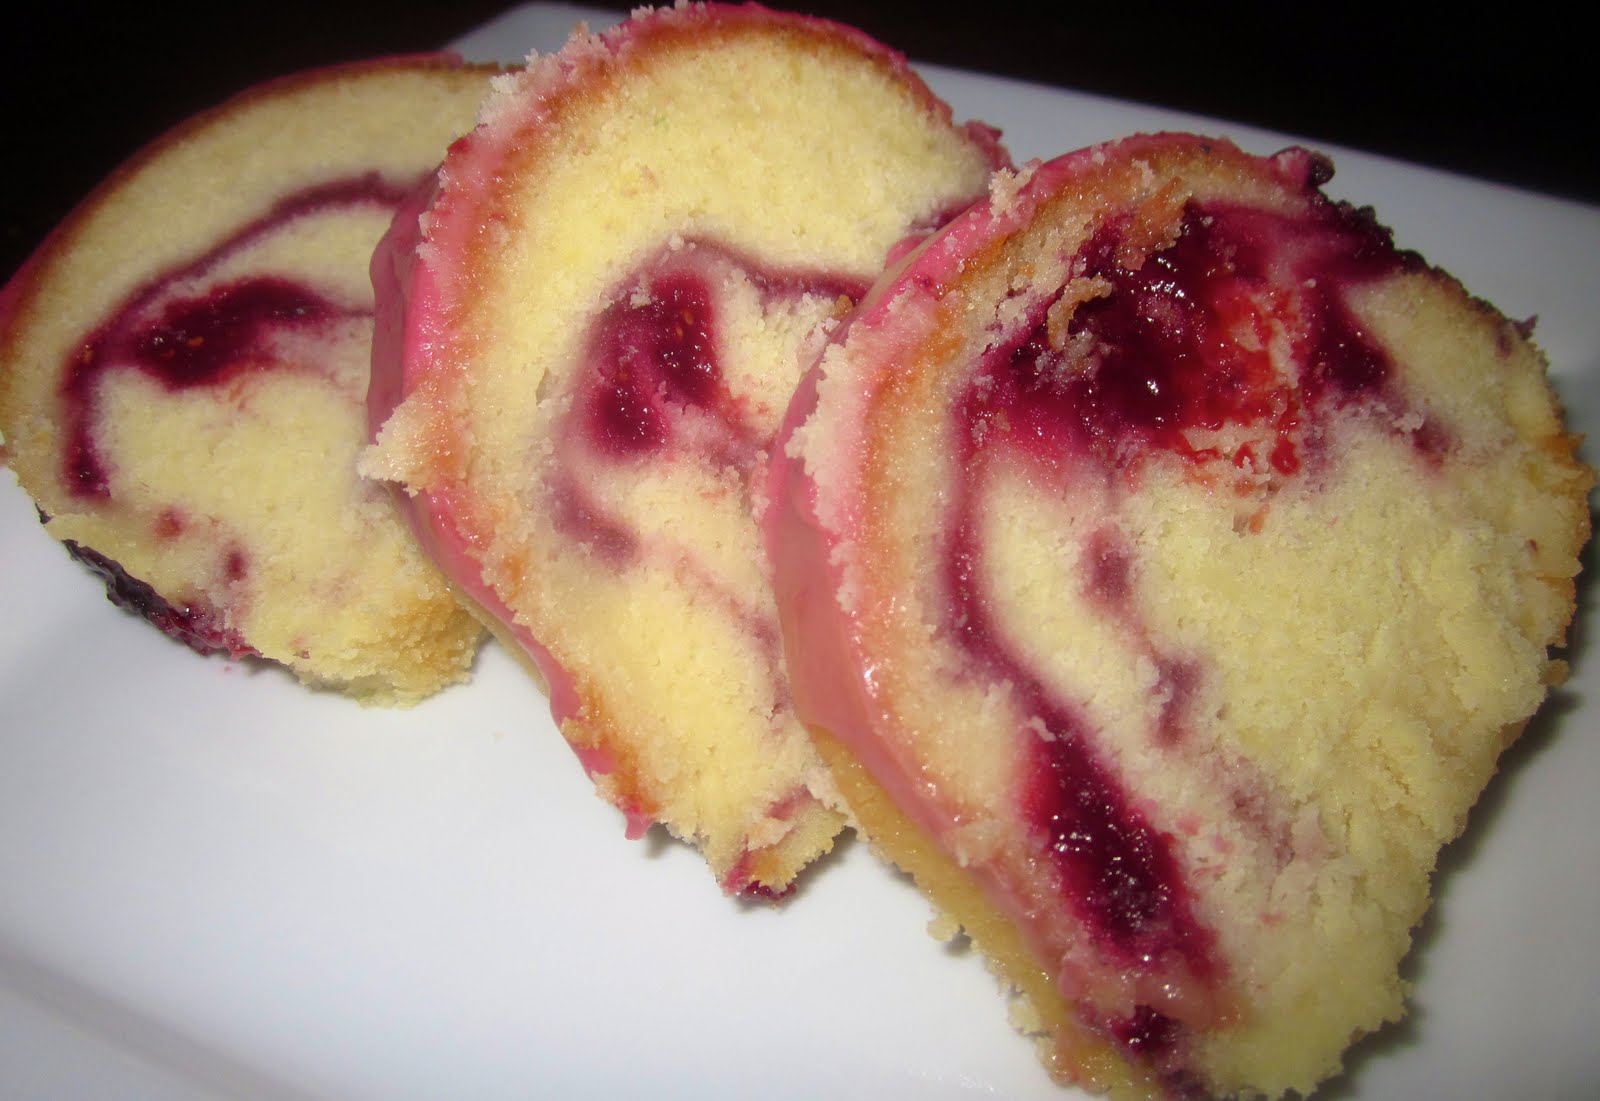
Swirled Lemon Raspberry Poundcake with Raspberry Glaze

I just love poundcake. It's so satisfying and luscious, but still light and fluffy. I seriously make a different poundcake every week. I just use my favorite recipe and substitute a few ingredients to customize the different flavors. This week I decided to make Swirled Lemon Raspberry Poundcake with Raspberry Glaze. I just love lemon and raspberry together. It's such a refreshing combination and so summery. The base is a dense, creamy lemon curd poundcake swirled with layers of raspberry filling, and then topped with a raspberry glaze. Yum yum yum! Enjoy :)
I Love the Bright Pink Raspberry Glaze
Lemon Curd Poundcake with Swirled Raspberry Layers & Raspberry Glaze
For the Poundcake:
2 Sticks of Unsalted Butter, Softened
1 8oz Package of Cream Cheese, Softened
½C Lemon Curd
1 ½C Sugar
4 Eggs
2t Vanilla
1T Lemon Zest
3T Lemon Juice
2C AP Flour
1 ½t Baking Powder
1t Salt

For the Raspberry Filling:
1C Frozen Raspberries
¼C Raspberry Jam
2T Lemon Juice
¼C Confectioners’ Sugar

For the Raspberry Glaze:
2C Confectioners’ Sugar, Sifted
2T Raspberry Filling
½C Raspberry Jam
2t Lemon Juice
3T Milk
½t Vanilla  

Directions:
1. Preheat the oven to 325 degrees and spray a bundt pan with Pam, and then set aside.
2. To Make the Raspberry Filling: Combine all of the ingredients in a small saucepan over medium-low heat. Break up any large raspberry chunks. Once the mixture has come to a bubble, remove from the heat and let it cool completely before adding it to the cake.
3. To Make the Poundcake: In a mixer, cream together the butter, cream cheese, and lemon curd. Pour in the sugar and mix until fluffy and smooth. Add the eggs, one at a time, mixing each one until it is incorporated before adding the next egg. Next, add in the vanilla, lemon zest, and lemon juice. Beat to combine. While ingredients are mixing, whisk together the flour, baking powder, and salt. Slowly add this flour mixture into the wet mixture. Mix until just incorporated.
4. Layering & Baking the Poundcake: Pour ¼ of the batter into the prepared bundt pan and smooth it over, making sure it is completely even. Next, spoon half of the cooled raspberry filling on top of the batter (try to keep the filling in the middle, so that it doesn’t spill out while baking). Repeat by topping the filling with ½ of the remaining batter and smooth once again. Spoon the rest of the raspberry filling over the batter and finally top with the remaining ¼ of the Poundcake batter. Smooth one last time. You should have three layers of lemon Poundcake separated by two layers of raspberry filling. Bake the cake for roughly an hour or until a toothpick inserted into the center comes out clean. Let the cake cool completely before pouring on the glaze.
5. To Make the Glaze: combine the confectioners’ sugar, raspberry jam, milk, zest, and vanilla in a bowl and whisk until it is completely combined and smooth. Pour the glaze over the cooled cake. Let the glaze harden for 15-20 minutes before you cut and serve. 


source: raspberry filling.


*Please check out, Sweets for a Saturday for my link, as well as many others!!

Swirled Lemon Raspberry Poundcake with Raspberry Glaze

I just love poundcake. It's so satisfying and luscious, but still light and fluffy. I seriously make a different poundcake every week. I just use my favorite recipe and substitute a few ingredients to customize the different flavors. This week I decided to make Swirled Lemon Raspberry Poundcake with Raspberry Glaze. I just love lemon and raspberry together. It's such a refreshing combination and so summery. The base is a dense, creamy lemon curd poundcake swirled with layers of raspberry filling, and then topped with a raspberry glaze. Yum yum yum! Enjoy :)
I Love the Bright Pink Raspberry Glaze
Lemon Curd Poundcake with Swirled Raspberry Layers & Raspberry Glaze
For the Poundcake:
2 Sticks of Unsalted Butter, Softened
1 Package of Cream Cheese, Softened
½C Lemon Curd
1 ½C Sugar
4 Eggs
2t Vanilla
1T Lemon Zest
3T Lemon Juice
2C AP Flour
1 ½t Baking Powder
1t Salt

For the Raspberry Filling:
1C Frozen Raspberries
¼C Raspberry Jam
2T Lemon Juice
¼C Confectioners’ Sugar

For the Raspberry Glaze:
2C Confectioners’ Sugar, Sifted
2T Raspberry Filling
½C Raspberry Jam
2t Lemon Juice
3T Milk
½t Vanilla  

Directions:
1. Preheat the oven to 325 degrees and spray a bundt pan with Pam, and then set aside.
2. To Make the Raspberry Filling: Combine all of the ingredients in a small saucepan over medium-low heat. Break up any large raspberry chunks. Once the mixture has come to a bubble, remove from the heat and let it cool completely before adding it to the cake.
3. To Make the Poundcake: In a mixer, cream together the butter, cream cheese, and lemon curd. Pour in the sugar and mix until fluffy and smooth. Add the eggs, one at a time, mixing each one until it is incorporated before adding the next egg. Next, add in the vanilla, lemon zest, and lemon juice. Beat to combine. While ingredients are mixing, whisk together the flour, baking powder, and salt. Slowly add this flour mixture into the wet mixture. Mix until just incorporated.
4. Layering & Baking the Poundcake: Pour ¼ of the batter into the prepared bundt pan and smooth it over, making sure it is completely even. Next, spoon half of the cooled raspberry filling on top of the batter (try to keep the filling in the middle, so that it doesn’t spill out while baking). Repeat by topping the filling with ½ of the remaining batter and smooth once again. Spoon the rest of the raspberry filling over the batter and finally top with the remaining ¼ of the Poundcake batter. Smooth one last time. You should have three layers of lemon Poundcake separated by two layers of raspberry filling. Bake the cake for roughly an hour or until a toothpick inserted into the center comes out clean. Let the cake cool completely before pouring on the glaze.
5. To Make the Glaze: combine the confectioners’ sugar, raspberry jam, milk, zest, and vanilla in a bowl and whisk until it is completely combined and smooth. Pour the glaze over the cooled cake. Let the glaze harden for 15-20 minutes before you cut and serve. 


source: raspberry filling.


*Please check out, Sweets for a Saturday for my link, as well as many others!!

Wednesday, May 25, 2011

Baked Cinnamon Roll French Toast Casserole

Baked Cinnamon Roll French Toast Casserole... it's a mouth full isn't it? Yeah I know, but I had to adequately describe to you how good this is (and easy shhhh). I wish I had a mouth full of this. Right now actually. The thing about this recipe is that you can go the hard route or the easy route, it's really up to you. I went with the easy route just because I wasn't in the mood, but I know I will try the hard route soon because it will be that much more yummier (is that even a word). The easy route is buying canned cinnamon rolls and the hard route is making your own homemade cinnamon rolls & cream cheese glaze to put into the casserole. Either way, it's delicious. It's so soft in the middle, but so crunchy with the cinnamon topping, just heaven in my mouth. It's definitely something you can prepare the night before, and just pop it in the oven the morning of, and feed a whole bunch of people. Definitely give this one a go!
Slices of the Casserole
Baked Cinnamon Roll French Toast Casserole
See That... That's the Crunchy Cinnamon Topping Covered in Cream Cheese Frosting
For the Batter:
8 Large Eggs
2C Half & Half
1C Milk
2T Sugar
1t Vanilla
¼t Cinnamon
¼t Nutmeg

For the Cinnamon Streusel:
½C AP Flour
½C Brown Sugar
1t Cinnamon
¼t Salt
½C Butter, Cut into Pieces

For the Casserole:  
2 Cans of Grands Large Cinnamon Rolls, Baked & Cut into Cubes
Cream Cheese Glaze from Canned Cinnamon Rolls
Prepared Batter
Prepared Cinnamon Streusel

Directions: 
1.  Bake the can of store-bought cinnamon rolls according to the label’s directions. Once fully cooked, let the cinnamon rolls cool (saving the cream cheese frosting for later) before you cube them. Cut the cooled cinnamon rolls into cubes and spread them out and let them become slightly stale, roughly 3 hours. Meanwhile, grease a 9x13-inch baking dish with butter and set aside. Once dried, toss the cubed cinnamon roll pieces into the prepared dish.
2. Next, prepare the French toast batter by combining the eggs, half & half, milk, sugar, vanilla, cinnamon, and nutmeg until well incorporated. Pour this mixture over the cinnamon roll cubes. Cover the baking dish and store in the refrigerator for at least 4 hours (preferably overnight).
3. To make the cinnamon streusel, mix together the flour, brown sugar, cinnamon, and salt. Next, cut the butter into this mixture until it resembles a fine pebble mixture.
4. Take the soaked casserole out of the refrigerator and pour the crumbly cinnamon streusel evenly on top of the rolls.
5. Preheat the oven to 350 degrees and bake the casserole for 45 minutes (a softer texture) or an hour (a firmer texture). Once it is done baking, immediately pour the cream cheese glaze all over the casserole.

source: Cinnamon Baked French Toast

*Please check out, Sweets for a Saturday for my link, as well as many others!!

Tuesday, May 3, 2011

Marbled Peanut Butter Brownie Banana Bread

If I haven't mentioned before, but I love banana bread, more than anything, and especially my recipe for banana bread, and I promise I'll get around to posting it soon. But for today, I'm posting something a little more decadent, Marbled Peanut Butter Brownie Banana Bread. Possibly one of my favorite combinations ever is chocolate + peanut butter, no question. And I also love the combination of bananas + peanut butter. So I paired my favorite brownie recipe with a peanut butter banana bread recipe to make a moist, swirled bread, I'm thinking I might have to leave a couple slices out overnight and maybe make some french toast tomorrow? I think it's a good possibility. Also, for all those cooks out there who don't have the time to make homemade brownie & banana bread batter, here's a little secret... you could easily go to the grocery store and buy a box of brownie and banana bread mix and do the exact thing I did, but just a short cut recipe. It might not be quite as good, but it would be a hell of a lot easier! Well, I hope you enjoy the recipe, it's so many different flavors jam-packed into one loaf pan.
Marbled Peanut Butter Brownie Banana Bread
For the Brownie Batter:
1 ¼C AP Flour
1t Salt
2T Cocoa Powder, Dark & Unsweetened
11oz Dark Chocolate, Coarsely Chopped
2 Sticks Unsalted Butter, Cut into 1inch Pieces
1t Instant Espresso Powder
1 ½C Sugar
½C Light Brown Sugar
5 Eggs, Room Temperature
2t Vanilla
½C Semi-Sweet Chocolate Chunks

For the Peanut Butter Banana Bread:
2 Eggs
1C + 2T Sugar
2T Sour Cream
1t Vanilla
1C + 2/3C AP Flour
1t Baking Soda
¼t Cinnamon
½t Salt
½C Vegetable Oil
4 Ripe Bananas, Mashed
¾C Creamy Peanut Butter
½C Peanut Butter Chips

Directions: 
1.  Preheat the oven to 350 degrees F and spray 2 loaf pans with Pam, and then set aside (or you could chose a bundt pan).
2. To Make the Brownie Batter: in a bowl, whisk together the flour, salt, and cocoa powder. Meanwhile, put the chocolate, butter, and instant espresso powder into a double boiler on low heat. Stir occasionally until the mixture is smooth. Turn off the heat and add both of the sugars, whisking until combine. Remove the bowl from the double boiler, and let the mixture come to room temperature. Once at room temperature, add in 3 eggs and whisk until combined before adding the rest of your eggs, and then add the vanilla (but do not over-mix). Sprinkle the flour mixture over the chocolate mixture and with a rubber spatula (not a whisk) fold the flour mixture into the chocolate until till barely combined, and then fold in the chocolate chunks. Set aside. 
3. To Make the Peanut Butter Banana Bread: in a standing mixer, beat together the eggs and sugar until light and fluffy, then add in the sour cream, creamy peanut butter, and vanilla and mix until incorporated. In a separate bowl, whisk together the flour, baking soda, cinnamon and salt. With the standing mixer at the lowest speed, add the flour mixture into the wet mixture in small increments. Next, slowly drizzle in the vegetable oil until just incorporated. In another small bowl, mash the ripe bananas until mushy. Fold the mashed bananas into the batter, and then fold in the peanut butter chips. Set aside.
4. To Make the Peanut Butter Brownie Banana Bread: pour equal amounts of the peanut butter banana bread into each loaf pan, repeat with the brownie batter on top of the banana batter. Then, alternate spoonfuls of banana and brownie batter into each pan, until all of the batter has been used. When all of the batter has been used, swirl the two batters with a knife for a marble effect. To finish it off, sprinkle the top of the loaves with some chocolate chunks and peanut butter chips.
5. Bake each loaf for an hour (or possibly an hour and 15 minutes) or until a toothpick inserted into the center of the bread comes clean. Cool in their pans for 20 minutes, then remove them and let them cool completely on a cooling rack for about an hour before slicing.