Monday, February 18, 2013

Fried Goat Cheese Crusted-Pickled Green Tomato Napoleon with Candied Bacon, Brussel Sprouts Salad, & Boursin Cheese, Drizzled with Homemade Pepper Jelly + Balsamic Reduction


Fried Goat Cheese Crusted-Pickled Green Tomato Napoleon with Candied Bacon, Brussel Sprouts Salad,
& Boursin Cheese, Drizzled with Homemade Pepper Jelly + Balsamic Reduction
Yeah, I know what you're thinking... why does this girl continually post recipes that have titles as long as paragraphs. I'm sorry, I apologize, but I guess it's my thing. I want all of y'all to know, up front, what the dish is. Yes it can be overly descriptive and unnecessary, but whatever, it's necessary (minus the -un). This "salad" is so completely decadent that it is not even allowed to be called a salad. So, in my book, it's now a stack or a napoleon. I got some pickled green tomato slices and coated them with some goat cheese, and then crusted them in panko breadcrumbs... then they went straight into the skillet to get extra crispy. During that time I made some candied bacon and my favorite brussels sprouts slaw to put in between the fried green tomatoes. Because one creamy cheese isn't enough, I sprinkled some boursin cheese on the napoleon layers... we gotta do it up big here, y'all. I had also made some homemade pepper jelly a while back, and I love fried green tomatoes with the spicy, sweet jelly so I drizzled that around the plate, along with a balsamic reduction for acidity. There are so many components, yet they all fit together in such harmony. And I know there are a couple of you na'sayer's out there, not believing that I would have all of these ingredients just laying around... BUT, I did. This was literally a last minute dinner, roughly made at 8:30PM, for my Mountain Man who was starving. I don't know if that means I just have a well-stocked fridge or if I am just good with what I got... well, maybe a little bit of both (deal?). Who knew that you could make a dish that's so gourmet and delicious with stuff just lying around in the kitchen? I think I'm onto something here... maybe I need to do this once a week, just to challenge myself. I definitely think so!! Enjoy :)

Ain't nothin' wrong about that, y'all. 

For the Fried Goat Cheese Crusted-Pickled Green Tomatoes:
4 Slices of Pickled Green Tomatoes, Dried of Excess Moisture (we used a paper towel)
4oz Goat Cheese, Cut into 1oz Slices
1C AP Flour
1 Egg + ½C Buttermilk
1C Panko Breadcrumbs
Vegetable Oil, For Frying
Salt & Pepper, For Sprinkling

For the Napoleon Stacks:
Prepared Fried Goat Cheese Crusted-Pickled Green Tomatoes, Hot & Crispy
Slices of Candied Bacon
Homemade Shaved Brussel Sprout Slaw
Crumbled Boursin Cheese
Homemade Pepper Jelly, For Drizzling
Balsamic Reduction, For Drizzling

Directions:
1. To Make the Fried Goat Cheese Crusted-Pickled Green Tomatoes: Remove the pickled green tomato slices from their jar and place the slices on a paper towel. Let the tomatoes drain for 15-30 minutes. After they have drained, dry the tomatoes a little more with some paper towels, removing any excess moisture. Pinch off or cut off about 1oz of softened goat cheese, and then using your hands, pat the cheese to form a disc roughly the same size as the tomatoes (just work with the cheese until it is pliable enough to make the compact shape). Then, press the cheese into one side of the green tomato... you want to make sure that it is completely adhered to the tomato, so the two will remain together throughout the breading process (there is no right or wrong way to do this, just kind of play around with it in your hands until the cheese has filled in the gaps in the green tomato).  Next, you have to set up a battering station. I use 3 pie tins. For the first station, I used plain flour. For the second station, I whisk together the eggs and buttermilk. For the third station, I used Panko breadcrumbs. Now, place the slices of dried green tomato pickles into the flour mixture, then into the egg wash, and finally the panko (making sure they are completely covered). Put the breaded slices onto a plate and then put it into the refrigerator and let the slices rest & chill for about 15-30 minutes (this helps the cheese to get firm again, ensuring that the cheese won't leak out of the breading during frying).
2. Frying the Tomatoes:Heat your deep sauté pan to medium heat with vegetable oil. Once the oil has heated, pull the chilled slices out of the refrigerator. Fry the slices for 2-3 minutes each (depending on the size of your fryer, mine is pretty small, so I do 2 at a time). The green tomatoes should be golden brown on the outside, but cooked, yet still firm on the inside (with no goat cheese seeping out of the crust, so don’t overcook them). Once they are done frying, place them onto a paper towel to drain, and sprinkle them with salt & pepper immediately. Once all of the tomatoes are fried, you can begin stacking your napoleon.
3. Assembling the Napoleon: Place a slice of a fried green tomato pickle onto the plate, and then begin stacking with the candied bacon, brussel sprout slaw, and crumbled Boursin cheese. Repeat with the remaining ingredients until the napoleon stack has been finished. Garnish the stack with a drizzle of homemade pepper jelly and balsamic drizzle.

Saturday, February 16, 2013

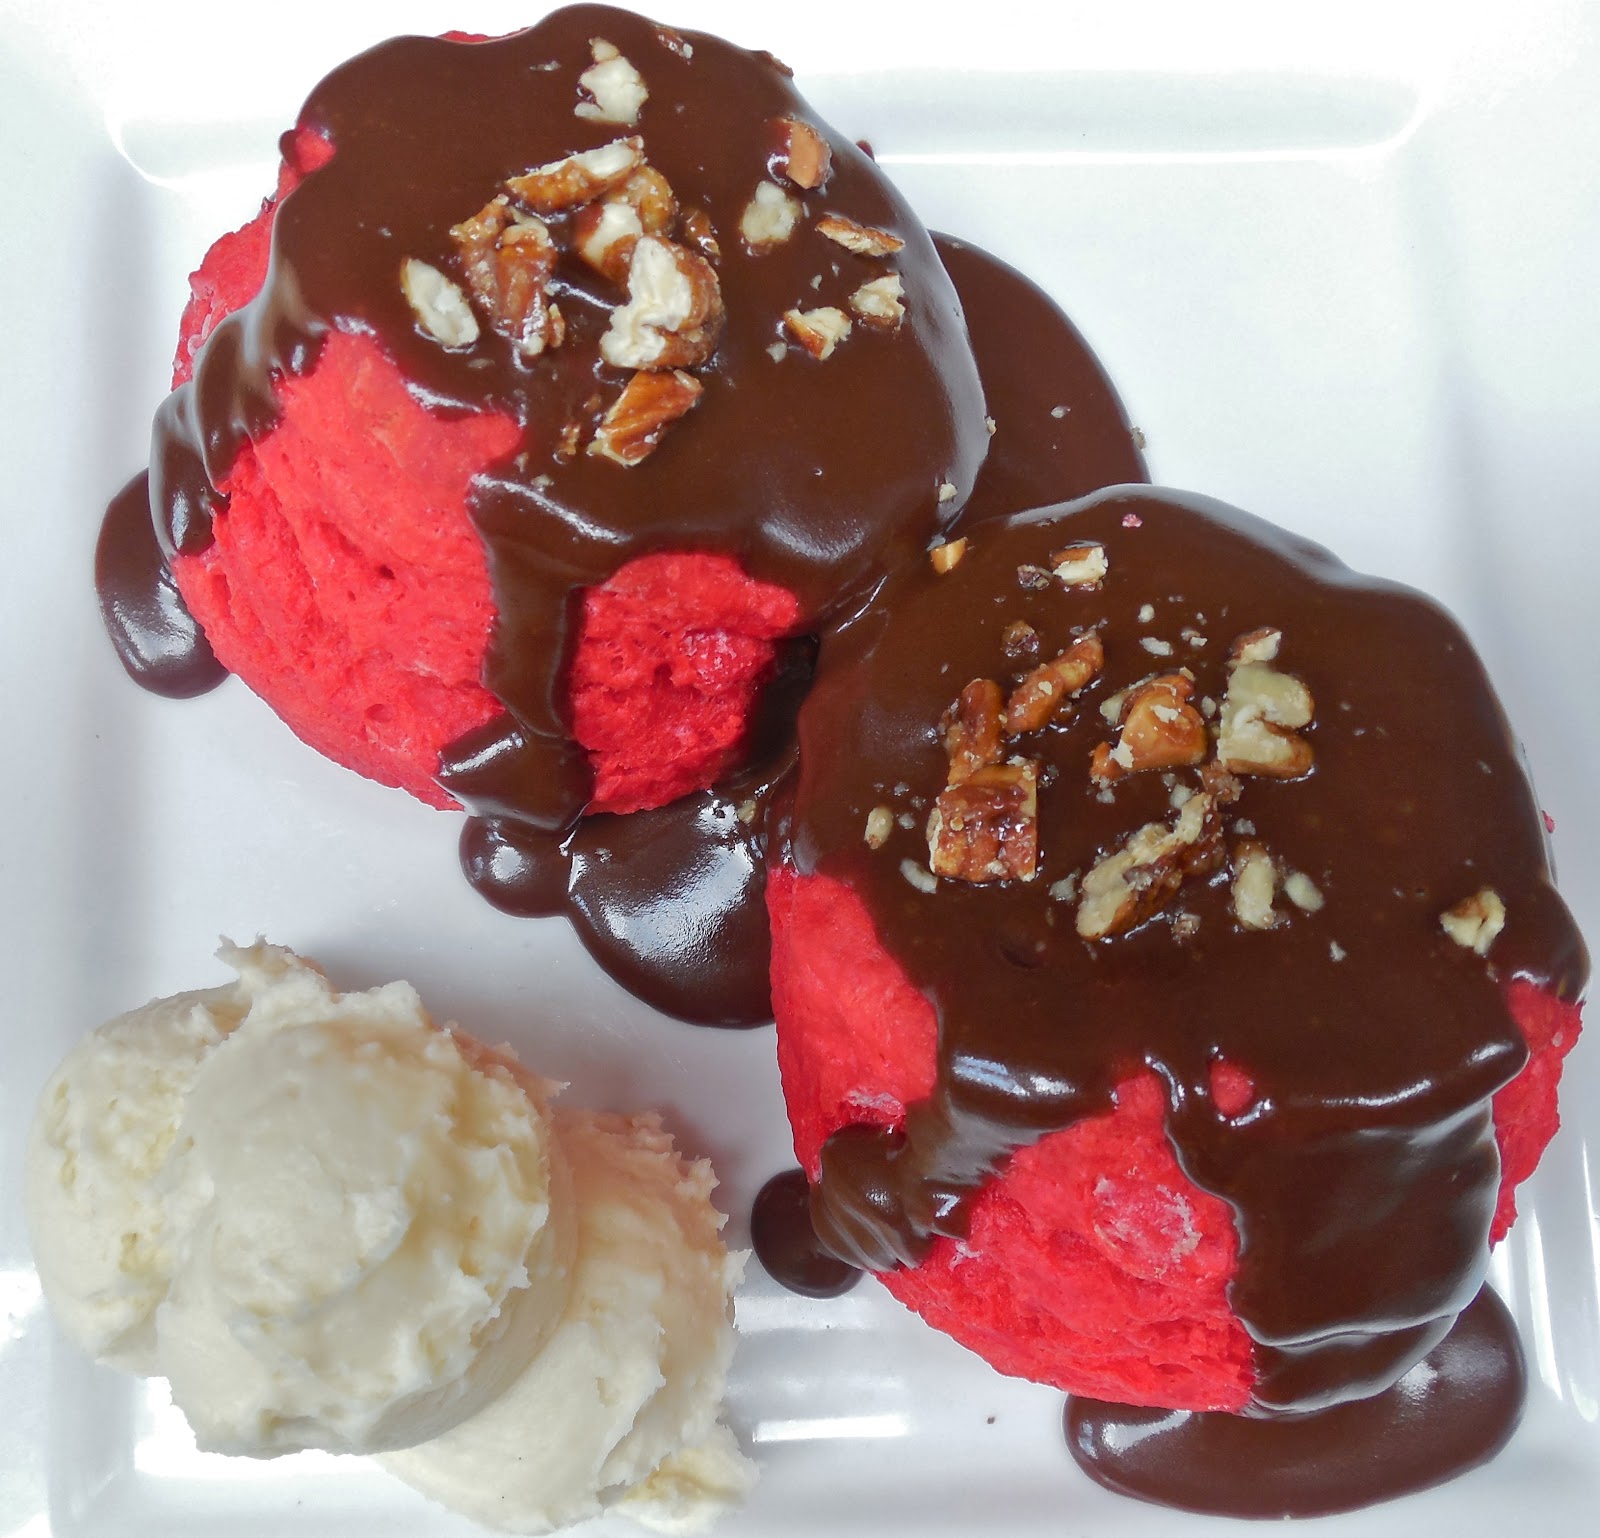
Red Velvet Buttermilk Biscuits with Southern Chocolate Gravy + Whipped Cream Cheese Butter

Red Velvet Buttermilk Biscuits with Southern Chocolate Gravy + Whipped Cream Cheese Butter
I hope all of y'all had a wonderful Valentine's Day... and I'm sorry it has taken this long to post a new Red Velvet inspired recipe!! As I mentioned in my last post, my Red Hot Velvet Cinnamon Rolls were the perfect breakfast-in-bed-with-your-honey meal, and I just had to come up with another one for this year. I racked my brain for breakfast ideas that could be turned into a red velvet recipe, but I didn't want to do one that had already been done... a lot of people have done waffles, pancakes, & crepes. And then it hit me, RED VELVET BISCUITS. Why had I never thought of that before?! Who knows. Well, I started building from there, and immediately remembered enjoying Southern Chocolate Gravy with Buttermilk Biscuits as a child. What kid doesn't want chocolate for breakfast? This kid over here does! So along with the Red Velvet Buttermilk Biscuits, that brings in the red and buttermilk component of this cake classic, the chocolate gravy would sub in for the cocoa powder element, and lastly, the Whipped Cream Cheese Butter mimics the ever-popular cream cheese frosting. So, this dish is practically Red Velvet Cake... deconstructed... in breakfast form... with some Southern lovin' added in for good measure as well. There aren't many things that are as comforting as biscuits + gravy, especially if chocolate and sugar are thrown into the mix also. The biscuits turned out to be a gorgeous "God Bless 'merica" red and were utterly + effortlessly fluffy. As for the chocolate gravy, I called my mom asking if she remembered her recipe and she couldn't find it in the millions of recipe cards shoved into the drawers in our kitchen. So, I found a recipe online that had gotten a lot of great reviews, and it certainly didn't disappoint. If you're like me then you'll want to split the biscuits in half and spread on some of that cream cheese butter until it melts into the hot bread, and drown them in the chocolate gravy until they are completely covered. And just for presentation, I sprinkled on some toasted pecan bits over the top. Honestly, I don't know if there is more in my belly... or more on my face and hands because I got knee deep in this meal. But, that's half the joy of it all, isn't it? Finger lickin' good gravy always cheers this girl up. What an awesome meal this was on Valentine's Day with my Mountain Man. Oh and P.S., I need to be officially dubbed the "Queen of Red Velvet", o'tay? Good, glad y'all agree with me because having this many red velvet inspired recipes is just plain unhealthy!! Enjoy :)
Chocolate Gravy Waterfall  
biscuits + gravy... red velvet-style 
Homemade Whipped Cream Cheese Butter 
Garnish with some Toasted Pecans!

For the Red Velvet Buttermilk Biscuits:
2 ¼C Cake Flour, Sifted
1T Baking Powder
1T + 1t Sugar
1t Salt
6T Unsalted Butter, Cut into Cubes & Frozen
¾C Buttermilk, Well-Shaken
Red Food Coloring (to your liking)
2T Melted Butter, For Brushing

For the Southern Chocolate Gravy:
4T Unsweetened Cocoa Powder
2T AP Flour
1C Sugar
1 ½C Whole Milk
4T Unsalted Butter
1t Vanilla
Pinch of Salt

For the Whipped Cream Cheese Butter:
1 Stick of Unsalted Butter, Softened
4oz Cream Cheese
¼C Sugar
½t Vanilla
Pinch of Salt

Directions:
1. For the Red Velvet Buttermilk Biscuits: Preheat the oven to 400 degrees. In a mixing bowl, whisk together the flour, baking powder, sugar and salt. Add in the frozen and cut the fat in using a pastry cutter until the mixture resembles coarse crumbs, but pea-sized pieces of butter still remain. In a measuring cup, pour in some red food coloring, and then fill up the measuring cup to ¾C of the liquid mixture (this will make sure that you don’t add too much extra liquid to your biscuits). Whisk together the food coloring and buttermilk until it is red. Pour in the red buttermilk and use a fork to mix it until the dough just comes together. Turn the dough out onto a floured surface, knead with floured hands, and pat into a thick square. Using a large, floured biscuit cutter, cut the biscuits from the dough and place them about 1-2inches apart on an ungreased baking sheet (I made about 6-8 biscuits). Brush the tops of the biscuits with some melted butter and bake for 20-25 minutes, depending on their side, or until the tops are golden brown. Just before serving, brush the tops of the biscuits with more melted butter.
2. For the Southern Chocolate Gravy: In a medium sauce a whisk together the dry ingredients. Pour in the milk and whisk vigorously to combine. Heat over medium-high until the mixture bubbles. Turn heat down to medium and stir until mixture has thickened to a gravy consistency. Remove from heat and stir in butter and vanilla. Let cool slightly then transfer to a gravy boat. Serve warm over buttermilk biscuits.   
3. For the Whipped Cream Cheese Butter: In the bowl of an electric mixer, fitted with the whisk attachment, beat together the butter and cream cheese until smooth & creamed together, about 1-2 minutes. With the mixer on high, add in the sugar, pinch of salt, and vanilla. Beat on high speed until light & fluffy like a whipped frosting. Refrigerate until ready to use.   
4. For Serving: Place some Red Velvet Buttermilk Biscuits onto a plate and pour the Chocolate Gravy over the top. Garnish the top of the gravy with some toasted pecans and serve the biscuits with the Whipped Cream Cheese Butter.   

Tuesday, February 12, 2013

Truffle-Honey Caramel Corn with Truffled Honey Caramel & Truffle Salt

Truffle-Honey Caramel Corn with Truffled Honey Caramel & Truffle Salt
So, Valentine's Day is in a couple days... that means you need to spend some quality time with your honey. Last year, I came up with the first + original recipe for Red Hot Velvet Cinnamon Rolls. You may have seen them on Pinterest because they blew up on there, and probably a few other recipes around the internet that got the idea from here, and if you haven't tried them, you should. Especially for the extra special lover's day. This year, my Mountain Man & I are kind of busy, so we have to push our celebration off until Friday. And for every holiday, we always have our own thing that we plan. He always takes us out for dinner, dessert, and a little surprise, while I always cook us a fancy dinner or a cute picnic lunch for the park. This time around, I thought about how I wanted to do a movie night with a bunch of gourmet snacks to enjoy while snuggling up together. This was one of my ideas and I know I will be recreating it for our special dinner + a movie. I mean, you always have to have popcorn while watching a film, ya know?!? Why not spice it up a bit with some caramel corn, and not just any kind of caramel corn... Truffle-Honey Caramel Corn. That's right, popcorn that is perfectly covered in a caramel sauce that is made with truffle honey and truffle butter, and then sprinkled with truffle salt! We love truffle-anything around this house. My Mountain Man is always sniffing the can of white truffle oil while I'm cooking, he's addicted. But, I do know, truffle isn't for everyone, so I urge those who aren't truffle fans to steer clear because it is DEFINITELY truffled. This is the perfect little snack to pop in your mouth while watching rom-com's or scary movies (whatever floats your boat)! Oh, and P.S., check back on Valentine's Day for a new, super awesome red velvet recipe... maybe it could top the cinnamon rolls? Debatable!! Enjoy :)

For the Gourmet Popcorn:
1/3C Corn Kernels
1T White Truffle Oil
½t Salt
2T Truffle Butter, Melted (for tossing the popcorn)

For the Truffle Honey Caramel:
½C Gourmet Truffle Honey
¼C Heavy Whipping Cream
2T Unsalted Butter or Truffle Butter (depending on how much truffle you want)
1t Vanilla
Truffle Salt or Vanilla Bean Fleur de Sel, For Sprinkling    

Directions:
1. Lightly coat a heatproof rubber spatula, a very large mixing bowl and line a large baking sheet with a silpat. Preheat the oven to 300 degrees.
2. In a large saucepan or pot with a lid, heat the 1T of white truffle oil over medium-high heat. Add the popcorn kernels and salt, cover and keep the saucepan moving until all of the kernels have popped, about 5-10 minutes (depending on the heat level). Transfer to the prepared bowl, removing any un-popped kernels. Pour over the melted truffle butter and toss to coat all of the popcorn (this will add even more truffle flavor, but can be omitted if wanted). Set the buttered popcorn aside.
3. For the Truffle Honey Caramel: In a medium pot, add in the truffle honey, whipping cream, butter, and vanilla. Bring the mixture to a boil over medium-high heat until it is bubbly and caramel in color, reaching 240 degrees. Make sure to stir continuously. Once it has reached the desired temperature, pour the honey caramel over the popcorn and toss it with the prepared rubber spatula until the popcorn is completely tossed and covered. Quickly pour & spread the caramel popcorn onto the prepared silpat. Sprinkle the hot popcorn with either truffle salt or vanilla bean fleur de sel until you have reached your desired saltiness (depending on how much truffle or sweetness you want, you can also use sea salt).
4. Place the popcorn pan into the oven and bake for 15-20 minutes until the popcorn has reached an even darker caramel color. Let the popcorn cool & harden completely before enjoying.

Sunday, February 10, 2013

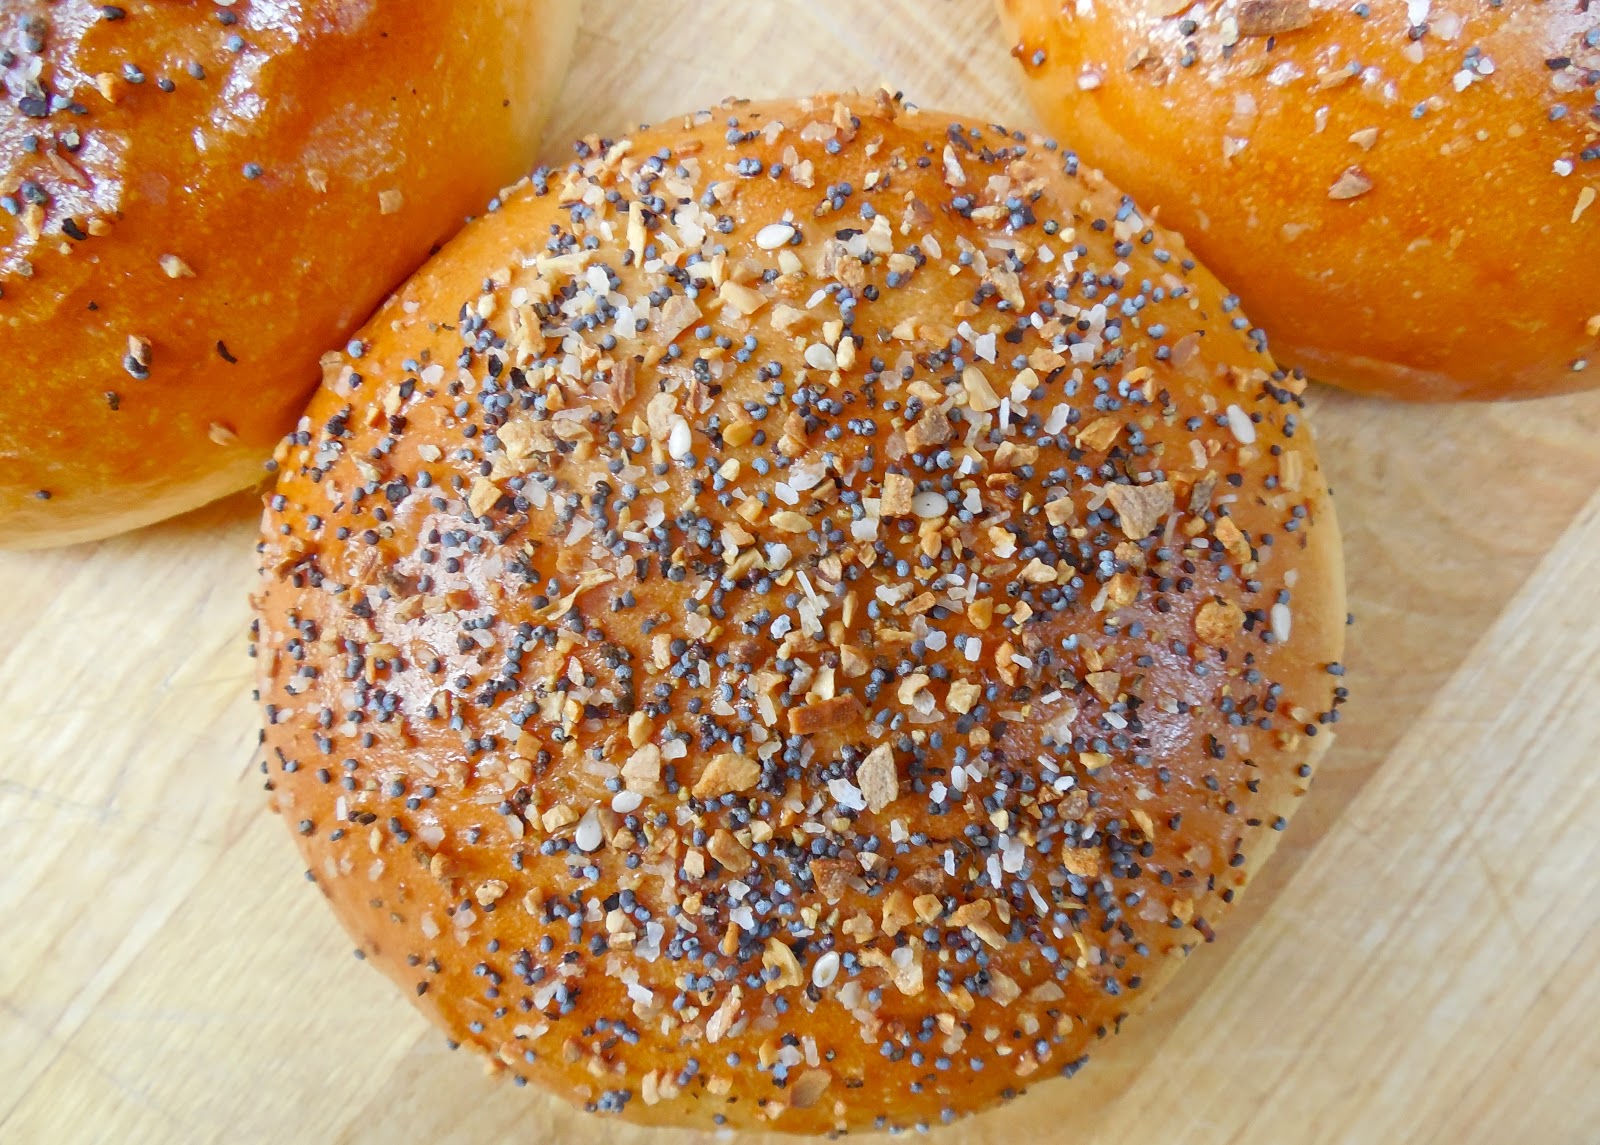
"Everything" Brioche Burger Buns

"Everything" Brioche Burger Buns
I can't stop thinkin' about that stinkin' burger we made yesterday. It was so good. And one of the biggest reasons why is because it was all stacked on a homemade bun. Not any ole' burger bun y'all, a brioche bun. If you've researched making some buns for your burger at home, then you have obviously come across this recipe. It was featured on blogs, such as Smitten Kitchen and Annie's Eats, and well, countless others. Each of them ranted and raved about these "light brioche burger buns", and when you keep hearing about 'em, well you eventually have to make them! I finally gave in this last week for the Jimmy Buffett concert and it was sooooooo worth it. They are buttery, soft, yet sturdy enough to hold a juicy burger. All are important qualifications, trust me. These buns would be just as good plain, so don't worry about the extra touch I put on them. But, if you're gonna make them, why not go all out?! Instead of just topping them with boring sesame seeds or poppy seeds... I heavily sprinkled the golden buns with an "everything" bagel topping. Who doesn't love "everything" bagels? Well, okay probably all of your friends who have to smell your breath for the rest of the day, but that's why they are your friends, right? Right. Everyone's reassured... good. Between the sesame seeds, poppy seeds, dried garlic, dried onion, sea salt, and fresh cracked pepper, you have got one seriously-flavored bun. And for a burger purist like me, who likes to only season a patty with just some good salt + fresh pepper, these buns add a lot of flavor while still keepin' everything classic. In other ways, the way it was intended to be. I can't rave about these enough, and you can certainly add me on to the list of bloggers who will be making these for years to come!! Enjoy :)


Amazing "Everything" Burger Topping
Aren't they just so gorgeous?
For the Brioche Buns:
3T Whole Milk, Warmed
1C Water, Warmed
2t Instant Yeast
2 ½T Sugar
1 ½t Salt
1 Large Egg
3C Bread Flour
1/3C AP Flour
2 ½T Unsalted Butter, Softened

For the “Everything” Topping:
1 Large Egg
1T Water
4t Poppy Seeds
4t Sesame Seeds
4t Dried Garlic (minced or flaked)
4t Dried Onion (minced or chopped)
2t Sea Salt
1t Fresh Cracked Pepper

Directions:
1. Making the Dough:In the bowl of a stand mixer fitted with the paddle attachment, combine the milk, water, yeast, sugar, salt and egg.  Mix briefly to combine.  Add the bread and AP flours to the bowl, and mix until incorporated.  Mix in the butter.  Switch to the dough hook and knead on low speed for about 6-8 minutes.  The dough will be somewhat tacky, but you want to avoid adding too much extra flour, which will create tough buns. Transfer the dough to a lightly oiled bowl. Cover with plastic wrap and let rise in a warm place until doubled in bulk, 1-2 hours.
2. Prepping for the Buns:Line two baking sheets with parchment paper or a Silpat (I prefer Silpats).  Using a dough scraper, divide the dough into 10-12 equal parts. Gently roll each portion of dough into a ball and place on the two baking sheets, 2-3 inches apart (I put 5-6 dough balls on each baking sheet, which ensures that they won’t touch). Cover loosely with lightly oiled plastic wrap and let rise again, 1-2 hours, until puffed up and nearly doubled.
3. For the “Everything” Topping:In a bowl, mix together the poppy seeds, sesame seeds, dried garlic, dried onion, salt, and pepper until completely incorporated. In another bowl, whisk together the egg and water. Set these both up in a station, along with a pastry brush, for quick assembly. Just a side note, you will not have to use all of the topping, just save the rest for another batch of buns or homemade bagels.
4. Baking the Buns:Set a large metal pan of water on the lowest rack of the oven. Preheat the oven to 400˚F with a rack in the center. Place one of the baking sheets in the oven and bake the buns for 7 minutes. Remove them from the oven, and then brush them completely with the egg wash and heavily sprinkle the tops with the “everything” seasoning topping. Rotate the pan halfway and return the seasoned buns to the oven and to cook for another 8-10 minutes or until they are perfectly golden brown on top and thoroughly cooked through in the center.
5. Once they are done, remove the buns to a cooling rack to cool completely. After they have cooled, gently slice the buns in half and store them until you are ready to use them.

Saturday, February 9, 2013

Muss + Turner Inspired Burgers with Cilantro-Candied Jalapeno Mayo, Roasted Poblanos, Pepper Jack Cheese, & Red Onion on Toasted “Everything” Brioche Buns


Muss + Turner Inspired Burgers with Cilantro-Candied Jalapeno Mayo, Roasted Poblanos, 
Pepper Jack Cheese, & Red Onion on Toasted “Everything” Brioche Buns
Sorry for not posting the last couple days, I had school and then my friends and I went down to Jacksonville, Florida for the Jimmy Buffett concert. And lemme tell y'all, it was debauchery at its' finest. Here's some pictures from our drunken adventure...
Kisses for Mollie
My car was so packed, we had to sit with stuff on our laps...
My Mountain Man bought this hat off some random people for $50... totally worth it.
debauchery.
Wrong in so many ways (that's a beach ball as my pregnant belly, don't worry) 
Heading into the concert!!
Me + Mollie Tailgatin'
About to grill our burgers
He's not too good at grilling, trust me.
Our Whole Group
Bruschetta Dip. BBQ Pulled Pork Dip. Caramelized Onion Dip. 
Us with two pirates
He loved my hatttttttt :)
Wasted away again in Margaritavilleeeee
Kisses for my Cleetus
"Cheeseburger's in Paradise" that we made, um yum. 
As you can see, it was pretty crazy! We're all still recovering, but it was so worth it. Everyone should go to at least one Jimmy concert in their life, there's nothin' like it. Anywayyyyyy, back to today's recipe. For our tailgate, I made some homemade brioche buns, but to make them extra special... I topped them with a classic "everything" bagel seasoning mix. There were poppy seeds, sesame seeds, dried garlic, onion flakes, salt, and pepper all gorgeously sprinkled on top of the perfectly browned buns. They were to die for. So much so, that when we had a few left over, I knew we had to make some burgers this weekend. Ultimately, I decided that I wanted to make a burger inspired by one of my favorite lunch spots in Atlanta, Muss + Turner. They have a bunch of great options, but their burger is always raved about. It's layered with roasted poblano peppers, aged cheddar, red onion, and a cilantro mayo. I mean, those are some great components y'all. It was mixed up a bit today because we used pepper jack cheese and a cilantro-candied jalapeno mayo. This burger is sweet, smoky, salty, creamy, & spicy. That sounds perfectly balanced in my book. Well, I'm happy to report it was fabulous and definitely ranks in the top five of any burger that I have made. All of the handmade components really take it over the top, especially that bun. I'm not including the bun in this recipe, but don't you worry, I'll post that recipe tomorrow afternoon. So, please check back!! Enjoy :)
Look at all those perfect layers, y'all :)

For the Cilantro-Candied Jalapeno Mayo:
½C Mayo
¼C Fresh Cilantro, Minced
2T Candied Jalapenos, Minced
1T Lime Juice
1 Small Clove of Garlic, Minced into a Paste (with a little salt)
Salt & Pepper, To Taste (a pinch of sugar, if needed)

For the Cumin Burger Seasoning:
2t Sea Salt
1t Fresh Cracked Pepper
½t Cumin

For the Muss + Turner Burger:
Homemade “Everything” Brioche Buns, Sliced & Toasted (or fried in butter)
Ground Chuck Beef Patties
Prepared Cumin Burger Seasoning
Prepared Cilantro-Candied Jalapeno Mayo
Pepper Jack Cheese Slices
Roasted Poblano Peppers (one per burger)
Thinly Sliced Red Onion

Directions:
1. For the Cilantro-Candied Jalapeno Mayo: Combine all of the ingredients in a bowl and whisk until incorporated. Season the mayo with salt, pepper, and sugar to taste. Refrigerate until ready to use.
2. For the Cumin Burger Seasoning: Mix together the spices in a small bowl until thoroughly mixed. Sprinkle the seasoning mix on both sides of the burger patties.
3. Assembling the Burgers: Season the burger patties with the prepared cumin seasoning. Sear the burgers over high heat until you have reached your preferred doneness (we like ours medium to medium-rare). Toast your brioche bun in the oven or fry them in oil until golden brown & crispy. Spread a big spoonful of the Cilantro-Candied Jalapeno Mayo on both sides of the buns. Layer the burger by placing down some of roasted poblano, followed by the burger, more roasted poblano, and a slice of pepper jack cheese. Toast the cheese topped burger in the oven until it has just melted. Remove it from the oven and finish it off with some thinly sliced onion and the top piece of the bun.
4. Enjoy immediately while it’s still warm!

Tuesday, February 5, 2013

Gourmet Coke Floats with Homemade Vanilla Bean Ice Cream & Salty Bourbon Caramel Sauce

Gourmet Coke Floats with Homemade Vanilla Bean Ice Cream & Salty Bourbon Caramel Sauce
Coke floats are a beloved childhood memory. I enjoyed them whenever we went to Johnny Rockets, The Varsity, or at home on a hot summer day. I can't honestly think of a combination that a kid could adore more... fizzy soda and creamy ice cream, sometimes topped with some whipped cream + a cherry. It's what dreams are made of. I had been dying to put my own twist on this diner classic, and I knew it had to start with my absolute favorite homemade vanilla bean ice cream. I swear by it. I have to triple the recipe when friends are coming over. I could probably open an ice cream parlor with this as my signature flavor. I don't know why... maybe because it's unbelievably creamy and has the strongest vanilla bean essence you can imagine. Just take my word for it, people. It's a luscious, frozen custard of glory. On top of the homemade ice cream element, I was kinda feeling the idea of incorporating a caramel sauce drizzled inside the cup. Isn't that what we love most about Coca Cola, that dreamy caramel flavor with that extra fizzy element? So, why not add even more to the float? We'd be crazy not to, girl. In an attempt to make it grown up a smidge, I whipped up my go-to caramel sauce that is spiked with bourbon and generously salted with fleur de sel. Next, all you'z got to do is assemble it! We got an extra tall glass (but a mason jar works great too) and drizzled the inside of it with some of the Salty Bourbon Caramel Sauce. Then, you gotta plop about 2-3 big scoops of the Homemade Vanilla Bean Ice Cream to fill up the cup. Finally, pour a cold can or bottle of Classic Coca Cola over the ice cream. Do this very, very slowly because if you don't, it's gonna bubble up like a volcano eruption and go every where. This is not good... and not proper etiquette when it comes to float making. As you pour the Coke, this fluffy foam rises to the top, and eventually the foam puffs up above the rim to form this sugary, caramel cloud. And because I'm a little naughty, and I like things sweet + savory, I like to garnish the top with just a pinch more of fleur de sel. But it's up to you whether or not you come to the dark side with me. Oh, and to be extra naughty, you can be like us and spike it with some vodka or bourbon, but hey, no peer pressure or anything. Also, for all you non-Coke lovers, Root Beer would be an easy substitution as well!! Enjoy :)
Salty Bourbon Caramel Sauce Drizzle 
Sugary, Caramel Soda Foam Cloud 
You see those vanilla beans... don't you??
Here's me + my girl enjoyin' Gourmet Coke Floats in mason jars in our garden
You gotta take a big gulp!
For the Homemade Vanilla Bean Ice Cream:
1 Stick Unsalted Butter, Melted & Cooled Slightly
2 ½C Heavy Cream
½C Whole Milk
6 Egg Yolks
1C Sugar
½t Salt
1t Vanilla
2T Vanilla Bean Infused Rum (or any kind of infused booze that is clear)
2 Whole Vanilla Beans, Split & Scraped for Seeds 

For the Salty Bourbon Caramel Sauce:
1C Sugar
3T Bourbon, Divided
1t Corn Syrup
½C Heavy Cream
6T Unsalted Butter, Cut into ½inch Cubes
½t Sea Salt
1 ½t Vanilla

For the Coke Floats:
Prepared Salty Bourbon Caramel Sauce
Frozen Homemade Vanilla Bean Ice Cream
Fleur de Sel, For Sprinkling (optional)
Coca Cola or Root Beer Soda
Whipped Cream, For Topping
Maraschino Cherries, For Garnishing

Directions:
1. For the Homemade Vanilla Bean Ice Cream: In a saucepan, bring the cream, milk, vanilla bean pods, and vanilla bean seeds to a simmer. In a bowl, whisk together the egg yolks, sugar, and salt until fluffy. Slowly whisk in the melted butter. Once combined, gradually and slowly into the simmering milk. Pour this mixture back into the saucepan and cook over low heat, until thickened (it should coat the back of a spoon). Strain the custard into a bowl that is placed into an ice bath. Stir in the vanilla bean infused rum and vanilla. Cool the custard base until completely chilled. Once the mixture is chilled, freeze in an ice cream maker according to the manufacturer’s instructions. As soon as the mixture is done churning, transfer to a bowl or airtight container. Store in the freezer until firm.
2. For the Salty Bourbon Caramel Sauce: Stir together the sugar, 2T of bourbon, corn syrup, and 1T water in a deep saucepan over medium-low heat until the sugar dissolves. Increase the heat, bring to a boil without stirring, and cook, occasionally swirling the pan and brushing down the sides with a wet pastry brush, until sugar is a deep amber color, about 6-8 minutes. Remove the caramel from the heat and whisk in the heavy cream, butter, and sea salt (the mixture will bubble vigorously). Let it cool for 5 minutes, and then whisk in the remaining 1T of bourbon and vanilla. Let the bourbon caramel cool slightly on your kitchen counter. The caramel can be made 2 hours ahead of time, but continue to let the caramel stand at room temperature until you are ready to use it. Pour the caramel into a squeeze bottle and keep at room temperature, so that the caramel will be easier to drizzle inside the glass.
3. Making the Coke Floats: In a tall glass, drizzle the salty bourbon caramel sauce all over the inside of the serving glass, making sure to let the drizzle drip down the sides, and then drop about 2-3 scoops of the ice cream into the bottom of the caramel drizzled glass. Pour some Coca Cola or Root Beer over the top of the glass very slowly because the mixture will begin to bubble and can expand over the rim of the glass. Garnish the top of the drink with some whipped cream, another drizzle of the caramel sauce, and a maraschino cherry. Enjoy before the ice cream begins to melt too much!