Showing posts with label Cream Cheese. Show all posts

Saturday, October 1, 2016

Saturday Down South: Creamy Taco Dip with Taco-Ranch Sour Cream, Shredded Colby Jack Cheese, Crunchy Hearts of Romaine, Homemade Pico de Gallo, + a Drizzle of Salsa Verde Crema

I don't have many recipes that require very little work... but hey, I've got one for you today! It is literally so easy-peasy, that it took me less than 20 minutes to whip up. Hell, you could easily make it faster if you buy a store-bought pico de gallo instead of making it from scratch! Essentially this has all of the components from a bite of a taco. What doesn't sound good about that? We've been on a real Mexican kick as of lately... nearly eating it every other day. So when the weekend came, I knew I wanted to make this. The dip starts off with a cream cheese + sour cream layer that is fortified with loads of flavor from taco seasoning, ranch seasoning, and hot sauce. Spoon this mixture onto a serving plate, and then sprinkle the colby jack cheese on top, followed by scattering the shredded romaine all over the dip. Next, make a mound of the pico de gallo and finish it off by drizzling some of the salsa verde crema + a sprinkle of chili powder. That's it... it's all done! All you have to do is serve it with some tortilla chips and you're gold as gold! Enjoy y'all :)


For the Taco-Ranch Sour Cream:
8oz Cream Cheese, Softened
8oz Sour Cream
1 Package of Taco Seasoning
¼C Ranch Seasoning
¼C Hot Sauce

For the Pico de Gallo:
5 Whole Roma Tomatoes, Diced
1 Small Red Onion, Diced
2 Jalapeno Peppers, Minced
¼C Candied Jalapeno, Minced
4 Cloves of Garlic, Minced
¼C Fresh Cilantro, Chopped
1 Lime, Zested + Juiced
1T EVOO
Salt + Pepper, To Taste

For the Salsa Verde Crema:
½C Mexican Crema
½C Salsa Verde 

For the Creamy Taco Dip:
Prepared Taco-Ranch Sour Cream
8oz Colby Jack Cheese, Shredded
1-2 Hearts of Romaine, Shredded
Prepared Pico de Gallo
Prepared Salsa Verde Crema
Chili Powder, For Sprinkling

Directions:
1. For the Taco-Ranch Sour Cream: In the bowl of a standing mixer, fitted with the whisk attachment, beat the softened cream cheese until smooth. With the mixer running on low, start adding the sour cream a little at a time. Next, toss in the taco and ranch seasoning, followed by the hot sauce. Beat to combine.
2. For the Homemade Pico de Gallo: Combine all of the ingredients in a bowl and toss to combine. Refrigerate until you are ready to serve.
3. For the Salsa Verde Cream: Whisk together the salsa verde and sour cream. Spoon this mixture into a squeeze bottle and set it aside.
4. Assembling the Creamy Taco Dip: Spoon the Taco-Ranch sour cream onto a serving plate. Sprinkle the shredded colby jack over the sour cream and scatter the shredded romaine on top of the cheese. Top the lettuce with a mound of the homemade pico de gallo. Finish the dip by sprinkling on some chili powder and drizzling the salsa verde all over the dip. Serve with tortilla chips and enjoy!

Friday, September 2, 2016

Saturday Down South: In 'n Out Animal Style Double Bacon Cheeseburger Dip with Mustard Grilled Burger Crumbles, Pan Fried Caramelized Onions, Cubed Dill Pickles, Diced Tomatoes, Crispy Bacon Lardons, + Secret Sauce Drizzle

It's officially the most wonderful time of the year... football season!! I swear my Mountain Man has been counting down the days since we won the national championship last season. Now comes the time of friends, tailgating, fatty food, bonfires, and plenty of booze. 

One of the mainstays of our menu is hearty dip, and this recipe that I am featuring today is just that! The inspiration came from a burger joint that is extremely popular in California... In n' Out Burger. Since Alabama is playing USC tomorrow, I thought this would be the perfect time to feature my first (of many) tailgate recipes this year. When you order a burger or fries "animal style", this usually means that it comes with extra secret sauce, caramelized onions, mustard grilled patties, and pickles. So, I started off with a creamy dip base and added mustard grilled burger crumbles, crispy bacon lardons, pan fried caramelized onions, cubed bread n' butter pickles, diced tomatoes, and shredded cheese. After it is baked in the oven until golden brown + delicious, you whip a batch of my not-so-secret secret sauce and drizzle it over the top. At this point, everyone will be salivating, so all that is left to do is serve with some some chips or crackers. I also like to put out some different bowls with burger toppings for extra garnishing... pickles, tomatoes, shredded lettuce, + more sauce. That way, when a friend grabs a chip and some dip, they can sprinkle a little bit of this and a little bit of that on top for the perfect bite! This recipe is super easy, so almost anyone can whip it up, don't y'all worry. I hope y'all love this first recipe of the season!! Enjoy :)


For the Mustard Grilled Burger Crumbles:
1lb 75-25 Ground Chuck
¼C Yellow Mustard
Kosher Salt + Fresh Cracked Pepper, To Taste
4T Unsalted Butter

For the Pan Fried Caramelized Onions:
2 Large Vidalia Onions, Sliced
4T Unsalted Butter + 2T Vegetable Oil
Kosher Salt, To Taste
¼C Sugar

For the Dip:
8oz Herbed Cream Cheese, Room Temperature
1C Sour Cream
½C Mayo
2C Shredded Cheddar, Split
2C Mozzarella Cheese, Split
1 Garlic Clove, Minced
1-2T Worcestershire Sauce
½t Smoked Paprika, Garlic Powder, & Onion Powder
Kosher Salt + Fresh Cracked Pepper, To Taste
Prepared Mustard Grilled Burger Crumbles
Prepared Pan Fried Caramelized Onions
1 Medium Tomato, Diced
½C Bread n’ Butter Pickles, Diced
Shredded Romaine Lettuce

For the Secret Sauce:
1/3C Mayo
3T Ketchup
1-2T Sweet Pickle Relish
1t Sugar + 1 White Vinegar
¼t Garlic Powder, Onion Powder, + Paprika
Kosher Salt + Fresh Cracked Pepper, To Taste

Directions:
1. Preheat the open to 350 degrees and spray a pan with Pam.
2. For the Mustard Grilled Burger Crumbles: In a large skillet, over medium high heat, brown the ground beef. Pour off any extra fat and stir in the mustard. Season with salt and pepper, and then set it aside.
3. For the Pan Fried Caramelized Onions: Heat the butter and onion in a large sauté pan over medium heat. Add the onions, salt, and pepper and sauté for 10 minutes. Reduce the heat to medium-low and cook, stirring occasionally, for 20 more minutes until the onions are browned and caramelized. Allow the onions to cool.
4. For the Secret Sauce: Mix together all of the ingredients until everything is incorporated. Taste the sauce and adjust to your taste preferences. Set this sauce aside until you want to top the dip with it.
5. For the Dip: Place the cream cheese, sour cream, and mayo in the bowl of an electric mixer, fitted with the paddle attachment, and bet until smooth. Add in 1C each of the shredded cheddar and mozzarella (saving the rest to put on top), followed by the mustard grilled burger crumbles, cooled caramelized onions, minced garlic, Worcestershire, spices, diced tomato, and diced pickles. Season with salt and pepper to taste. Sprinkle the left over cheese on top and bake in the oven for 20-30 minutes until the cheese has melted and begun to brown on top. Remove the dip from the oven and drizzle the secret sauce over the top. Serve with Ritz crackers or potatoes chips, and have a bowl of shredded lettuce on the side to garnish the dip.

Saturday, September 26, 2015

Saturday Down South: University of Alabama-Inspired Houndstooth Pudding Trifle with Homemade Red Velvet Pudding, Cream Cheese Whipped Cream, Crushed Double Stuffed Oreos, + Red Velvet Cake Sprinkles

The Haute + Heirloom blogger has returned, yay!! I know I have been gone for-like-ever and I apologize for that, but I have been extremely busy and my personal life is in shambles. I hate that I haven't posted some of my new recipes, but I'm back, and the recipes are even BETTER. It's a 100% guarantee, mmk? As many of my followers know, we are huge football fans. Obviously, Alabama comes in first in the ranking, and just behind them comes University of Georgia + the Atlanta Falcons. So if you're a Georgia gal like me, this dessert is perfect for all three teams and all of your buddies will love you for making a pan of this trifle during the long day of tailgatin'. Trust me on that one. My usual go-to dessert had always been my Gourmet Banana Pudding, but I wanted something festive to celebrate with... and this is certainly festive. If you didn't know already, Alabama's team colors are crimson + white, but the school has incorporated the pattern of houndstooth into the scheme as well. The tradition of houndstooth comes from the greatest college football coach of all time, Bear Bryant. He wore a houndstooth hat to every single game, and well, it caught on like wildfire. Now it's almost impossible to not see someone with houndstooth on during the game day. So, when I first started concocting this dish in my head, it became clear to me that I wanted the same idea that I use for banana pudding. Instead of creamy vanilla bean pudding, there is a luscious + homemade red velvet pudding. You have to know by now that my obsession with "red velvet desserts"is quite unhealthy and I tend to go overboard, but hey who's counting anyway. Next, I used crushed up Double Stuffed Oreos rather than the homemade shortbread because I needed the contrast of the black + white cookies to represent the houndstooth concept. And hell, who doesn't like Oreos... I sure do!! What's even better about them is that if you let the pudding trifle sit in the refrigerator for 1-4 hours (or overnight if you need to) like we did, the cookies begin to soften to the texture of the Oreos in cookies + cream ice cream. They literally, like, melt in your mouth. Lastly, you have to make the "frosting" type whipped cream layer. It has the tang of a cream cheese frosting (which is what all red velvet cakes must have), the sweetness from the sweetened condensed milk, the delightful cloud-like fluff from the Cool Whip, oh and don't forget that vanilla bean that is added in because that is so much better than vanilla extract. One fun ingredient I found for this dessert are some of Betty Crocker's yummy Red Velvet Cake Sprinkles. And let's be honest, sprinkles make every dessert so much better, it's a scientific fact. To be frank, these are double the fun because they are sprinkles that taste like cake.... woah, woah, WOAH. Mind Blown. These Red Velvet Cake Sprinkles also give the dish a little crunch with each bite. Textures galore here, folks!! I hope y'all enjoy this pudding trifle as much as we did because it's already on our tailgate menu for the Alabama-LSU game in Tuscaloosa in November. So go on, start cookin' it :)
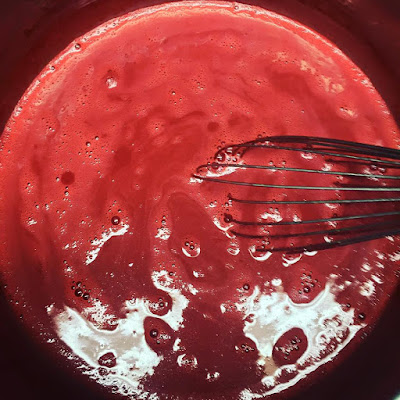
the beginning of making the homemade red velvet pudding
assembling like a beast
check out those layers, guys
The Close Up: Amazing Betty Crocker Red Velvet Cake Sprinkles
And the best shot of them all... a perfect spoonful of every glorious layer :)
For the Classic Pudding Mix:
½C Cornstarch
¼C Buttermilk or Milk Powder (I used buttermilk since it’s a key component in red velvet cake)
1C Cake Flour (AP Flour can be substituted if you don’t have it)
1 ½C Sugar
1t Kosher Salt  

For the Homemade Red Velvet Pudding:
3C Whole Milk, Divided
¾C Classic Pudding Mix (above; you will have leftover mix, but now you can make more of it)
5T Cocoa Powder, Sifted
Generous Pinch of Salt
¼C Sugar
2 Eggs
1T White Vinegar
2T Salted Butter
2t Vanilla Extract
1T Cream Cheese Emulsion
Red Food Coloring (use as much as you want until you reach your desired red color)

For the Cream Cheese Whipped Cream:
8oz Cream Cheese, Softened
1 Can of Sweetened, Condensed Milk
1T Cream Cheese Emulsion
¼C Heavy Whipping Cream
16oz Cool Whip, Defrosted
1 Vanilla Bean, Split + Scraped for Seeds (if you don’t have vanilla bean, sub in 2t vanilla extract)
Generous Pinch of Salt  (or to taste)

For the Houndstooth Trifle:
Prepared Homemade Red Velvet Pudding, Completely Chilled
Prepared Cream Cheese Whipped Cream, Completely Chilled
1 Box of Double Stuffed Oreos, Crushed into Bite Size Pieces
1 Container of Betty Crocker Red Velvet Cake Sprinkles (chocolate sprinkles can be subbed in)

Directions:
1. For the Classic Pudding Mix: Combine the cornstarch, flour, buttermilk powder, sugar, and salt. Whisk the mixture until it is a cohesive mixture is formed. Set this pudding mix aside. If you have any remaining pudding mix left, store it in an airtight container.
2. For the Homemade Red Velvet Pudding: Pour 2 ½C of whole milk into a medium sized saucepan or pot. Turn on the stove to low heat and allow the milk to get hot (with some slight steaming), but make sure the milk does not start boiling! While the milk is heating, get another mixing bowl and whisk together the pudding mix, sifted cocoa powder, sugar, 2 eggs, a generous pinch of salt, white distilled vinegar, and the remaining ½C of whole milk. While whisking, make sure it is a smooth, creamy, chocolate liquid. Once the milk is hot, add in the chocolate liquid to the hot milk and whisk vigorously (so that the eggs won’t cook and curdle). Then add in the salted butter, vanilla extract, cream cheese emulsion, and red dye. Increase the heat to medium or medium-low while whisking continuously because the pudding could easily burn. Cook and whisk until the pudding mixture starts to thicken, this usually takes about 8-12 minutes, depending on the thickness that you prefer. During the cooking period, make sure to taste test it to see if it needs more salt or vanilla (do it to taste) When it has reached your desired consistency, turn off the heat and remove the pan from the burner. It will continue to thicken a little more as it cools and sits. Press a piece of plastic wrap onto the top of the pudding; this will help the pudding to remain smooth and also prevents it from developing a “skin” on top.  Cool the pudding until it is completely chilled and store in the refrigerator until you need to use it.
3. For the Cream Cheese Whipped Cream: Place the softened cream cheese, vanilla bean seeds, heavy whipping cream, cream cheese emulsion, and a pinch of salt into the bowl of a standing mixer with the whisk attachment. Beat the cream cheese at medium speed until it smooth and slightly whipped, about 1-2 minutes. With the mixer still on, pour in the can of sweetened, condensed milk and mix until it is a cohesive, creamy mixture (also make sure to scrape down the sides and the bottom of the bowl to get any remaining cream cheese that is stuck). This should take another 1-2 minutes. Lastly, gently fold in the defrosted (yet still cold) Cool Whip, so that it is completely incorporated, but still has a light and airy texture. Cool the refrigerator until you are ready to use it.
4. Assembling the Houndstooth Pudding Trifle: Get your favorite serving piece (preferably a glass trifle dish, so that you can see every layer) and begin the layering process. Start off with a base of crushed double stuffed Oreo cookies. Next, dollop some of the homemade red velvet pudding all over the cookies and then gently smooth it out, so that the Oreos are completely covered. Following the same method as the pudding, dollop the cream cheese whipped cream on top of the red velvet pudding and smooth the top as well. Spread some of the red velvet sprinkles evenly over the cream cheese whipped cream. Repeat the layering process of crushed cookies, red velvet pudding, cream cheese whipped cream, and red velvet sprinkles until you have run out of all of the different components. 
5. You can enjoy the pudding now, but I personally prefer to let it sit in the refrigerator, so that the pudding and whipped cream have firmed up, while the cookies are soft (think of the softened textures of Oreos in cookies + cream ice cream). You can chill it from 1-4 hours… or even overnight if you want or need to! Besides that, it’s time to chow down on your festive football dessert. And hey, it’s also great for UGA + Falcons fans as well!!

Sunday, December 28, 2014

Festive Christmas Cheeseball with Boursin Cheese, Cranberry Cheddar, Aged Gruyere, Caramelized Walnuts, Crispy Sage, Chives, + Rolled in Pomegranate Arils

Festive Christmas Cheeseball with Boursin Cheese, Cranberry Cheddar, Aged Gruyere, Caramelized Walnuts, Crispy Sage, Chives, + Rolled in Pomegranate Arils
Hey y'all, sorry I have been out of commission, we have been traveling non-stop. First we were in Birmingham for about a week, and then Atlanta for a few days, and in just two day, we're heading off to New Orleans for the Alabama vs. Ohio State game at the Sugar Bowl for the first football playoff game... oh yeah, and we get to celebrate New Years Eve there too!! So it will have been a couple crazy weeks. But even though we are heading to the famous Bourbon Street, sadly, we have to admit that Christmas has passed us once again :( I can't believe it has already come + gone and now we have have to wait a'whole'nother year before celebrating it again. This year, since we were so busy, I unfortunately didn't get to make but two new recipes to honor the holiday season. This is the first recipe and it is the perfect party appetizer that all your friends + family are sure to enjoy. And hey, it's festive in color, to boot! The cheeseball begins with softened cream cheese + boursin cheese, shredded cranberry cheddar + aged gruyere, caramelized walnuts, crispy sage, fresh chives, and finally rolled in pomegranate arils. How perfect is that... green, red, + white? It's like Santa's elves made it themselves. Honestly, it is so easy to make as well. All you have to do is beat together the softened cream cheese and boursin until whipped + cohesive. And then toss in the the shredded cheese, walnuts, herbs, and some fresh cracked pepper. Mix it together until a cohesive mixture is formed, and using plastic wrap, roll it into one large ball or two medium-sized balls, before placing them into the fridge to chill. Meanwhile, pour your pomegranate arils onto a thickly, paper towel-lined cutting board and spread them out, so that they can dry as much as possible. The more moisture removed, the better the cheeseball will look and taste (we don't want no soggy cheese, y'all)!! After the cheeseball has chilled out in the fridge and the pomegranate is perfectly dry, you just need roll the ball around in the arils, pressing them in slightly, so that they adhere and stick to the cheese... making the perfect presentation. You can serve the festive christmas cheeseball directly out of the refrigerator or you can let it soften a bit, so it is easier to spread onto various crackers. This appetizer hits every flavor note that you could ever want... salty, sweet, juicy, herby, cheesy, fruity, creamy, + nutty!! I hope y'all get to enjoy this one before New Years Day!! Enjoy :)
For the Festive Cheeseball:
4T Unsalted Butter, Melted
16 Fresh Sage Leaves
1 Round of Boursin Cheese, Softened
8oz Cream Cheese, Softened
6oz Cranberry Cheddar, Shredded
6oz Aged Gruyere, Shredded
1C Caramelized Walnuts
¼C Fresh Minced Chives (or more if you please)
Fresh Cracked Pepper, To Taste
1C Fresh Pomegranate Arils (enough to cover the ball; dried cranberries are a good substitute)
Various Styles of Crackers, For Serving

Directions:
1. Frying the Sage: Heat a skillet over medium heat and add butter. Once it's sizzling, toss in the sage leaves and cook until crispy - flipping once and cooking about 1 minute per side. Remove the sage leaves and place them on a paper towel to crisp up a bit. Set the butter aside.
2. Making the Cheeseball: In the bowl of your electric mixer, combine the cream cheese, mascarpone and cheddar cheese. Beat until combined, and then add in the almonds, sage leaves, remaining butter, salt and pepper. Mix on low speed until combined, about 1 minute, scraping down the sides and the bottom if needed. Take the cheese mixture out of the bowl and mold it into a big ball as best you can. Roll it in plastic wrap and place it in the fridge for 30 minutes.
3. Prepping the Pomegranate: Meanwhile, place the arils on a paper towel and pat them completely dry. Let them sit out while the cheese is chilling to remove as much liquid from them as possible. This will keep the cheeseball pretty, and not wet or slimy.
4. Finishing the Cheeseball: After 30 minutes, mold the cheese into more of a smooth ball. Add the arils to a plate or baking sheet and roll the ball through them, using your hands to press arils into all the cracks and crevices. You will need to gently press so the arils adhere to the cheese. At this time, you can serve it immediately or keep it in the fridge until ready to use. If you want to make it ahead of time, you can rolls the ball 1 to 2 days beforehand. I'd wait until the night before or morning of to add the pomegranate arils, and you may need to let the cheese come to room temp a bit so it's sticky enough.
5. Serve with various types of crackers and enjoy with friends + family!

Tuesday, July 8, 2014

Herbed Strawberry Bruschetta with Whipped Feta + Pink Peppercorn Balsamic Reduction on Olive Oil Fried Multigrain Toast

Herbed Strawberry Bruschetta with Whipped Feta + Pink Peppercorn Balsamic Reduction
on Olive Oil Fried Multigrain Toast
Hey y'all, I hope everyone had a great Fourth of July holiday… we sure did. My Mountain Man and I celebrated our one year engagement anniversary. I can't believe it's already been a year of wedding planning, it seemed to pass so slowly and now looking back, it was too incredibly fast. Just in a short three months, we will be saying "I Do" in Atlanta. So bizarre. Anyway, today I am sharing a recipe that should be enjoyed all spring and all summer long. We're huge fans of bruschetta over here… and by that, I mean we could just eat a massive plate of it for dinner and call it a night. We don't discriminate, not even when it's made with fruit. Ripe strawberries pair beautifully with savory flavors and this recipe is a great example of that! I was actually inspired by a dish at our favorite restaurant (and wedding location), JCT Kitchen + Bar. It was a simple side of the ripest, sweetest strawberries that I have ever tasted with a drizzle of olive oil and balsamic, some crumbled feta, and minced basil, mint, & chives. As we popped each berry into our mouth, the flavors sang so loudly and tasted so brightly. I couldn't believe the flavor combination. I just knew I had to take this idea and run with it. My recipe starts with a good loaf of multigrain bread, cut into rounds, and fried until golden brown in olive oil (a personal favorite technique when it comes to making bruschetta). Then, I made some whipped feta in the food processor, which is a breeze to make, but yields such lovely results. You could easily sub in goat cheese here, if you prefer, however I totally recommend the feta cheese. The strawberry bruschetta topping begins with chopping the berries into cubes and macerating them in a little sugar, balsamic, and lemon. I did this for about an hour, just to allow them to deepen and sweeten in a flavor (it's a must-do).  Luckily for me, I have a whole mess of fresh herbs growing in our garden, so I just minced up basil, mint, chives, and parsley, and added it to the mix. Save a little bit of the mixed herbs for garnishing though, it gives a beautiful contrast against the red berries, white feta, and dark balsamic. The balsamic reduction is enhanced with some crushed pink peppercorn because I absolutely love that flavor profile when paired with strawberries. Last year, I made strawberry-pink peppercorn jam and it was fab. So do it. Everyone loved this easy + fresh appetizer, and I can't wait to make it again and again and again!! Enjoy :)


For the Whipped Feta Cheese:
8oz Creamy Feta Cheese, Room Temperature (or very soft)
2oz Cream Cheese, Room Temperature (or very soft)
3T Cold Heavy Cream
Pinch of Salt & Pepper

For the Herbed Strawberry Bruschetta Topping:
1 Pint of Fresh Strawberries, Cut into Cubes
2T Balsamic Vinegar + 1-2T Sugar (depending how ripe your berries are)
1 Lemon, Zested & Juiced
2T Olive Oil
Big Handful of Fresh Basil + Mint, Minced
2T Minced Chives
Fleur de Sel + Fresh Cracked Pepper, To Taste
¼t Red Pepper Flakes 

For the Pink Peppercorn Balsamic Reduction:
¼C Balsamic Vinegar
1T Honey
½t Crushed Pink Peppercorns (or to taste)

For the Bruschetta:
Prepared Herbed Strawberry Bruschetta Topping
Prepared Whipped Feta Cheese (plus crumbled feta for garnish)
Slices of Multigrain Bread
Olive Oil, For Frying
Prepared Pink Peppercorn Balsamic Reduction, For Drizzling
Freshly Minced Basil, Chives, & Mint, For Garnishing

Directions:
1. For the Whipped Feta Cheese: In the bowl of a standing mixer fitted with the whisk attachment, beat together the softened cream cheese and salt until thoroughly mixed. Scrape down the sides and turn the mixer to medium-high speed and add in ¼C heavy cream. Continue whipping, while continuously adding a little bit of a crumbled feta cheese at a time, until the feta cheese is combined throughout. Add in the remaining ¼C heavy cream and beat on high until it is light & fluffy. Season the feta cheese with salt & pepper to taste. Spoon this mixture onto a serving plate.
2. For the Herbed Strawberry Bruschetta: In a large mixing bowl, toss together the cubed strawberries, balsamic vinegar, sugar, lemon zest, and lemon juice. Let the berries macerate for an hour. Add in the remaining ingredients and season with salt and pepper to taste. Set aside for 15-30 minutes to let the flavors meld.
3. For the Balsamic Reduction: Add the balsamic vinegar and honey to a small saucepan and cook to reduce for 3-5 minutes, or until thick and syrupy. Stir in crushed pink peppercorns. Set this aside until ready to use.
4. For the Multigrain Bread: Heat about 1 inch of olive oil in a deep sauté pan over medium-high heat. Fry the slices of multigrain bread in the oil until golden brown & crispy, about 2 minutes on each side.
5. Assembling the Bruschetta: Spread the fried bread with some of the whipped feta, and then top each piece of bread with a mound of the strawberry Bruschetta topping mixture. Garnish with a drizzle of balsamic reduction, crumbled feta, and fresh minced herbs. Serve immediately.