Showing posts with label Mountain Man Approved. Show all posts

Tuesday, October 20, 2015

Pan Fried Italian Sausages with Charred Peppers + Onions on a bed of Creamy Parmesan Polenta

Pan Fried Italian Sausages with Charred Peppers + Onions on a bed of Creamy Parmesan Polenta
This is a dish I have never made before, seeing that it's an Italian staple, and I'm not the biggest fan for Italian food, it makes perfect sense that I wouldn't concoct a recipe for Sausage with Peppers + Onions. But, guess what... we all loved it, even me!! We're huge sausage people over here... any kind, any brand, any flavor... you name it, we want it. I especially love Al Fresco's Chicken Sausage; I decided that the best choice would be their Sweet Italian Style. But really, you could sub in any kind of Italian sausage, even a spicy one if you so please. It really doesn't matter what you end up using, as long as they are cooked up perfectly until they are golden brown, slightly charred, and crisped on the outside. The pan fried sausages are nestled on top of a bed of creamy parmesan polenta and charred peppers + onions. So let's start with the polenta first because who doesn't want extra cheesy polenta to chow down? These are perfectly seasoned in every which way and they are a cinch to make! Although the consist of mainly freshly grated parmesan, I wanted to add some shredded fontina to balance out the flavor and give them that little extra boost of cheese flavor! I'm tellin' y'all, every single one of us was moaning and groaning over this polenta... it was that good. I can't wait to use it in more of my recipes in the future, so keep that in your back pocket. Next, come the charred peppers + onions. I tried to used as many colors as I could get my hands on, so I grabbed 2 red onions, 1 red bell pepper, 1 orange bell pepper, 1 yellow bell pepper, and 1 green bell pepper. Now if you hate red onions, you can switch out another type of onion instead. If you can't find all four colors of bell peppers, just use what your local grocery store is carrying. No biggie! I have a somewhat strange, unorthodox method to cooking and charring the peppers + onions, so hear me out. I begin by sautéing them in some butter and olive oil, and then braise them in a sweetened red wine + red wine vinegar mixture. While they are cooking and the liquid is reducing, it is important that you keep an out on the veggies because you want them still quite crunchy before the next step. Now, here's where it might get weird for some of y'all. I like to pour the whole put into a strainer (placed over the sink) and allow all of the braising liquid to drip off. I even use some paper towels to dry them as much as I can before it's second stage of cooking. Don't worry though, your peppers will still have plenty of flavor; this step is important because you need dried veggies in order to get all of those wonderful charred edges. Secondly, you gotta have a dry cast iron skillet because that is how you achieve the blackening phase. So, put that sucker on high heat and add the dried peppers + onions in the screamin' hot pan and add in the minced garlic, Italian seasoning, a pinch of sugar, crushed red pepper flakes, kosher salt, and fresh cracked pepper. Toss to combine the vegetables with all of the seasonings, and once they have reached an al dente texture and a charred exterior, throw in some fresh mixed herbs for a little fresh bite. Now all that's left of the recipe is to begin assembling. I like to serve this in bowls, starting with a few big ladles of the cream parmesan polenta and some more freshly grated parmesan for good measure. Then you make a mound of your charred peppers + onions, so that your pan fried Italian sausages have a bed to rest on. We decided that we wanted a sweet + spicy dish, so we drizzled some white balsamic reduction over the top and garnished it with a sprinkling of dried red pepper flakes and fresh mixed herbs (think basil, parsley, chives, and oregano) to finish off the dish. This is a great weekday or Sunday supper, and also, a perfect hearty meal for this time of the year!! Enjoy :)


For the Pan Fried Italian Sausages:
8 Italian Sausage Links (We love Al Fresco’s Sweet Italian Style Chicken Sausage)
2T Unsalted Butter + 1T EVOO

For the Charred Peppers + Onions:
2T Unsalted Butter + 2T EVOO
1-2 Red Onions, Sliced (we like a lot of onion, so we used two)
4 Bell Peppers, Sliced into Strips (we used 1 of each color: red, orange, yellow, + green)
¼C Red Wine + ½C Red Wine Vinegar
1-2T Light Brown Sugar
4 Garlic Cloves, Minced
2t Italian Seasoning
A Heavy Pinch of Sugar ( to help the blackening process)
½-1t of Crushed Red Pepper Flakes (depending on how hot you like it)
Fleur de Sel + Fresh Cracked Pepper, To Taste
1-2T Mixed Fresh Herbs (we used basil, parsley, chives, andR
4C Unsalted Chicken Stock (homemade or store-bought)
2 Large Cloves of Garlic, Minced
1C Stone-Ground Cornmeal
1T Kosher Salt + 1t Fresh Cracked Pepper
1C Freshly Grated Parmesan
4oz Fontina Cheese, Shredded
¼C Crème Fraiche
4T Unsalted Butter
¼-½C Heavy Cream or Milk (to thin it out to your desired thickness) 
1-2T Mixed Fresh Herbs (we used basil, parsley, chives, + oregano)   

For the Sausage + Peppers with Parmesan Polenta:
Prepared Parmesan Polenta
Freshly Grated Parmesan, For Garnishing
Prepared Charred Peppers + Onions
Pan Fried Italian Sausages, Browned + Crisped
Homemade or Store-Bought White Balsamic Reduction, For Drizzling
Mixed Fresh Herbs, For Garnishing (same mixture of herbs used above)

Directions:
1. For the Pan Fried Italian Sausages: Melt the butter and EVOO in a cast iron skillet over medium-high heat, and then add in half of the sausages. Brown on all sides, about 8-12 minutes total, until they are golden brown yet slightly blackened in color. Remove the crisped sausages from the pan onto a plate and cover them with aluminum foil so that they stay warm while you cook the remaining half of the sausages (by following the same process as before). Make sure to keep them warm until you are ready to serve the dish.
2. For the Charred Peppers + Onions: In a large skillet, over high heat, melt together the butter and EVOO. Add in the red onion and multicolored pepper slices. Toss to coat them in the oil, along with some kosher salt and fresh cracked pepper, and sauté for about 5-10 minutes. Pour in the red wine and red wine vinegar to deglaze the pan. Add in the brown sugar and cook for a few more minutes until the wine has reduced by half. Get a large strainer and place it over your sink, pour the red wine braised peppers + onions into the strainer, so that all of the excess liquid is removed. Once all the liquid has dripped off, get a few pieces of paper towels and dry the peppers + onions are completely dried off. This is an important step because it will help you to obtain a perfect char (also make sure to completely wipe out all remaining liquid/moisture/butter/oil from the pan). With the skillet still on high heat, return the dried peppers + onions to the wiped down pan and let them vegetables char, making sure to stir them around for even browning. You want your peppers to be al dente in texture and blackened on the edges for color (so, make sure your pan is completely dry to obtain this component of the recipe). Add in the minced garlic, Italian seasoning, a heavy pinch of sugar, crushed red pepper flakes, and salt + pepper to taste. Cook again, while tossing to combine the seasonings with vegetables, for a minute or two, making sure that the minced garlic doesn’t burn. Once the peppers + onions are done, do a quick taste test and add in any necessary seasoning to your preferred taste (for example: kosher salt, fresh cracked pepper, crushed red pepper flakes, and/or sugar). After you have done the taste test and love the flavor, stir in the fresh herbs and keep this mixture ready until you are ready to assemble.
3. For the Creamy Parmesan Polenta: In a large pot, pour in the chicken stock and add in the minced garlic. Cook over medium-high heat until the stock comes to a boil. Reduce the heat to medium-low and very slowly whisk in the cornmeal, whisking constantly to make sure there are no lumps. Switch to a wooden spoon and add in the kosher salt and fresh cracked pepper. Simmer, while stirring constantly, for 10-12 minutes or until they are thick. Be sure the scrape the bottom of the pan thoroughly while you’re stirring. Move the pan off the heat and mix in the freshly grated Parmesan, shredded fontina cheese, crème fraiche, butter, and fresh herbs. If this mixture becomes to thick (either by overcooking or allowing it to sit too long), stir in some of the heavy cream/milk to loosen it again. Taste for seasonings and serve it immediately.
4. Assembling the Dish: Ladle some of the Creamy Parmesan Polenta into the bottom of a serving bowl and freshly grate some more Parmesan over of the polenta. Using a spoon or tongs, make a mound of the charred peppers + onions on top of the polenta. Place two links of pan fried Italian sausages (per bowl, per person) in the middle of the vegetable bed and drizzle the surface of the dish with a little bit of the white balsamic reduction (this is optional, but we like the sweetness of the reduction against the saltiness of the polenta). Garnish with fresh mixed herbs and enjoy while it’s still hot!!

Tuesday, April 7, 2015

Spicy Barbecue Bucatini with Caramelized Red Onions, Pulled Pork, + Smoked Cheddar Cheese

I realize that the recipe I am posting today sounds a little bit off and a little bit crazy, but doesn't some things that are called crazy, some of the best stuff? A lot of you pasta fanatics/lovers of food will turn your nose up or scoff at me for mixing Southern BBQ or Italian, but y'all, it totally works. Better yet, it is easy-peasy and the perfect meal to use leftover pork or any kind of BBQ meat (smoked chicken, brisket, etc). I started off by using some Bucatini Pasta, it's like spaghetti, but like on steroids. It is a little bit thicker, but the glorious part, by far, is that it has a hole through the middle. This is beneficial for many, many reasons, but mainly it rocks because the pasta sauce goes into the center and with every bite, you get the perfect ratio of pasta to sauce. Um, yum. But it's not just like you are going to throw in a pound of pasta, a shit ton of pork, and a bottle of BBQ sauce, it's more complex than that. I started off by caramelizing sliced red onions, which gives the pasta a nice, unctuous bite to the entire dish. The flavor is then boosted with other aromatics like fresh garlic and green onions before it is mellowed out with some crushed San Marzano tomatoes + tomato paste. After that mixture cooks down, it is then when you stir in your favorite BBQ sauce and some seasonings, to finish it off. I wouldn't recommend using any vinegar based sauces (like a North Carolina style) because the flavor might be slightly astringent and sinus-burning, so go with a sauce that is on the sweeter side because with the addition of the tomatoes, it will be much yummier. Now my Mountain Man + I obviously like to bring the heat when it comes to any recipe we make, so I added in one of my favorite condiments, Candied Jalapenos. These are literally the best little morsels you will ever put in your mouth... I know I've said that time + time again, but it is oh-so-true. Not only is this an easy leftover meal, but you can really make it all in just ONE pot, which doesn't happen around this joint often. SO TAKE ADVANTAGE OF IT :) Once you've finished the Barbecue Bucatini, place it into a serving bowl, drizzle it with some extra BBQ sauce, top it with a blanket of smoked cheddar cheese, fresh cilantro, and a few extra candied jalapeno rounds... and dinner is served!! I hope y'all enjoy it as much as our whole family did :)
For the Barbecue Bucatini:
1lb Bucatini Noodles (or spaghetti noodles if you can’t find those)
4T Unsalted Butter
2 Red Onions, Thinly Sliced
1lb Pulled Pork
6 Cloves of Garlic, Finely Diced
1 Bunch of Green Onions, Sliced
8oz Whole, Peeled San Marzano Tomatoes (crushed into smaller pieces by hand or diced)
3T Tomato Paste
¼C Candied Jalapenos, Finely Diced in a Food Processor (almost to a puree)
2-3C Homemade BBQ Sauce (or you can substitute in your favorite store-bought sauce)
½t Red Pepper Flakes
¼C Minced Fresh Cilantro, Divided (half will be put into the pasta, half will be used to garnished)
Smoked Cheddar Cheese, For Garnishing
Whole Candied Jalapenos, For Garnishing
BBQ Sauce, For Drizzling
Kosher Salt + Fresh Cracked Pepper, To Taste

Directions:
1. For the Pasta: In a large stockpot, bring water to a boil, making sure to add a good bit of salt to the water and a touch of olive oil. Cook the noodles according the package until they reach al dente. Strain the pasta and let them sit while you make the remainder of the dish.
2. Beginning the Dish: In the same stockpot that used to cook the pasta, add the 4T of butter and melt over medium heat. Add in the sliced red onions and a heavy sprinkling of kosher salt, and caramelize them for about 15-20 minutes, stirring constantly, so that they do not burn. Once they have caramelized, add in the garlic and cook for just a minute or two, and then toss in the pulled pork and green onions. Sautee these ingredients for about 5 minutes before adding in the crushed San Marzano tomatoes, tomato paste, candied jalapenos, BBQ sauce, and red pepper flakes. Let these flavors meld by simmering them on low-medium heat for about 10-15 minutes.
3. Finishing the Dish: After everything has cooked down, it’s time to add in the cooked Bucatini noodles into the pork + onions mixture, and toss to combine everything together. Add in the fresh cilantro and any salt & pepper to taste if it is needed.
4. Serving the Dish: Place the finished pasta dish into a bowl and garnish with a drizzle of a extra BBQ sauce, a mound of shredded smoked cheddar cheese, and a sprinkling of cilantro. If you want to make it extra spicy, you can top it with extra candied jalapenos. Eat it while it’s still hot! 

Monday, February 16, 2015

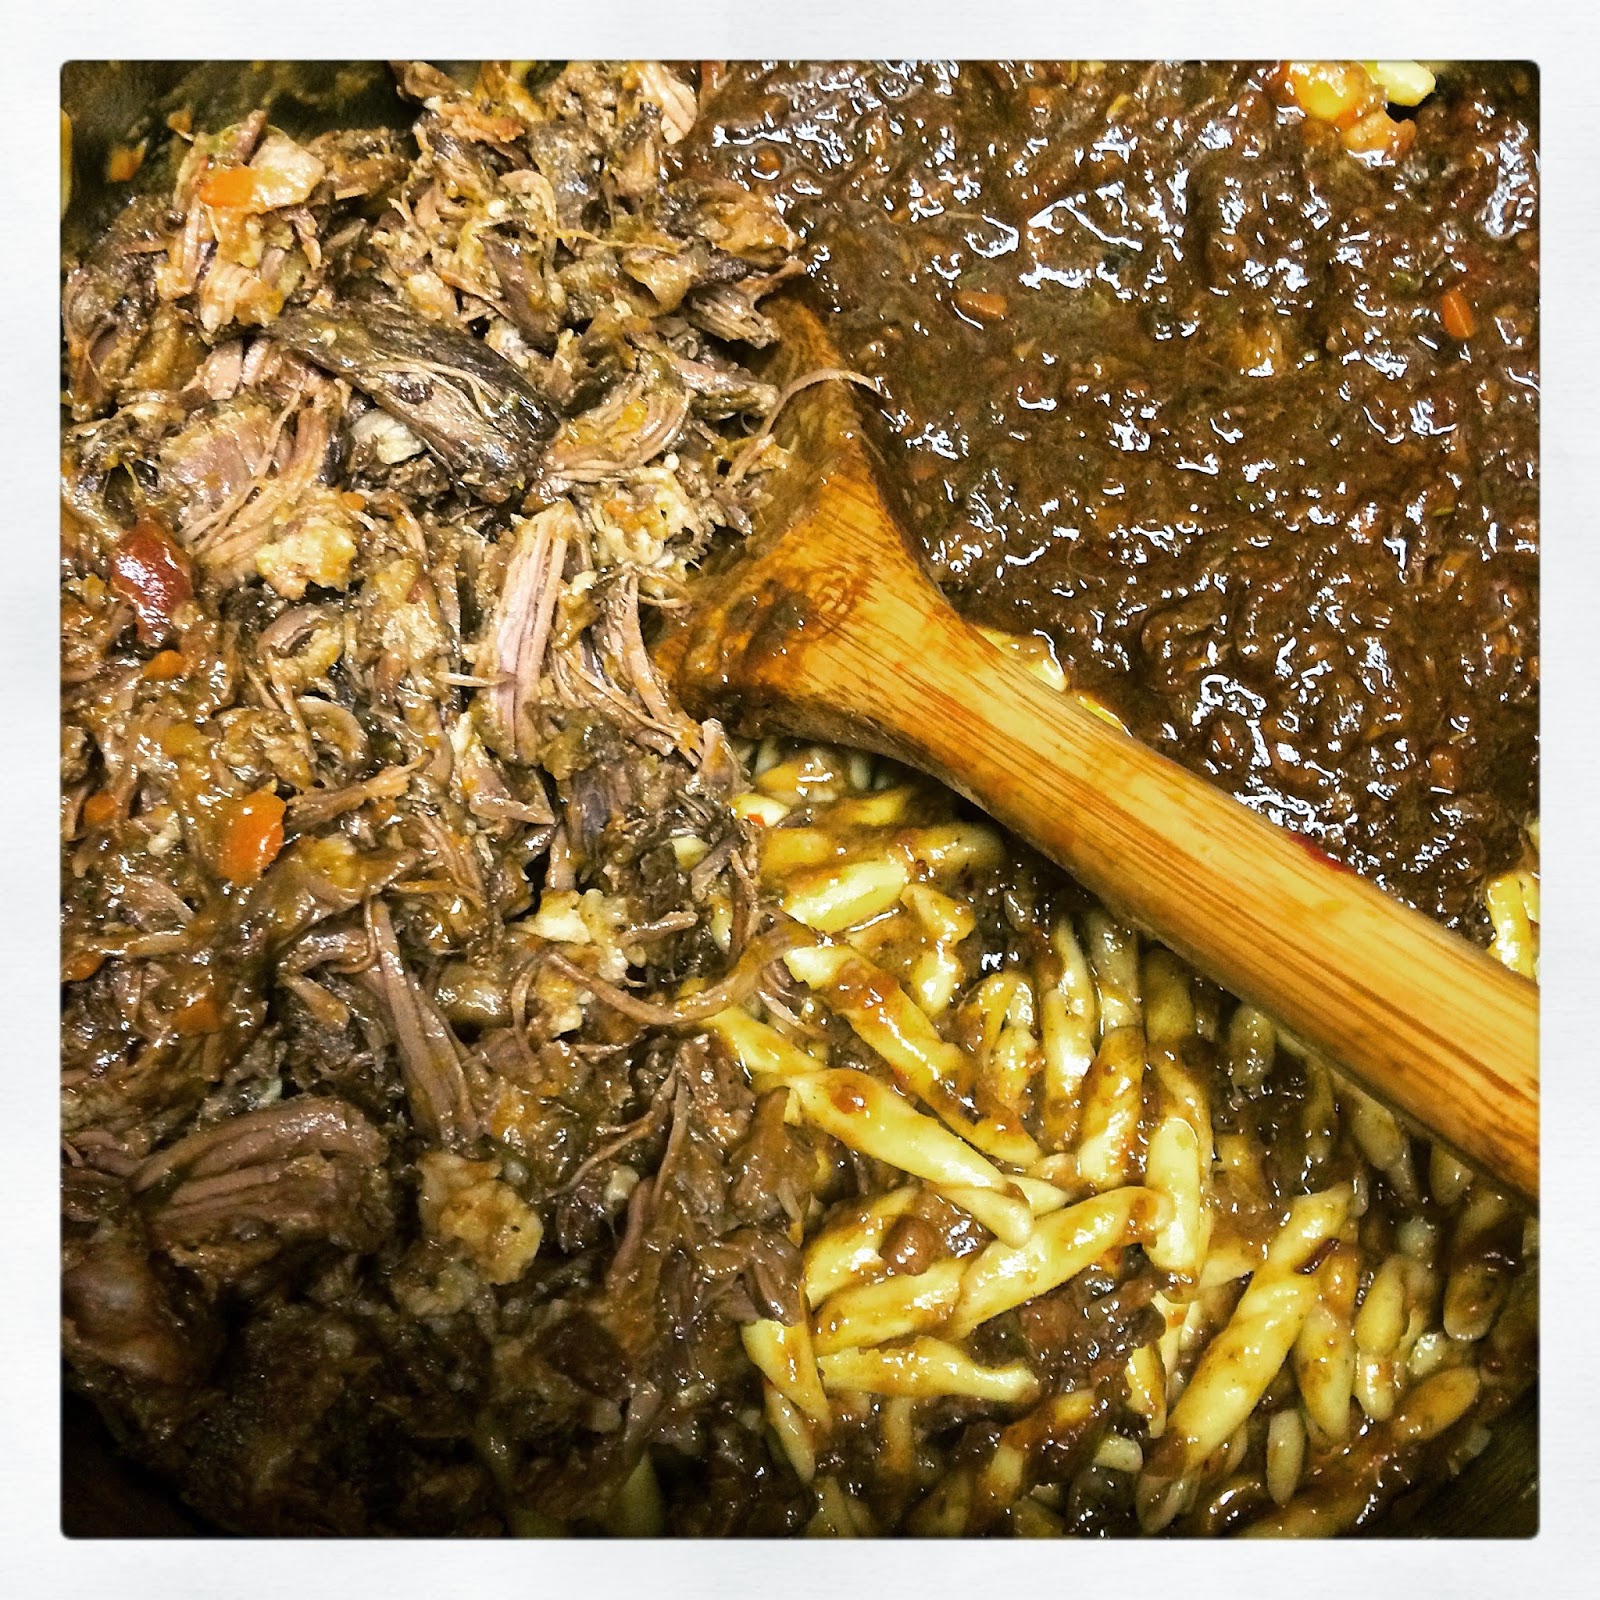
Braised Short Rib Ragu Pasta

There are some meals here on Haute + Heirloom that we tend to repeat... and repeat... and repeat. Like our favorite Fancy Pot Roast, we make this 3-4 times a month. Well this Braised Short Rib Ragu Pasta is also becoming a weekly tradition. It is something that you can start early on Sunday and by dinner time you just have to stir together everything for a super comforting + filling meal. There is something so magical about braised short ribs, and I can't really put my finger on it, but it is truly special. After browning the short ribs in a big pot, I added in a bunch of aromatics... carrots, garlic, leeks, onions, parsley, and celery. After they saute a bit, it's time to add in the pureed tomatoes, tomato paste, beef stock, and red wine.
Finally, it is all topped with the crucial "flavor"-producing components... herbs, bay leaves, cocoa powder, balsamic vinegar, fish sauce, and Worcestershire sauce. These all bring such depth to the dish, so don't skip out on any of them. I MEAN IT. Now this pot, it's gonna braise and braise and braise some more. Like 4-5 hours worth of braising is on the horizon, but to me, that's okay because I'm already doing some house cleaning and laundry, so I can keep an eye out on the pot as well. Eventually you get to that glorious part of the recipe where the braised short ribs are amazingly tender and forked off the bone tender. UM YUM. And then, you have to reduce this sauce down until it becomes chocolate brown and much thicker than where it started. I continuously stirred the sauce, so it would evenly reduce and not burn on the bottom. Once that sauce is ready, it's time to add in some more yummy stuff. Begin by browning a stick of butter in a separate pot, once it is just started to brown, add in the minced garlic and saute for just a minute or two. Throw in already cooked pasta, turn off the heat, and coat the pasta in the garlicky brown butter. And this, my friends, is where the magic begins to happen. Put the shredded short rib met on top of the pasta, along with as many scoops of your ragu sauce as you like, caramelized onions, red pepper flakes, shaved bittersweet chocolate, half of the grated Parmesan, some fresh herbs, and heavy cream (to make it extra luscious). Fold in all of the ingredients until you have a cohesive pasta dish. Spoon the finished pasta into serving bowls and garnish with a mound of freshly grated Parmesan + fresh herbs. Y'all are gonna LOVE it!! Enjoy :)
For the Braised Short Ribs:
¼C Extra Virgin Olive Oil
4oz Diced Pancetta + A Heavy Pinch of Cinnamon
4lbs Bone-In Short Ribs
Fleur de Sel + Fresh Cracked Pepper (to heavily season the short ribs)
½C AP Flour
1 Vidalia Onion, Finely Minced
1 Leek, Finely Minced
3 Carrots, Finely Minced
4 Cloves of Garlic, Finely Minced
3 Stalks of Celery, Finely Minced
½C Fresh Parsley
28oz Whole San Marzano Canned Tomatoes, Pureed until Smooth
3T Tomato Paste
2 ½C Beef Stock
1 ½C Red Wine
2 Sprigs Fresh Rosemary + Fresh Thyme
1t Dried Oregano
3 Bay Leaves
3T Cocoa Powder (sifted to remove clumps)
1T Balsamic Vinegar
1T Fish Sauce
1T Worcestershire Sauce

For the Braised Short Rib Pasta:
1 Stick of Unsalted Butter, Melted & Browned
4 Cloves of Garlic, Minced
1lb Pasta, Cooked Al Dente
Braised Short Ribs, Shredded into Bite Size Pieces (prepared above)
A Few Scoops of the Braised Short Rib Ragu Sauce (from the pot used above… to taste)
1C Caramelized Onions
½-1C Heavy Cream (depending on how creamy you like it)
1-2t Red Pepper Flakes (or as spicy as you like)
4-6t Shaved Bittersweet Chocolate
1C Freshly Grated Parmesan (divided)
Fresh Herbs, For Garnishing (we used parsley, basil, and chives)

Directions:
1. Preparing the Short Ribs: Place the olive oil in a large heavy soup pot over medium heat. Add in the Pancetta, with a pinch of cinnamon, and cook until the Pancetta is golden and crisp. This will take about 2-4 minutes. Meanwhile, season the short ribs with salt and pepper, and then dredge in flour (make sure to dust off any excess flour, so there is only a light coating). Using a slotted spoon, remove the Pancetta from the pan and put them into a small bowl, and reserve it for later. Add the short ribs to the pan and brown on all sides, about 10 minutes. Once all of the short ribs have evenly browned, take them out of the pot and place them on a plate or baking dish.
2. Making the Braised Short Rib Ragu: Meanwhile, place the onion, leek, carrots, garlic, celery, and parsley into a food processor and pulse until everything is finely diced, but definitely not pureed! Add these minced aromatics to the pot that the short ribs had been browning in and allow them to cook and caramelize some, just about 5-10 minutes over medium heat. After sautéing them, add the crispy pancetta, pureed tomatoes, tomato paste, beef stock, and red wine. Bring this mixture to a boil and reduce the heat to a simmer, before you submerge all of the browned short ribs into the braising liquid, and then top with fresh rosemary, fresh thyme, dried oregano, and bay leaves. Cover the pot and cook at a simmer for 2 hours. Remove the lid and simmer for another 2 hours, making sure to stir occasionally. After this period of cooking, remove the lid, and continue to cook for another 2 hours (while also making sure to occasionally stir the sauce). After their second cooking period, remove the meat and bones from the pot. Discard the meat and bones from the pot onto a large cutting board (making sure to throw away any fatty pieces as well). Shred the meat into bite-size pieces and let them rest while we reduce the ragu sauce. Stir in the cocoa powder, balsamic vinegar, fish sauce, and Worcestershire sauce, and bring the sauce up to a boil, and then back down to medium heat. You will need to remain near the pot to stir the sauce to ensure that it does not burn. Cook this sauce until it is much darker in color and reduced in volume. It should be quite thick. Remove the bay leaves, sprigs of rosemary, and sprigs of thyme. Season the sauce with some kosher salt and fresh cracked pepper (and sugar if you want it to be a little bit sweeter).
3. Assembling the Short Rib Pasta: In another pot, melt a stick of butter over medium heat until it begins to brown and release a nutty fragrance. Add the minced garlic and sauté just for a minute or so in the brown butter. Turn off the heat and quickly add the al dente pasta and coat it completely in the garlicky brown butter. Throw all the meat on top of the pasta, followed by some scoops of the reduced ragu sauce (as much as you want), caramelized onions, heavy cream, red pepper flakes, ½C grated Parmesan, shaved bittersweet chocolate, and fresh herbs. Fold the pasta gently to combine and until a luscious sauce has coated your pasta.
4. Serving the Pasta: Spoon the short rib pasta into serving bowls and add a heap of freshly grated Parmesan and some fresh herbs to garnish. Enjoy! 

Tuesday, January 13, 2015

#instagrub: Eggplant Parmesan with Homemade Brown Butter-Heirloom Tomato Sauce, Creamy Burrata Cheese, Fresh Basil, + a Drizzle of Balsamic Reduction

Eggplant Parmesan with Homemade Brown Butter-Heirloom Tomato Sauce, Creamy Burrata Cheese, Fresh Basil, + a Drizzle of Balsamic Reduction
Tag team, back againnnnnn. It's our official first recipe of the new year!! Hip-hip-hooYAY. Anyway, it's been pretty dreary here in Atlanta. Not only has it been 20-30 degrees outside, but it's raining too, which makes it 10x worse. But with all things in this world, you gotta find that silver lining. With cold weather comes sitting by the fire, wearing cozy sweaters, and eating hearty, warm + toasty, food. That means, we will be eating a-shit-ton of casseroles, soups, pot roast, and roasted winter vegetables. One of those go-to dishes for us is Eggplant Parmesan. Because, lez'be'honest, crispy fried food + melty cheese are practically synonymous with comfort. And as always, I had to give this Italian classic a little oomph. Slices of eggplant are coated into crunchy herbed panko breadcrumbs and fried until golden brown + crispy on the outside and have reached a soft eggplant velvet on the inside. I don't know about you, but I'm jealous of the eggplant, I want to be velvet on the inside... amirite? Instead of the traditional marinara that is thinner and heavy on the tomato paste flavor, I decided to make a tomato sauce by browning a heap of butter until nutty in fragrance, followed by throwing in a mound of baby heirloom tomatoes, so that they can caramelize until they burst. This fresh brown butter-heirloom tomato sauce is oh-so-simple, yet surprisingly equal in flavor to any other sauce I've ever made. More importantly, it thickens to almost a tomato jam-like consistency, which I think lends to a way better Eggplant Parmesan because it maintains great layers and also does not make the fried eggplant any less crispy. That's called a "win-win" y'all. Arguably the best part of any dish is the cheese component. And in this case, it is amped up with something that is better than fresh mozzarella. What could be better than that, you might ask... Burrata. Yes, mozzarella's cream filled cousin is already luscious and dream-worthy on its' own, so why not use it this casserole-style Eggplant Parmesan? Finally, you have to use whole fresh basil leaves in between the other hearty layers, which gives it an extra delightful note that you cannot, will not, and should not miss. After the dish has baked, we like to spoon servings onto our dinner plates with a drizzle of balsamic reduction, followed by a mound of freshly grated Parmesan cheese + a garnish of minced basil!! So you see y'all, as long as it is cold outside, we get to enjoy the little things in life, like this decadent Eggplant Parmesan. Gather 'round your honey, close friends, and family because this is something that you should be required to make if the temperature outside drops below freezing. It is that good!! Enjoy :)

For the Brown Butter-Heirloom Tomato Sauce:
2 Sticks of Unsalted Butter
4 Cloves of Fresh Garlic (2 minced + 2 thinly sliced)
½C Vidalia Onion, Finely Chopped
4C Baby Heirloom Tomatoes
2T Balsamic Vinegar
¼t Dried Oregano
1t Dried Red Pepper Flakes (or less if you don’t want it that spicy)
¾C Fresh Basil, Minced
Pinch of Sugar (or to your desired liking)
Fleur de Sel & Fresh Cracked Pepper, To Taste


For the Breaded Eggplant:
1 Large Eggplant, Sliced ¼inch Thick Slices
2T Kosher Salt
½C AP Flour
1 Beaten Egg + ¼C Buttermilk 
Herbed Italian Breadcrumbs (you can use traditional or panko style)
Canola Oil, For Frying


For the Eggplant Parmesan:
Prepared Brown Butter-Heirloom Tomato Sauce, Room Temperature
Breaded Eggplant Slices (already fried until crispy & golden brown)
2 Balls of Creamy Burrata Cheese, Cut into Slices
Fresh Basil (whole, large leaves)
4T Freshly Grated Parmesan
A Sprinkling of Dried Red Pepper Flakes
Balsamic Reduction, For Drizzling

Directions: 
1. Preheat the oven to 400 degrees and spray a baking dish with Pam. Also, for a helpful hint, it is important that you make sure that you have an equal amount of slices of the eggplant + burrata cheese, as well as that many large fresh basil leaves.
2. For the Brown Butter-Heirloom Tomato Sauce: In a medium skillet, melt the butter over medium heat. Sauté the diced onions + the fresh garlic (both minced and sliced) and cook until translucent. Reduce the heat to low, add the tomatoes and cook until the tomatoes begin to soften and burst and the butter turns brown, about 15-20 minutes. Stir in the balsamic vinegar, dried oregano, red pepper flakes, and basil. Season the sauce with fleur de sel, fresh cracked pepper, and sugar to taste.
3. For the Breaded Eggplant: Cut the eggplant in ¼inch slices and toss the 2T of kosher salt. Arrange in a single layer in a colander for 45 minutes to an hour. Then dry completely with paper towels, making sure to press down and remove any more moisture and excess salt. Next, you have to set up a battering station. I use 3 pie tins. For the first station, I use plain flour. For the second station, I whisk together the eggs and buttermilk. For the third station, I use herbed Italian breadcrumbs. Now, place the slices of prepared eggplant into the flour mixture, then into the egg wash, and finally the breadcrumbs (making sure they are completely covered).
4. Frying the Eggplant: Heat a deep sauté pan to medium heat with the canola oil. Once the oil has heated, fry the slices for 2-3 minutes each side (depending on the size of your fryer, mine is pretty small, so I do 2 at a time). The eggplant should be golden brown on the outside and velvety soft on the inside. Once they are done frying, place them onto a paper towel to drain, and sprinkle them with salt & pepper immediately. After all of the eggplant is fried, you can begin layering your Eggplant Parmesan.
5. Layering the Eggplant Parmesan: Begin the assembling process by spreading a ladle-full of room temperature, brown butter-heirloom tomato sauce into the bottom of the baking dish as a base. Layer the crispy eggplant slices, a piece of creamy burrata cheese, & whole fresh basil leaves, following this shingling technique, repeatedly, until all of the components have been used up. Finish by freshly grating some Parmesan cheese and sprinkling some red pepper flakes over the top of the Eggplant Parmesan.
6. Baking the Eggplant Parmesan: Place the finished dish into the oven and bake until the burrata cheese has melted until ooey-gooey and everything has reached a golden brown color. This should take about 15-20 minutes.
7. Finishing the Eggplant Parmesan: Once it has all melted, crisped, baked, and cooked through, spoon a portion of the eggplant onto plates and garnish with freshly grated Parmesan + a drizzle of balsamic reduction. Enjoy with a hearty glass of red wine! 

Monday, December 29, 2014

Southern-Style Jalapeno, Crystallized Aged Cheddar, Bacon Cornbread with Cilantro, Buttermilk, + Scallions, Fried in Bacon Fat Filled Skillet

Southern-Style Jalapeno, Crystallized Aged Cheddar, Bacon Cornbread with Cilantro, Buttermilk, + Scallions, Fried in Bacon Fat Filled Skillet
While at my in-laws home for the holidays in Birmingham, Alabama, we had the opportunity to go hang out with some good friends at night. After one night we arrived, our friend has made some cornbread, and then all of a sudden, we were on a cornbread-talking-kick for about a day straight because I told him of my favorite cornbread recipe. This isn't just any ordinary cornbread you make out of the box, this is a recipe I had adapted from the most famous cook in our family, Mama Jones. Mama Jones always instead on using stone-ground cornmeal (for better texture), a little bit of mayo (for extra added moisture), and frying it in a bacon fat filled cast iron skillet (for even more flavor). Now it might sound crazy to add mayo to a cornbread because as far as I know, no one else does it (well, besides when she did of course). But if you really break it down, it's mainly just eggs and oil whipped together. And in the deep South, we even add mayo to our red velvet cakes and any kind of chocolate cakes. So just take my word for it; it works fabulously. The process may seem tedious, but it is well worth the work, as long as you are organized. Start with three separate mixing bowls... one large and two small. In the large bowl, whisk together all of the dry ingredients until it is a complete cohesive mixture. In one of the other small bowls, whisk together the wet ingredients until it is smooth and well incorporated. Lastly, prep the mix-in bowl by tossing the shredded cheddar, sliced scallion, crispy bacon bits, diced jalapeno, and minced cilantro in a little bit of AP flour. This will help the mix-ins to remain evenly dispersed throughout the cornbread, instead of sinking to the bottom. And now the best part happens... the bacon cooking part, #butofcourse. Fry an entire pound of bacon until super crispy in a large, deep cast-iron skillet. After the bacon has fried, strain the fat through a fine mesh sieve to remove it burnt, black bits from the bottom of the pan (make sure to rub down skillet with a paper towel to make sure there is no residue remaining. After that process, pour the bacon fat back into the skillet and return it to medium-high heat. Allow it to almost reach it's smoking point before pour in the cornbread batter, making sure to even spread and smooth out the batter, so that it fills up the whole pan. Cook for a few minutes until the edges begin to bubble and cook slightly. Afterwards, take that bacon fat-soaked-fried cornbread skillet and place it onto a baking sheet and cook it until you can insert a toothpick into the center and it comes out clean. After pulling it out of the oven, let it chill for 5-10 minutes before inverting it onto a cutting board and slicing it into pieces. I suggest your serve your cornbread with a softened high-quality butter or even a compound butter made with fresh cilantro or candied bacon or pepper jelly. This cornbread is the bomb... it is super moist, yet still has the desirable crumbly cornbread texture, while also having a spicy kick, a toasty cheese taste, and the smokey bacon flavor. Make sure to eat this cornbread while it is still hot and the butter is stilling melting on your slice of cornbread, yummmmmmm!! Enjoy :)

 
For the Cornbread:
1lb Thick-Cut Applewood Smoked Bacon
3 ½C AP Flour
1C Yellow Cornmeal (preferably coarse ground, we like Anson Mills)
2T Baking Powder
¼C Sugar
Fresh Cracked Black Pepper + Fleur de Sel, To Taste
2 Spoonfuls of Mayonnaise (for added extra moisture)
1-2T Honey
2C Buttermilk, Freshly Shaken
4 Medium Eggs, Lightly Beaten
2 Sticks of Unsalted Butter, Melted & Cooled (you can brown it to if you like, but we didn’t)
1 Lime, Zested
8oz Crystallized Aged White Cheddar, Shredded (but any high-quality aged cheddar will do)
½C Sliced Scallions
2-3 Jalapenos, Minced (depending on your heat preference)
2-4T Fresh Cilantro, Minced (depending on your preference)
High-Quality Butter or Compound Butter, For Serving

Directions:
1. Preheat the oven to 350 degrees and get out your cast iron skillet.
2. For the Bacon: Heat a cast iron skillet over medium-high heat and fry the bacon slices until they are all quite crispy. You do not want them to be chewy because when they are baked into the cornbread, they bacon bits tend to get soggy and you want crispy nuggets of gold. After you have fried all of the bacon, strain the fat through a fine mesh sieve into a bowl. Wipe out the skillet, in order to remove any black, burnt bits from the bottom of the pan (because that won’t taste to good at the end). Pour the strained bacon fat back into the rubbed-down skillet and let it sit there while you make the cornbread.
3. Beginning the Cornbread: In a large mixing bowl, sift or whisk together the flour, cornmeal, baking powder, sugar, fresh cracked pepper, and fleur de sel until a cohesive mixture is formed. In another small bowl, plop in the two spoonfuls of mayo and whisk until smooth. Slowly whisk in the honey, buttermilk, beaten eggs, the melted (and cooled) butter, and the zest of one lime. We don’t want no scrambled eggs in our cornbread, y’all (so be careful with hot butter).
4. Prepping the Mix-Ins: Grate the crystallized, aged cheddar into large shreds. Add it into another small mixing bowl. Slice the scallions and add them to the cheddar bowl. Dice the fresh jalapenos and add them to the same bowl as well. Finely chop of the super crispy bacon until they resemble (slightly-larger) bacon bits and toss them into the bowl. Lastly, mince up as much fresh cilantro as you like and lastly add that to the mix-in component bowl. Add in a couple tablespoons of AP Flour into the mix-in bowl and toss all of the ingredients around, so that they are all lightly coated in the flour. This will help the mix-ins to remain evenly dispersed throughout the cornbread, instead of sinking to the bottom.
5. Finishing the Cornbread: Using the large mixing bowl of dry ingredients as the starting point, pour in the small mixing bowl of the wet ingredients. With a wooden spoon, stir the wet ingredients into the dry until most of the lumps are dissolved. Don't please DO NOT over-mix or it could become quite dry + crumbly. Lastly, add in the flour-tossed mix-ins by gently folding them into the batter, just until everything is combined and mixed throughout. Set this aside and get that bacon fat skillet ready.
6. For the Bacon Fat Fried Cornbread: Reheat the bacon fat in the cast iron skillet to medium-high heat until it is almost to its smoking point. Once it has reached that point, slowly pour or spoon in the loaded cornbread batter into the hot bacon fat. It should begin to sizzle and pop… this a good thing and what develops the most delicious crisp crust. Just make a concerted effort to spread out the cornbread, so that the whole pan is filled. Fry the bread just until the edges begin to bubble and cook, about 3-5 minutes, depending the size of your skillet. Place the hot skillet onto a baking sheet (this will help keep any drippings of bacon fat that might spill over while cooking) and place the whole thing into the preheated oven. Cooke the cornbread for 45 minutes to an hour, making sure to check the cornbread at the 30 + 40 minute mark with a toothpick for doneness (so it doesn’t get overcooked).
7. Serving the Cornbread: Once the cornbread it cooked thoroughly through, remove it from the oven and use a knife to run along the edges of the skillet to loosen up any stuck sides. Let it cool for 5-10 minutes in the pan, just so it can chill a bit. After settling, invert the cornbread out of the skillet and onto a cutting board. Cut the bread into cake-style slices (we hade about 12 generous slices of cornbread at the end). Serve the cornbread with softened, high-quality butter (or even a cilantro compound butter or candied bacon butter, um yum) for even more flavor! Enjoy while it’s still hot and the butter begins to melt on each slice!